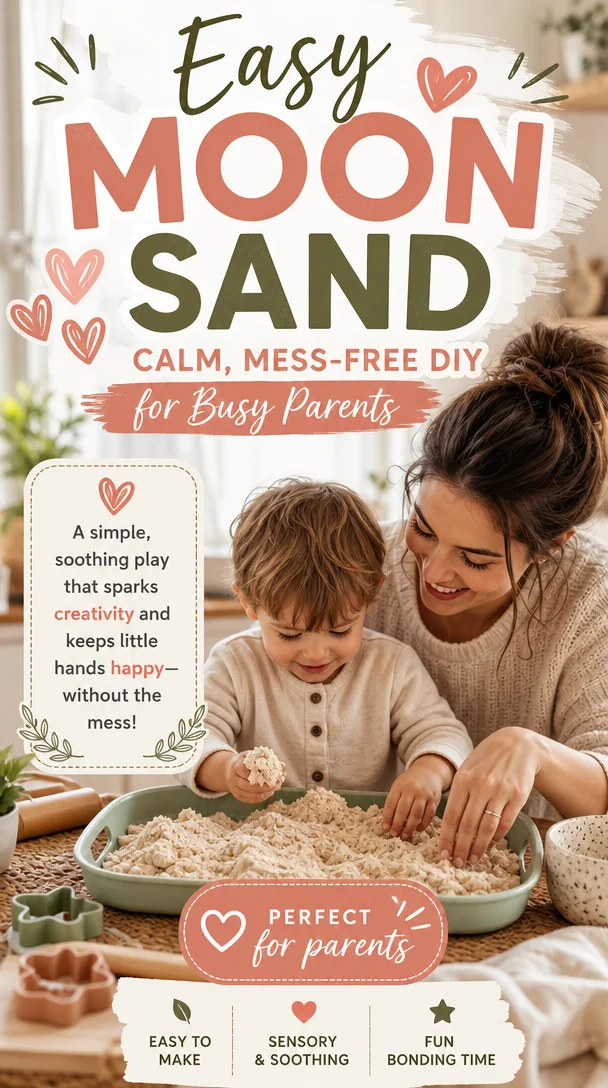
Easy Moon Sand: Calm, Mess-Free DIY for Busy Parents
How to Make Moon Sand: A Fun and Easy Kids Craft
Meta Description
Discover how to make moon sand with just 2 ingredients! This sensory play idea is perfect for toddlers, preschoolers, and tweens. Enjoy summer fun and creativity!
Introduction
Hey there, super parent! If you’re anything like me, you probably know that parenting can be a delightful rollercoaster ride. One moment you’re marveling at your child’s curiosity, and the next, you’re navigating a maze of spilled snacks and toy explosions! But fear not — I’m here to share a simple, joyful activity that will delight your little ones and give you a much-needed break: homemade moon sand!
Imagine a sensory experience that not only captivates your kids but also brings that big, lopsided smile to their faces. This moon sand is soft, moldable, and incredibly fun to play with — and the absolute best part? You only need two simple ingredients to whip it up! Whether it’s a sun-soaked summer afternoon or a cozy winter day, this activity is guaranteed to keep your kids engaged, imaginative, and happy. So grab a snack (or a cup of coffee!), and let’s dive in!
What is Moon Sand?
Moon sand is a fluffy, moldable substance that’s perfect for sensory play. It feels like a blend between sand and dough, allowing kids to shape, build, and create unique textures. This sensory experience not only entertains but also enhances creativity and fine motor skills. Plus, it encourages imaginative play — think castles, moon bases, or even adorable sea creatures! The beauty of moon sand lies in its simplicity and versatility.
Why You Should Try Making Moon Sand
Creating moon sand is an engaging way to bond with your kids while allowing them the freedom to explore their creativity. Here are some fantastic benefits of moon sand play:
- Sensory Exploration: The texture of moon sand is engaging for little hands, encouraging kids to explore tactile sensations.
- Fine Motor Development: Molding, squeezing, and shaping the sand develop hand-eye coordination.
- Creative Expression: Kids can create whatever their minds envision, fostering imagination and independent play.
- Stress Relief: Creating with moon sand can be a calming activity for both children and parents!
Are you excited yet? Let’s get to the fun part — making moon sand!
How to Make Moon Sand: 2-Ingredient Recipe
Ingredients You’ll Need:
- Flour – 4 cups
- Vegetable Oil – 1/2 cup
Step-by-Step Instructions
- Gather Supplies: Grab a mixing bowl, measuring cups, and a mixing spoon. Lay down some newspaper or an old tablecloth to make clean-up easier.
- Mix Flour and Oil: In the mixing bowl, combine the flour and vegetable oil. Start with the flour first to prevent a mess.
- Combine: Use your hands or a spoon to mix thoroughly. Once mixed, you should get a texture similar to wet sand — soft but moldable.
- Adjust As Needed: If your moon sand is too dry, add a bit more oil. If it’s too oily, sprinkle in more flour.
- Playtime: Once your moon sand is ready, transfer it to a container or a sensory bin, and let the fun begin!
Sensory Play Ideas
While your kids dive into their moon sand masterpiece, you can enhance their playtime with a few extra touches:
Creative Tools
- Molds and Cutters: Use cookie cutters, cups, or any mold you have on hand!
- Spoons and Scoops: These can be great for pouring and transferring the sand.
- Toys: Little figurines, cars, or animals can spark imaginative play narratives.
Thematic Play
- Outer Space: Add star-shaped sprinkles or glitter for a space theme. Encourage kids to create planets or aliens!
- Underwater Fun: Incorporate seashells and small ocean animal toys.
- Construction Zone: Use toy trucks and shovels — the possibilities are endless.
Helpful Tips for a Successful Moon Sand Experience
Setup Your Space
- Contain the Chaos: To minimize mess, consider doing this activity outside or in the kitchen. A large plastic tub can keep the sand contained and make clean-up a breeze!
Storage Tips
- Keep It Fresh: Store your moon sand in an airtight container when not in use. It can last for weeks if stored properly!
Engaging Your Kids
- Ask Open-Ended Questions: While they play, engage your kiddos with questions about their creations. For example, “What kind of creatures live on your moon?” or “How tall is your sand castle?”
- Take Photos: Snap some pictures of their creations. Not only does it create lasting memories, but it also encourages them to share their work and be proud of their achievements.
The Role of Moon Sand in Emotional Development
As we navigate the ups and downs of parenting, it’s crucial to consider emotional development as well. Engaging in activities like playing with moon sand can have a profound impact on your child’s emotional well-being.
Expressing Emotions
Kids often struggle to express their feelings verbally. When they play, they might act out scenarios or share stories related to their day. This encourages them to articulate their emotions and provides an outlet for any stress or anxiety.
Building Confidence
Creating something tangible boosts children’s self-esteem. A completed project, no matter how small, shows them they can achieve their goals and express themselves. Celebrate their achievements, even little ones, to foster confidence!
Encouragement for Parents
I know the days can be long, and sometimes, you might feel overwhelmed. But remember: it’s perfectly okay to take a breather and allow your kids to explore on their own. Making moon sand — or engaging in any playtime activity — doesn’t have to be a pressure-filled experience. Embrace the moments, let your children shine, and always remind yourself that you’re doing an amazing job.
Conclusion
Making moon sand is such a delightful way to foster creativity, fine motor skills, and emotional expression in our little ones. Plus, it gives you a break from the typical whirlwind of family life. So go ahead, mix those two ingredients, and let the imaginative play unfold!
Remember, you don’t need to be a perfect parent to create magical moments. With little activities like this, you’ll find joy in the chaos and laughter in the everyday mess. Embrace the imperfections and cherish each moment — after all, these are the little joys that make family life truly special.
Thanks for joining me today at Little Life Society! I hope you feel inspired to try this activity and create some wonderful memories with your kids. Now, let’s get creating! 🌟
FAQs About Moon Sand
-
How do I store moon sand?
- Keep it in an airtight container to keep it fresh and moldable.
-
Can I add color to moon sand?
- Absolutely! You can mix in colored sand or food coloring for a fun twist.
-
What if my child has allergies?
- You can substitute vegetable oil with coconut oil or a safe alternative to accommodate allergies.
-
How can I clean up after playtime?
- Sweeping the area and using a damp cloth should help gather up any stray grains.
-
Is moon sand safe for toddlers?
- Yes! Just supervise them to ensure they don’t put it in their mouths. Always prioritize safety!

Tiny Bottles, Big Calm: 6 DIY Sensory Bottle Recipes for Focus
DIY Sensory Bottles: 6 Recipes for Calm & Focus
Meta Description
Discover 6 easy DIY Sensory Bottle recipes that turn toddler meltdowns into moments of zen. Create a calming play space using organic materials!
Introduction
As a parent, you know those overwhelming moments — the tears, the tantrums, the chaos. Sometimes, it feels like everything is spiraling out of control. During those times, wouldn’t it be a blessing to have a simple tool that helps your little one find calm and focus in the midst of the storm? Enter the magic of sensory bottles!
These delightful DIY creations not only captivate toddlers but also provide a sense of tranquility, helping them navigate big emotions. Whether your child struggles with meltdowns or just needs a moment of pause, sensory bottles can transform chaos into calm. Plus, they’re incredibly easy and fun to make! Let’s dive into six soothing recipes that you can whip up in no time.
Why Sensory Bottles?
Sensory bottles engage children’s senses and promote mindfulness. When kids focus on the movement of the contents inside, they can redirect their overwhelming feelings and find a moment of peace. By incorporating organic materials into these bottles, you create a safe and enriching environment that fosters creativity and exploration.
Let’s explore how you can craft these magical tools and make the most of sensory play!
1. Ocean Waves Sensory Bottle
What You Need:
- Clear plastic bottle with a lid
- Blue water
- Glitter or small fish toys
- Vegetable oil
Instructions:
- Fill the bottle about one-third with blue water.
- Add a sprinkle of glitter and a couple of small fish toys for that oceanic feel.
- Fill the rest of the bottle with vegetable oil to create a lovely contrast.
- Ensure the lid is tightly sealed (consider using some duct tape for extra security).
- Shake and watch your ocean waves come alive!
Actionable Tip:
Encourage your child to shake the bottle and describe what they see. Ask them questions like, “What do the fish feel like?” or “How does the water move?” This helps them express their thoughts and feelings.
2. Rainbow Colors Sensory Bottle
What You Need:
- Clear plastic bottle with a lid
- Warm water
- Food coloring (various colors)
- Small beads or pom poms
- Glitter
Instructions:
- Fill the bottle halfway with warm water.
- Add a few drops of food coloring; each color can represent a different emotion.
- Toss in some small beads or pom poms for texture.
- Top with glitter and fill with more warm water.
- Seal up the bottle and give it a shake!
Actionable Tip:
Use this bottle during emotions talks with your child. When they feel a strong emotion, ask them to pick a color that matches how they feel and talk about it together.
3. Calming Lavender Sensory Bottle
What You Need:
- Clear plastic bottle with a lid
- Water
- Lavender essential oil or dried lavender
- Blue or purple glitter
Instructions:
- Fill your bottle halfway with water.
- Add several drops of lavender essential oil or a teaspoon of dried lavender for scent.
- Sprinkle some blue or purple glitter in there for a touch of magic.
- Fill the rest of the bottle with water, seal it up, and give it a good shake.
Emotional Hook:
The calming scent of lavender can be just what your child needs after a tough day. Use this bottle before bedtime or nap time for a soothing routine.
4. Starry Night Sensory Bottle
What You Need:
- Clear plastic bottle with a lid
- Water
- Black or dark blue food coloring
- Star confetti or glow-in-the-dark stars
- Baby oil
Instructions:
- Fill the bottle one-third with water and add several drops of black or dark blue food coloring to create a night sky.
- Toss in star confetti or small glow-in-the-dark stars.
- Fill the rest with baby oil, which will slow down the movement of the stars.
- Seal the lid tightly and shake!
Helpful Examples:
This bottle is perfect for nighttime routines. When your child is anxious about going to sleep, show them how to shake it and watch the stars twinkle.
5. Sensory Rattle Bottle
What You Need:
- Clear plastic bottle with a lid
- Rice or pasta
- Assorted small objects (buttons, beads, or tiny toys)
Instructions:
- Fill the bottle about one-third with rice or pasta.
- Add a selection of small objects for a delightful rattle sound.
- Completely fill the bottle with more rice or pasta to the neck, then seal the lid.
Practical Parenting Advice:
Encourage your child to move the bottle around, creating sound and visual stimulation. Use this bottle during playdates or group activities to enhance interactions with peers.
6. Nature Time Sensory Bottle
What You Need:
- Clear plastic bottle with a lid
- Water
- Natural materials (small twigs, leaves, or flower petals)
- A few drops of natural food color (optional)
Instructions:
- Wet the twigs, leaves, and petals. Fill the bottle with these nature elements.
- Pour water to fill it up. Optionally add a drop of food coloring for a fun twist!
- Seal the lid securely — nature’s wonders are created to be cherished!
Engaging with Nature:
Take your little one on a nature walk to collect materials. Together, you can personalize this bottle, making it a cherished reminder of your adventure!
Encouraging Conclusions
In the whirlwind of parenting, creating calm and focus doesn’t need to feel daunting. By tapping into DIY sensory bottles, you not only contribute to your child’s emotional development but also strengthen your bond through shared activities. These recipes are simple, fun, and incredibly rewarding.
Remember, you’re doing a fantastic job! Parenting is not about being perfect; it’s about creating opportunities for connection and learning, even in the messiest moments. So gather your supplies, get creating, and watch as your home transforms into a hub of calm and creativity!
Ready to Dive Deeper?
Share your sensory bottle creations and let us know how your little ones responded! Don’t forget to check back for more wonderful parenting tips and tricks. You belong here, and we’re all in this together — one lovely moment at a time.
Optional FAQ Section
Q: How often should we use sensory bottles?
A: Feel free to integrate them into your routine whenever you sense big feelings brewing or simply during quiet playtime.
Q: Can I use other materials for the bottles?
A: Absolutely! Tailor these recipes based on what you have at home. The more personal the bottle, the more special it becomes to your child.
Q: What age is appropriate for sensory bottles?
A: Sensory bottles suit toddlers and older children alike! Just keep in mind any potential choking hazards with small objects for younger kids.
Make parenting feel lighter and more joyful with these simple sensory bottle recipes, and remember, every moment spent together counts! 🌼