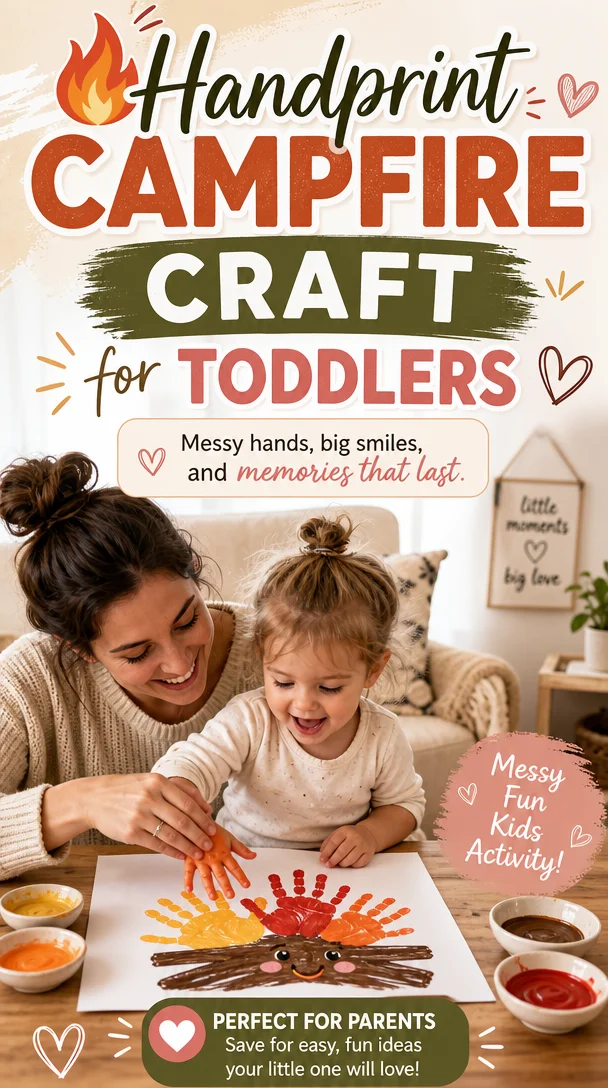
🔥 Handprint Campfire Craft for Toddlers (Messy Fun Kids Activity)
Spark Joy with a Handprint Campfire Craft for Toddlers: The Ultimate Messy Fun Kids Activity!
Meta Description
Discover a fun handprint campfire craft for toddlers that sparks creativity and sensory exploration! Perfect for summer activities and camping themes.
Introduction
Hey there, fellow parents! If you’re anything like me, you know that some of the most cherished moments with our little ones come from messy, hands-on activities. Today, I’m excited to share a heartwarming project that will ignite your child’s imagination and create some unforgettable memories—a delightful handprint campfire craft! 🌟
Imagine this: you and your toddler are sitting at the kitchen table, surrounded by bright colors and all the giggles that come with a little chaos. The table may look like a paint explosion occurred, but it’s all part of the fun! As your toddler dips their hands into bold, vibrant paints, they’ll not only create a glowing campfire but will also explore textures and unleash their creativity.
This activity isn’t just about making a craft; it’s about sharing a magical experience while reinforcing a love for art and play. So, grab those paint smocks, and let’s dive into this messy adventure together!
The Magic of Messy Play
Why Messy Play Matters
We all know that toddlers are naturally curious. They’re explorers at heart, eager to touch, feel, and discover new experiences. Engaging in messy activities like this handprint campfire craft helps them develop their fine motor skills, sensory awareness, and creativity. Plus, it’s great for bonding time!
A Fun Twist to Summer Activities
Whether you’re planning a camping-themed week or simply looking for ways to keep your little ones entertained this summer, this craft fits seamlessly into various themes. Even if you’re having one of those days where nothing seems to go as planned, this messy fun will surely alleviate some of that stress (and turn it into laughter).
Materials You’ll Need
To create your handprint campfire, gather the following materials:
- Bright, washable kids’ paints (orange, red, yellow, and brown)
- Large pieces of sturdy paper or cardboard (think poster board)
- Paint smocks or old T-shirts to protect clothes
- Child-safe scissors and glue
- Optional: glitter, sequins, or other decorative embellishments for added flair
Steps to Create Your Handprint Campfire
Step 1: Prepare Your Space
Find a designated area for crafting—preferably an easy-to-clean surface. Lay down some newspaper or an old tablecloth to catch any paint spills. Trust me; your future self will be thankful!
Step 2: Get Your Little Artist Ready
Dress your toddler in their paint smock or an old T-shirt. Make sure they’re ready to get a little messy—this is where the fun begins!
Step 3: Create the Flames
- Pour a small amount of orange, red, and yellow paint onto a palette or paper plate.
- Encourage your child to dip their hands into the paint, and then press their hand onto the paper, creating a flame shape.
- Mix and match colors; overlapping is encouraged! The more vibrant and varied, the better!
- Repeat this step until your paper is nicely layered with colorful handprints—these will be the flames of your campfire.
Step 4: Build the Campfire Base
- While the flames dry, we’ll move on to crafting the base of the campfire.
- Use brown paint to create handprints for logs. Encourage your child to use their fingers to add wood grain textures to the logs.
- Once the paints are dry, you can use scissors to cut out your flames and logs if needed.
Step 5: Assemble Your Campfire
- Display your little artist’s handiwork by gluing the logs onto the bottom of the flames.
- Add decorative elements like glitter or sequins for a bit of sparkle—just imagine those campfire embers glowing!
Step 6: Display Your Masterpiece
Once the project is complete, it’s time for a mini celebration. Hang their artwork in a special spot—maybe on the fridge or in a place that makes your toddler proud!
Helpful Tips for a Successful Crafting Session
Embrace the Mess
Let go of perfection! Toddlers love exploring different textures, and it’s essential to let them dive into the experience fully. Instead of worrying about the mess, focus on the joy of creating together.
Incorporate Language Development
Talk with your toddler about the different colors and textures as they paint. This simple conversation builds their vocabulary and fosters emotional connection.
Create a Routine Around Crafting
Consider making craft days a part of your weekly routine. This could be anything from a “Messy Monday” to a “Fun Friday.” Having predictable family activities cultivates excitement and gives everyone something to look forward to.
Explore Sensory Play Options
Once the craft session ends, consider extending your sensory play. Fill a container with dry pasta, rice, or even sand, and let your toddler explore different materials. Fine motor skills flourish through these experiences!
Use This Activity for Emotional Development
Invite your child to express their feelings about camping or sitting by the fire. This could lead to storytelling time, where they can share their “camping” adventures, whether real or imagined.
Questions to Spark Connection
Here are a few conversation starters to deepen your connection during the craft:
- “What do you think it feels like to sit by a campfire?”
- “If you could roast marshmallows, what flavor would you pick?”
- “Tell me one adventure you’d like to have next time we camp!”
Encouraging Conclusion
Creating a handprint campfire craft with your toddler is not just a fun way to spend quality time together; it’s an opportunity to explore creativity, develop skills, and foster emotional connections. Every splash of color tells a story, and every messy moment becomes a cherished memory.
So next time you feel overwhelmed or uncertain about how to engage your toddler, remember that the messier the activity, the bigger the smiles. Each small win on this parenting journey matters, and you’re doing an amazing job! Now, go gather those supplies, dive into that paint, and enjoy every moment of this shimmering summertime adventure!
Optional FAQ Section
What should I do if my toddler is hesitant to get messy?
Encourage them by starting with a smaller brush or sponge. Emphasize the fun aspect of creating! Sometimes, leading by example can also help them feel inspired to dive in.
How can I adapt this craft for older kids?
Older kids can create more intricate designs by adding more details to their campfire or using different types of textures and materials to enhance their projects.
Can we do crafting outside?
Absolutely! If the weather permits, a backyard where they can be as free and messy as they want will surely add to the fun. Just remember to use washable paints for easy cleanup!
Now, go forth and let those tiny hands create their own masterpiece! Happy crafting, everyone! 💛
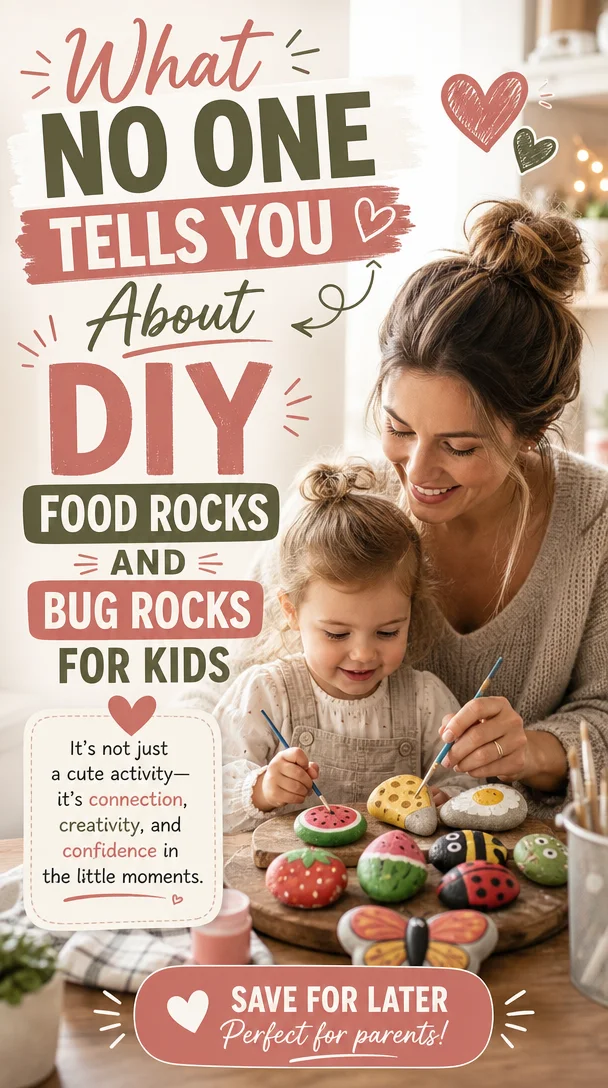
What No One Tells You About DIY Food Rocks and Bug Rocks for Kids
Unlock Backyard Fun: Create Your Own DIY Food Rocks & Bug Rocks for Imaginative Play
Meta Description: Spark creativity in your backyard with DIY food rocks and bug rocks! Perfect for imaginative play, these simple crafts bring endless fun for kids.
As a parent, you know that a backyard can be a magical place filled with endless possibilities. The lush green grass, chirping birds, and the gentle sway of branches can transport your little ones to faraway lands — all without leaving home! But let’s be honest, sometimes, the backyard can also feel like just another patch of dirt when you’re looking for ways to keep the kids engaged. What if I told you that you could transform ordinary rocks into food rocks and bug rocks, giving your kids the ultimate playtime experience?
These DIY crafts not only stir imagination but also encourage creativity and nurture developmental skills. Plus, they’re incredibly easy to make and can provide hours of fun! Let’s dive into how you can create these delightful additions to your outdoor playtime.
Why DIY Food Rocks & Bug Rocks?
Creating DIY food rocks and bug rocks offers so many benefits beyond just being fun:
- Imaginative Play: Encouraging your child to create stories and scenarios promotes their imagination and storytelling skills.
- Fine Motor Skills: Painting and decorating the rocks help develop your child’s fine motor skills.
- Outdoor Learning: Mixing art with nature teaches kids about the environment and the beauty of simple materials.
So, whether you’re looking for that extra special activity to transform your backyard or simply want to reduce screen time, food rocks and bug rocks can spark joy. Plus, they’ll come with a side of precious memories as you create together!
Gathering Your Materials
Before diving into this creative adventure, let’s gather what you’ll need:
Materials for Food Rocks
- Smooth Rocks: Look for various sizes. The smoother, the better for painting!
- Acrylic Paints: Choose vibrant colors for your food rocks like red for apples, yellow for bananas, or brown for cookies.
- Paintbrushes: A variety of sizes will work best.
- Sealant: Optional, but it helps protect your masterpiece from the elements.
- Palette or Plates: Use these for mixing and holding paint.
Materials for Bug Rocks
- Smooth Rocks: Similar to food rocks, the smoother the rock, the easier it is to paint.
- Acrylic Paints: Think bright colors like green for bugs or black for ladybugs.
- Paintbrushes and Markers: Use smaller brushes or markers for intricate designs.
- Sealant: To protect against rain or sunshine.
- Google Images or Nature Guides: These can serve as inspiration for designs!
With your materials ready, let’s jump into the fun of crafting!
Crafting Your DIY Food Rocks
Step-by-Step Guide
-
Pick Your Rocks: Go on a little treasure hunt in your backyard or local park to collect small, smooth rocks.
-
Wash and Dry: Rinse your rocks with soap and water to remove dirt. Let them dry completely.
-
Plan Your Designs: Sketch out your fruits, veggies, or treats on paper. This step is useful for kids who want to visualize their masterpiece!
-
Paint Your Rocks:
- Use a paintbrush to apply the base color first.
- Once dry, paint details — think seeds, spots, or stems.
-
Seal Your Rocks (Optional): If you choose to seal your artwork, ensure it dries completely before applying the sealant.
Examples of Food Rocks Ideas
- Fruits: Apples, oranges, and bananas are super easy and fun!
- Desserts: Cookies with chocolate chips, cupcakes with frosting!
- Veggies: Carrots, bell peppers, or eggplants can add a nutritious twist!
Crafting Your DIY Bug Rocks
Step-by-Step Guide
-
Gather Your Rocks: Just like with food rocks, the smoother, the better!
-
Clean Your Rocks: Make sure they’re free of dirt.
-
Decide on Your Bugs: Research bug designs that interest your child. Ants, ladybugs, beetles, and butterflies work wonders.
-
Begin Painting:
- Apply the basic color to each rock first.
- After it dries, use smaller brushes or markers to add details like wings, stripes, or antennae.
-
Optional Seal: If you want your designs to stand up against the elements, apply a protective sealant.
Examples of Bug Rocks Ideas
- Ladybugs: Black spots on red or orange rocks.
- Butterflies: Colorful wings and patterns.
- Bees: Yellow and black stripes with cute little wings.
Making Playtime Even More Fun
Once your DIY food rocks and bug rocks are complete, here are some fun ways to include them in play:
Mud Kitchen Adventures
Set up a mud kitchen with pots, pans, and your rocks. Encourage your little chefs to create delicious imaginary dishes using their food rocks — just be cautious of the “tasty” bugs popping up in the mix!
Bug Hunts
Host a bug scavenger hunt in your backyard! Hide your painted bug rocks for the kids to find. Create a checklist for more interactive in-depth play.
Story Time Play
Encourage narrative play by crafting stories around your food rocks and bug rocks. What happens during the great bug bake-off? Or who wins the race between the ant and the ladybug? Let their imaginations roam free.
Encouraging Emotional Development
As your child engages in these activities, take note of how you can weave in emotional development lessons:
- Sharing & Cooperation: Encourage children to share their completed rocks and create stories or dishes together.
- Empathy & Understanding: When discussing insects, you can touch on their roles in the ecosystem, helping children develop a sense of empathy for all creatures, big or small.
Helpful Tips for Parents
- Join the Fun: Participate in the crafting process. Your involvement conveys that creativity and play are valuable.
- Set Aside Time: Dedicate specific days for backyard fun. The ritual helps foster anticipation and excitement.
- Encourage Dialogue: Ask open-ended questions as your child creates. What colors are you choosing? Why did you select that bug?
Conclusion
Turning your yard into a vibrant playground filled with love, creativity, and imagination doesn’t have to feel overwhelming. With just a few rocks and some paint, you can create a world of food rocks and bug rocks that not only entertain but also nurture your child’s emotional and creative development.
Parenting is a journey filled with ups and downs, messy moments, and countless small victories. Remember that every little endeavor counts, and these quiet afternoon projects can spark immense joy and connection within your family. You’ve got this, and your little ones are growing into their best selves with every imaginative play session. So grab your paints and rocks, and let the fun begin — the backyard awaits!
FAQ
What age is best for this activity?
Children of varied ages can enjoy this activity! Toddlers may need assistance with painting, while older children can take the lead.
How do I store the rocks once painted?
Store painted rocks indoors in a safe spot to protect them from harsh weather. Alternatively, designate a ‘rock garden’ in your yard!
Can we use other types of rocks?
Absolutely! Experiment with different shapes and sizes. Your kids might love creating with unique rocks from nature.
Let the creativity flow and watch your toddlers thrive while they enjoy a lovely outdoor experience. Happy crafting!
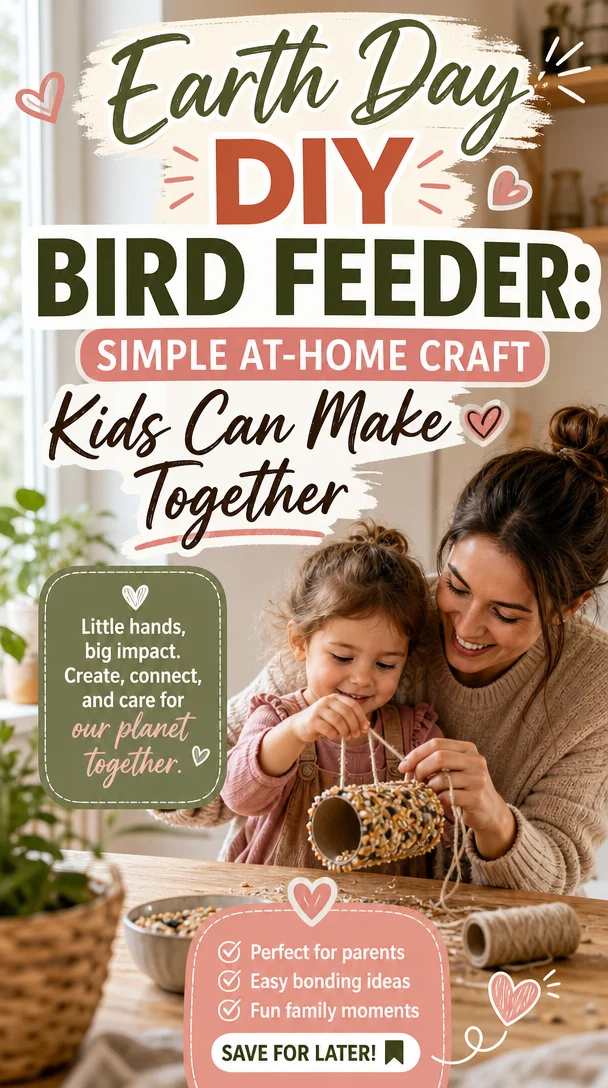
Earth Day DIY Bird Feeder: Simple At-Home Craft Kids Can Make Together
DIY Bird Feeder Craft: A Fun and Meaningful Project for Kids
Meta Description
Create lasting memories with your kids by making a DIY bird feeder at home! This easy Earth Day craft nurtures wildlife and family bonding.
Introduction
As parents, we cherish those moments spent with our kids, the laughter-filled afternoons, and the shared experiences that make our family stories richer. Imagine gathering around your kitchen table, armed with simple supplies, all while teaching your little ones about nature and wildlife. What if I told you that you could turn everyday materials into a delightful DIY bird feeder? Not only does this craft keep your kids engaged, but it also allows you to foster a love for nature while celebrating Earth Day. Trust me, you’ll love the satisfaction of watching the birds flock to your handmade creation! Let’s dive into this fun and purposeful project that promises to bring joy to both your family and our feathered friends.
Why Make a DIY Bird Feeder?
Making a DIY bird feeder with your children isn’t just about the craft; it’s about the lessons and memories you create together. Engaging with nature helps children develop a sense of curiosity, responsibility, and compassion. Plus, it’s a wonderful way to disconnect from screens and immerse yourselves in the outdoors. By crafting and observing, your kids can learn about the different birds in your area, their habitats, and the importance of wildlife conservation.
The Perfect Easy Craft for Kids
Not every craft needs to be elaborate or time-consuming. This DIY bird feeder project is remarkably simple, making it perfect for even the youngest of crafters. You can use items you probably already have at home, making it budget-friendly and accessible. Plus, it encourages teamwork and creativity, bringing everyone closer together.
Materials You’ll Need
Before you start your DIY bird feeder adventure, gather the following materials:
- Plastic Bottle (such as a 2-liter soda bottle or any empty container)
- Twine or String (for hanging)
- Scissors
- Drill or Sharp Object for Puncturing
- Birdseed (you can even make your own mix!)
- Optional Decoration Supplies (markers, stickers, paint)
These materials are easy to find and inexpensive, making this craft a friendly choice for parents looking for low-prep, high-fun activities.
How to Make Your DIY Bird Feeder
Step 1: Prepare the Plastic Bottle
Start by rinsing the plastic bottle, removing any labels, and drying it thoroughly. Then, use scissors or a drill to carefully poke a couple of holes on opposite sides near the bottom of the bottle. This will allow the birdseed to fall out when the birds come to feed!
Step 2: Create Feeding Ports
Next, make larger holes (about the size of a quarter) about an inch or two above the bottom holes. These are the feeding ports where birds can access the seed. Make sure they are smooth to avoid hurting the birds—an adult should supervise this step to ensure safety.
Step 3: Fill with Birdseed
Now for the fun part! Fill your bottle about halfway with birdseed. You can create a simple birdseed mix using various seeds like sunflower seeds, millet, and corn. This doesn’t just attract birds; it’s a great chance to teach your kids about the different types of birds that visit your yard!
Step 4: Attach Twine for Hanging
Cut a long piece of twine or string, then poke it through the cap or through the top of the bottle and tie it securely. This will be your hanging mechanism. Help your kids understand the importance of securely attaching it, so the birds can safely visit.
Step 5: Hang and Enjoy!
Find a suitable spot to hang your bird feeder, preferably near a window where your family can observe the birds without disturbing them. This creates an excellent opportunity for discussions about what birds they see. Make sure it’s high enough to be safe from neighborhood pets.
Helpful Tips for Enjoying Your Bird Feeder
As you and your family settle in to watch your bird feeder, consider these tips to further enrich your experience:
1. Bird Watching Journals
Encourage your kids to keep a bird watching journal. They can draw the birds they see and note down their colors, sizes, and any special behaviors. This not only provides a creative outlet but also teaches them observational skills.
2. Take Photos Together
Capture the moments by taking photos of your kids as they create their DIY bird feeders and during their bird-watching sessions. You could even create a scrapbook of your nature adventures together!
3. Experiment with Different Seeds
As you refill your bird feeder, experiment with different types of seeds to attract various birds. Discuss with your kids which birds they see most often and what seeds seem most popular.
4. Create More Feeders
Once you’ve completed one feeder, why not make more? You could use different styles, colors, or materials, expanding your crafting experience. You could even organize a fun neighborhood bird feeder sharing day!
5. Make It Educational
Use your time spent watching the birds to share facts about them. Discuss their habitats, migration patterns, and the role they play in the ecosystem. This turns a fun project into a valuable learning experience.
Encouraging Daily Routines with Nature
Integrating nature into your family’s daily routine can work wonders for emotional development. Here are a few ideas to make nature a regular part of your life:
-
Nature Walks: Set aside time for weekly family nature walks. Not only do they promote physical health, but they also encourage mindfulness and discovery.
-
Outdoor Picnics: Enjoy meals outside when the weather permits. It gives your family a chance to recharge while appreciating the sights and sounds of nature.
-
Gardening Together: Start a small garden, whether it’s herbs, flowers, or veggies. Gardening offers fantastic lessons on nurturing and patience.
Warm Conclusion
Creating a DIY bird feeder is not just about providing food for our feathered friends—it’s a chance to build lasting memories with your kids. Embrace the messiness, the laughter, and the magic of working together and learning from one another. Always remember, being a parent doesn’t require perfection; it requires love, creativity, and the willingness to try new things with your little ones. So, grab those supplies and start crafting! Together, you’ll not only nurture wildlife but also heal and bond, one small moment at a time. You’ve got this, and above all, remember you’re never alone on this parenting journey.
Optional FAQ Section
Q: What types of birds will visit my feeder?
A: This depends on your location, but common visitors include finches, sparrows, and cardinals. Different seeds can attract different species!
Q: How often should I refill the bird feeder?
A: Check your feeder regularly. If it’s empty or if you see fewer birds visiting, it’s time for a refill.
Q: Can we make bird feeders from other materials?
A: Absolutely! You can use pine cones, milk cartons, or even wooden frames for unique bird feeders. Get creative!
Q: How can I keep squirrels away?
A: Consider placing your feeder on a smooth pole with no branches nearby, or choose squirrel-proof feeders specifically designed to deter these furry friends.
By implementing these ideas and nurturing a connection with nature, you’ll not only enhance your child’s creativity but also strengthen your family bond. Happy crafting!
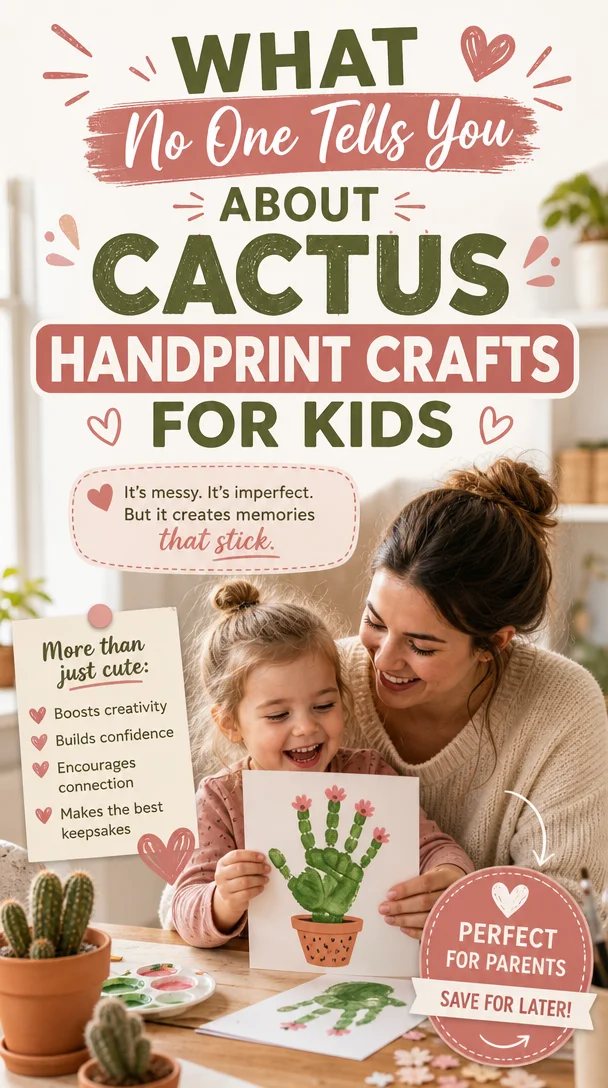
What No One Tells You About Cactus Handprint Crafts For Kids
Cactus Handprint: A Touch of Childhood Magic in Your Home
Meta Description
Bring magic into your home with cactus handprint art! This fun, easy activity sparks creativity in kids while making meaningful memories.
Childhood is all about the little moments–splashing in puddles, chasing butterflies, and creating art with your hands. But sometimes, amidst the chaos of parenting, we overlook these delightful opportunities to connect with our kids through creative play. This is where the charming cactus handprint art comes in—a simple activity that not only engages your child’s imagination but also teaches them about nature in a fun way. Let’s dive into this warm and joyful endeavor that could spark countless conversations and connections!
The Magic of Cactus Handprint Art
Creating cactus handprint art taps into the simple joy of crafting, all while nurturing your child’s imagination. The tactile experience of paint on their hands provides sensory stimulation that kids crave, and the end result is a whimsical piece of artwork that represents their unique creativity. Not to mention, it’s a fantastic way to spend quality time together without the pressures of perfectionism.
Why Cactus Handprints?
Cacti symbolize resilience—a fitting trait for both kids and parents alike! They thrive in tough environments, reminding us that even in the messiness of family life, we can find strength and beauty. This metaphor resonates with many parents who navigate the ups and downs of raising little ones. By creating cactus art, you’re not just making a fun craft; you’re instilling the idea of resilience, creativity, and the beauty in imperfection.
What You’ll Need
To get started on your cactus handprint adventure, gather these simple supplies:
- Non-toxic green paint (washable for easy clean-up!)
- White or light-colored paper (construction paper works great)
- Paintbrush (optional, for finer details)
- Markers or crayons (for adding decorations)
- A damp cloth or baby wipes (to clean up hands afterward)
Setting Up for Success
To truly enjoy this creative journey, set up your space for success. Lay down some newspaper or a tablecloth to protect your surfaces from paint spills. Prepare your child’s paint and have paper ready for handprints. Create a cozy atmosphere with favorite music playing softly in the background, and don’t forget to grab your favorite drink—because you deserve a little something sweet during this playful moment, too!
Step-by-Step Guide to Creating Your Cactus Handprint
Here’s how to make your cactus handprint art piece come to life:
Step 1: Prepare the Paint
Pour some green paint onto a plate or shallow dish. Encourage your child to dip their hand into the paint, covering their palm and fingers evenly. You might want to demonstrate this first, showing them how fun it can be!
Step 2: Create Handprints
Press their hand firmly onto the paper, making sure to apply enough pressure for a clear print. Gently lift their hand away to reveal a lovely green handprint—this will serve as the base of the cactus. Feel free to make multiple prints on the same sheet for a little cactus garden!
Step 3: Add Details
Once the green handprints dry, it’s time to add personality! Use markers or crayons to decorate the cactus. Your child can draw flowers, pots, or even little creatures peeking out from behind. Encourage them to let their imagination run wild. There are no mistakes—just beautiful creations!
Step 4: Display the Artwork
Find a special spot in your home to showcase your cactus handprints. This could be the refrigerator, a dedicated art wall, or even their bedroom. Seeing their creations proudly displayed will boost their self-esteem and encourage further creativity.
Tips for Making This Experience Even More Enjoyable
Creating cactus handprint art can be a seamless blend of enjoyment and learning. Here are some tips to enhance the experience:
Engage in Conversation
Use the cactus handprint activity as a springboard for conversation. Ask open-ended questions like, “What do you love most about nature?” or “Why do you think cacti are special?” These questions not only deepen connections but also stimulate their critical thinking skills.
Connect to Everyday Life
Illustrate the importance of resilience by sharing stories about how cacti survive in harsh conditions. Relate this to your child’s own life—how they can overcome challenges, adapt, and still shine brightly, just like our prickly plant friends!
Invite Friends or Family
Throw a mini cactus art party! Invite friends over for playdates and create a joyful, shared experience. Kids love socializing, and working together on art can spark delightful friendships.
Include Your Little Ones in the Clean-up
Make cleaning up part of the fun! Invite your child to help wash brushes and wipe the table. Turning clean-up into a game or making a song about it adds an element of joy to this necessary task.
Embracing Imperfection in Parenting
One of the most significant lessons we can impart to our children is the beauty of imperfection. Your cactus handprint art doesn’t have to look “perfect”—it simply needs to be created with love. Celebrate the crooked lines, uneven colors, and splashes. Each imperfection tells a story—a moment in time when your child explored their creativity and shared it with you.
Real-life Example:
I remember creating handprint art with my son when he was three. He was enthralled with the paint, and instead of a masterpiece, we ended up with a few handprints mixed with lots of accidental smudges and splatters. But to this day, I cherish that messy artwork. It reminds me of his creativity and our shared laughter, which made the whole experience magical.
More Family Fun with Handprint Crafts
Excited to keep crafting? Here are a few other handprint art projects you might enjoy:
- Tree Handprints: Use brown paint for the trunk and green for the leaves. Talk about seasons and nature as you create!
- Animal Prints: Turn handprints into animals by adding features with crayons or markers. For example, a handprint can easily become a butterfly or a fish with a bit of imagination.
- Holiday Themes: Adapt handprint art for holidays! Try turkey handprints for Thanksgiving or a Santa handprint for Christmas.
Conclusion
As you venture into the world of cactus handprint art, remember that every stroke of paint becomes a cherished memory. This simple, engaging activity allows you and your child to connect, create, and celebrate the beautiful mess that is parenting. So, grab that paint, share some laughs, and make family art that radiates love and joy.
Parenting can feel overwhelming at times, but squeezing in little moments of creativity can make all the difference. So go ahead, embrace the chaos, and keep creating joyful memories—one handprint at a time!
FAQ Section
What age is appropriate for cactus handprint art?
Cactus handprint art works wonderfully for toddlers and preschoolers, but older kids can enjoy this too!
What if my child doesn’t want to get their hands messy?
Consider using paintbrushes or sponges for applying paint. You can always make a "painted foot" version if they’re more comfortable!
How can I clean up easily afterward?
Using washable paint makes clean-up a breeze! Keep a damp cloth or wet wipes nearby to manage any spills quickly.
Creating art should be about joy and connection, so dive into that creative spirit!
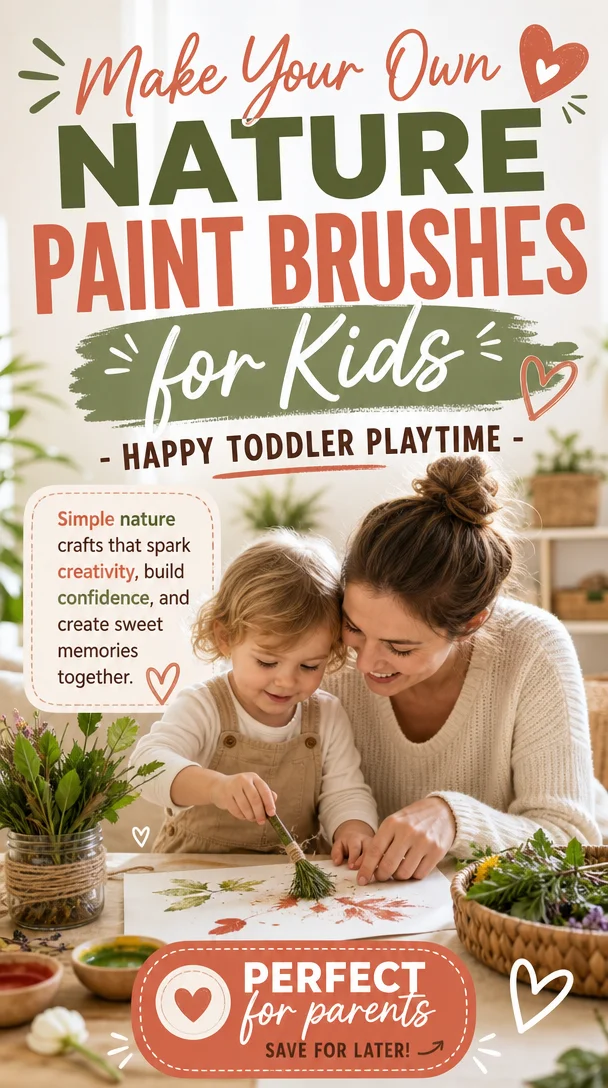
Make Your Own Nature Paint Brushes for Kids – Happy Toddler Playtime
Make Your Own Nature Paint Brushes: Happy Toddler Playtime
Meta Description: Create unique nature paint brushes with your kids! This fun, screen-free activity nurtures creativity while enjoying the great outdoors.
Introduction
As a parent, you know the challenges that come with keeping little ones engaged and happy. You juggle nap times, snack breaks, and seemingly endless energy, all while trying to find ways to encourage creativity. But let me assure you, you’re not alone!
Imagine heading outdoors, breath fresh with the scent of grass, and the excitement sparkling in your child’s eyes as they discover the beauty in simple twigs, leaves, and flowers. Not only does this little adventure provide an excellent opportunity for imaginative play, but it also sparks curiosity and creativity through a delightful art project: making your own nature paint brushes.
In this blog post, I’ll guide you step-by-step as we make nature paint brushes together. You’ll find tips, encouragement, and a sprinkle of fun along the way. Get ready to explore the world with your toddler and create some beautiful art that celebrates nature’s wonders!
The Benefits of Using Nature Paint Brushes
Before we dive into the how-to part, let’s chat about why this activity is not just a fun way to spend an afternoon but also a learning experience packed with developmental benefits.
Nurturing Creativity
Encouraging creativity is vital for young developing minds. Using nature items for painting opens up a whole new world of texture and color. Each brush you create represents a unique experience—each twig or flower petal embodies exploration.
Promoting Fine Motor Skills
Swirling, dipping, and painting with nature brushes improves fine motor skills. When toddlers grasp different brush materials, they practice coordination and control, all while having a splendid time!
Connecting with Nature
In a world filled with screens, getting outside and interacting with nature is crucial. This activity allows kids to discover the beauty around them while stimulating their senses. You’ll watch as they touch, smell, and, yes, even taste some of the different textures they find!
Quality Family Time
As you create these brushes and craft beautiful pieces of art together, you’re strengthening family bonds. Sharing laughs, insights, and the occasional surprise discovery makes lasting memories.
Crafting Your Own Nature Paint Brushes
Now that you’re excited about the rewards, let’s get into the nitty-gritty. This is a simple, screen-free activity that’s easy to set up. Grab your outdoor gear, and let’s head out!
What You’ll Need
-
Materials for Brushes:
- Twigs, sticks, or branches (consider different sizes and textures)
- Leaves (big and small)
- Flowers (safe and non-toxic)
- Pine needles (for a different texture)
- Grass (for a unique bristle effect)
-
Painting Supplies:
- Non-toxic paint (washable is best for little hands)
- Large paper or canvas (for your masterpieces)
- Paint plates or containers (something to hold the paint)
- A bowl of water (for cleaning up)
Step 1: Nature Scavenger Hunt
Start your adventure with a nature scavenger hunt! Give your toddler a small bag or basket and head out to collect materials. Encourage them to choose different shapes and sizes—this is their chance to explore!
You might say, “Look at this big leaf! Can you find a smaller one? What about that green twig over there? Let’s see how many different things we can gather!” This playful dialogue encourages observation and sparks excitement.
Step 2: Making the Brushes
Once you’ve gathered your treasures, it’s time to create your paint brushes. Depending on your child’s age, they might need some help with this part. Here’s how:
-
Twigs/Branches: Wrap the ends with the paintable material (leaves, flowers, etc.) using string or rubber bands. This will create a nice grip and a brush effect.
-
Grass Brushes: Gather a handful of grass, tie it tightly with string, and trim the ends for an even look.
-
Pine Needle Brushes: Use a twig and attach pine needles at the end by wrapping them with string.
Let your little ones help wherever they can, from holding the materials to wrapping the string. They’ll feel a sense of accomplishment in creation!
Step 3: Painting Time!
Now, it’s time for the fun part—painting! Set up your workspace outside or in a well-protected area. Pour the non-toxic paint into your containers and have your toddler dip their new brushes into the colors.
Encourage them to explore different techniques. Ask questions like, “What happens when we use the leaf brush versus the twig? Can we mix two colors and make something new?”
Tips for an Engaging Nature Painting Experience
This activity is full of opportunities to engage your toddler. Here are some tips to enhance the experience:
1. Create a Theme
If it’s autumn, collect colorful leaves and use them as inspiration for fall-themed paintings. In spring, encourage them to paint flowers or sunshine!
2. Story Time
As your kids paint, tell stories related to what they are creating. “Once upon a time, a little bird found a crown made of flowers!” This keeps their imagination flowing.
3. Fun Music
Set the mood with some lively music while you paint. Dancing and singing together doubles the fun.
4. Capture the Moment
Take pictures of your kid’s creations. Not only does this preserve memories, but it also shows your child how proud you are of their work. You can even make a little photo book as a keepsake!
Encouraging Open-Ended Exploration
It’s essential to create an environment that fosters imagination and creativity. Encourage your child to explore beyond just painting with their nature brushes.
-
Texture Exploration: Allow them to feel the different materials. Ask them which one they think will create the best marks.
-
Color Mixing: Provide different paint colors and prompt them to mix them for exciting new hues.
-
Nature Stories: Use the brushes to create a story on paper. They can paint their favorite animals or settings based on what they learned while exploring.
Each moment is a chance for learning, and as you support their creativity, you’ll be amazed at how this strengthens your bond.
Conclusion
Creating your own nature paint brushes is not just a craft; it’s a beautiful opportunity to nurture your child’s creativity, enhance their motor skills, and connect with the world around them. You’ll see the sheer joy on their faces as they explore, create, and tell stories through their art.
Remember, it’s not about perfection or the final piece but the experience shared—the laughter, the exploration, and the magical moments that make parenting so rewarding.
You’re doing an incredible job navigating this beautiful journey of parenthood, and each moment spent fostering creativity adds warmth and joy to your family life. So grab those nature brushes and paint the town—together!
Optional FAQs
Q: What materials work best for nature paint brushes?
A: Twigs, leaves, flowers, pine needles, and grass each bring unique textures and effects to your paintings. Experiment to find what works best for you and your child.
Q: How can I clean up after our painting session?
A: Since we used non-toxic and washable paints, cleanup involves a bowl of water and some paper towels or cloths. Encourage your child to rinse their brushes in the water after painting.
Q: Can we do this activity indoors?
A: Absolutely! Just make sure to cover your workspace with newspaper or a plastic sheet to protect surfaces from spills.
Now, go dive into nature and unleash the creativity that awaits. Happy crafting!
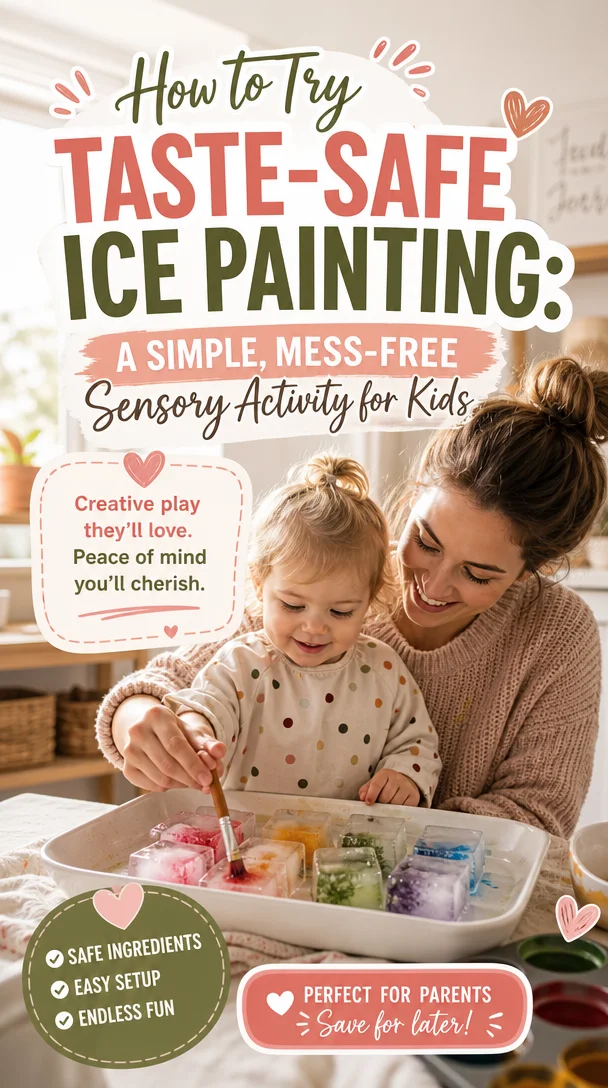
How to Try Taste-Safe Ice Painting: A Simple, Mess-Free Sensory Activity for Kids
Taste Safe Ice Painting: A Fun Sensory Play Activity for Kids
Meta Description: Discover taste-safe ice painting for sensory play! Create colorful art while fostering creativity and exploration in your little ones.
Hey there, fellow parent! You know those days when the kids seem to have an endless amount of energy, and the weather limits outdoor play? We’ve all been there! Sometimes, it feels like you need a little magic to transform those chaotic moments into something special. That’s why I’m excited to share an amazing activity with you: Taste Safe Ice Painting.
This engaging sensory play idea not only allows your little ones to uncover their creative talents but also provides a wonderful opportunity for exploration and learning. The best part? It’s completely taste-safe! So, don’t worry if they take a curious lick or two. This activity isn’t just about art; it’s about building connections with your child while encouraging their natural curiosity. Let’s dive into the colorful world of ice painting and create some joyful memories together!
The Benefits of Sensory Play
Before we jump into the nitty-gritty of ice painting, let’s chat about why sensory play is so essential for our little ones. Engaging their senses helps children develop crucial skills such as:
- Fine Motor Skills: Squeezing, stirring, and manipulating tools enhance dexterity and strengthen hand muscles.
- Cognitive Development: Sensory experiences foster problem-solving skills as kids explore colors, shapes, and textures.
- Emotional Regulation: Hands-on activities can help children express their feelings and reduce anxiety.
- Creativity and Imagination: Unleashing their creativity allows kids to express themselves in unique ways.
With the benefits in mind, let’s explore a delightful sensory activity that your toddler will adore!
What is Ice Painting?
Ice painting combines the joy of painting with the sensory experience of melting ice. You freeze colorful, edible liquids in ice cube trays and then use the ice to paint on paper or canvas. As the ice melts, children witness a beautiful blending of colors. This magical transformation can captivate young hearts and minds!
What You Will Need
Gather these simple supplies for an enjoyable ice painting adventure:
Materials
-
Taste-Safe Paint:
- 1 cup of water
- 1 cup of sugar-free juice or unsweetened yogurt (you can also use diluted food coloring)
-
Ice Cube Trays: These will serve as molds for your paint.
-
Paper or Canvas: Use watercolor paper, cardstock, or a canvas where the colorful artwork will appear.
-
Plastic Wrap (optional): If your little artist wants to transport their artwork outside, this will help keep it from blowing away.
-
Paintbrushes or sponges (optional): For those who want to dab, swirl, or create patterns as they play.
Preparing Your Materials
- Make the Paint: Combine water and your choice of juice or yogurt in a bowl. If using food coloring, mix it in to create vibrant colors.
- Fill the Ice Cube Trays: Pour your colorful mixture into the ice cube trays and freeze them overnight.
- Prepare Your Workspace: Set up a designated painting area outdoors or at a table covered with newspaper. Minimize the mess while maximizing fun!
Ice Painting Step-by-Step Instructions
Once your ice cubes are frozen and your space is ready, it’s time for the fun! Follow these steps:
- Set the Stage: Find a nice spot either outdoors where your child can create freely or somewhere inside protected from spills.
- Gather Encouragement: Invite your child to browse through the ice “paints.” Encourage them to pick their favorite colors or flavors to start.
- Start Painting: Show your child how to hold an ice piece and paint! Let them explore the melting ice, feeling its coolness against their hands.
- Experiment with Techniques: Encourage them to press, swipe, and spin the ice on the paper. Ask questions like, “What happens when we layer colors?” or “Can you create a rainbow?”
- Observe and Discuss: As the painting progresses, take a moment to observe the changing colors and discuss what your child sees. Use descriptive words and encourage them to share their thoughts.
Connecting Through Conversation
This activity isn’t just about creating beautiful artwork; it’s an opportunity for meaningful connection. Here are some conversation starters to enhance the experience:
- “What color do you think we should mix next?”
- “How does the ice feel against your skin?”
- “Can you describe what this color reminds you of?”
By fostering these interactions, you nurture language development and emotional bonds between you and your child, making the experience even richer.
Helpful Tips for Success
To ensure your ice painting session goes smoothly, keep these tips in mind:
Make it a Mess-Free Zone
- Use a plastic tablecloth or old newspapers to protect your surfaces.
- Dress your child in old clothes or a smock to avoid worries about stains.
Adapt for Age and Skill Level
- For younger kids, allow them to freely explore without specific instructions.
- For older children, introduce techniques like layering, mixing colors, or even creating shapes and patterns.
Add Layers of Learning
- Teach about color mixing: What happens when they combine red and blue?
- Discuss the science of melting: Why does the ice melt, and what can we learn about temperature?
The Joy of Displaying Art
Once your little artist finishes their masterpiece, let’s celebrate their creativity!
- Spotlight Art: Find a special place at home to hang their artwork. Use clips, strings, or a gallery wall for an attractive display.
- Keep an Art Journal: Take pictures of their creations and compile them into a fun scrapbook. You can create a mini-gallery of their artistic journey to look back on together.
Encouraging Independence
As your child starts to gain confidence in their creativity, encourage them to lead the way. Let them choose their colors and methods. Empowering them builds self-esteem and a sense of ownership over their creations. Remember, there’s no wrong way to play!
Cleaning Up Made Easy
No need to dread the cleanup after such a fun activity! Once your ice painting session wraps up:
- Quick Rinse: If using juice or yogurt, quickly rinse any brushes or surfaces with warm water to prevent stickiness.
- Store Remaining Ice Cubes: If there are any leftover ice paints, you can refreeze them for future play sessions. Just pop them back in the freezer!
Conclusion
Taste-safe ice painting combines creativity and sensory exploration, bringing joy and learning right into your home. As parents, we want to create moments that matter, and this simple activity allows us to do just that. Along the way, you bond with your child, encourage artistic expression, and help them express their emotions.
Remember, parenting doesn’t require perfection. Little moments of joy, like ice painting, are what make this journey beautiful. So, the next time your little one needs an engaging activity, whip out those ice paints, grab your favorite juice, and let the creativity flow. You got this, and you’re doing amazing!
Now, let’s grab those supplies and begin painting the world with imagination and love. Happy creating!
Frequently Asked Questions
Q: Is the ice paint safe for my toddler to taste?
A: Yes! Using juice or yogurt means it’s taste-safe. Just supervise to ensure they don’t consume too much at once.
Q: What if it’s too cold outside?
A: You can do ice painting indoors! Just prepare your space accordingly, but keep the temperature in mind to avoid slippery floors.
Q: Can we use these techniques with other materials?
A: Absolutely! Try using different tools, such as sponges or brushes, or even create splatter art by flicking paint from toothbrushes!
By following this guide, you can create a delightful sensory-rich environment that supports your child’s development and strengthens your parent-child bond. Let’s keep those creative juices flowing, one activity at a time!
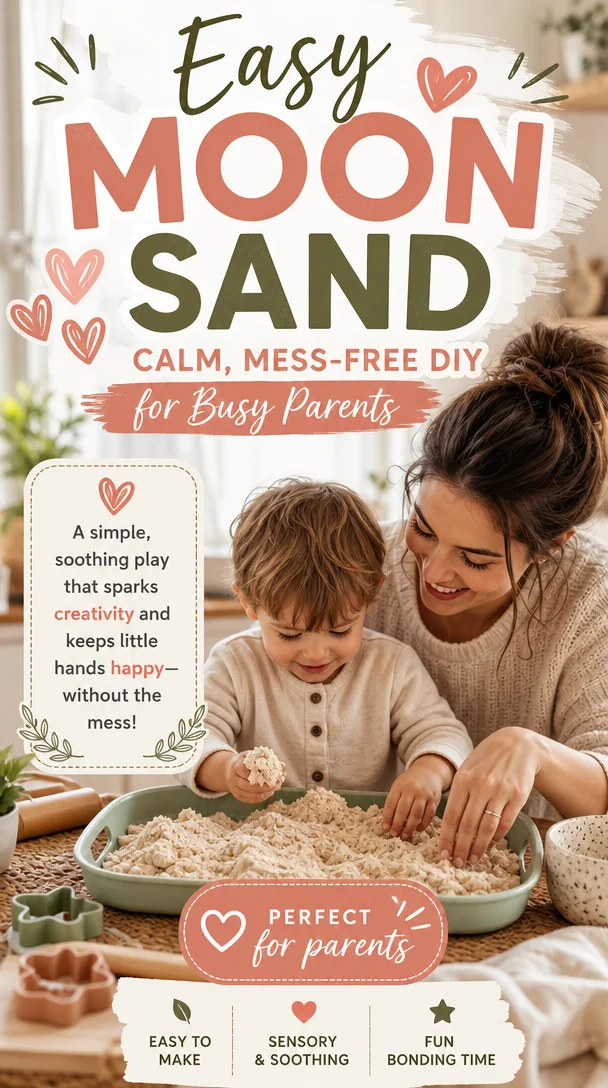
Easy Moon Sand: Calm, Mess-Free DIY for Busy Parents
How to Make Moon Sand: A Fun and Easy Kids Craft
Meta Description
Discover how to make moon sand with just 2 ingredients! This sensory play idea is perfect for toddlers, preschoolers, and tweens. Enjoy summer fun and creativity!
Introduction
Hey there, super parent! If you’re anything like me, you probably know that parenting can be a delightful rollercoaster ride. One moment you’re marveling at your child’s curiosity, and the next, you’re navigating a maze of spilled snacks and toy explosions! But fear not — I’m here to share a simple, joyful activity that will delight your little ones and give you a much-needed break: homemade moon sand!
Imagine a sensory experience that not only captivates your kids but also brings that big, lopsided smile to their faces. This moon sand is soft, moldable, and incredibly fun to play with — and the absolute best part? You only need two simple ingredients to whip it up! Whether it’s a sun-soaked summer afternoon or a cozy winter day, this activity is guaranteed to keep your kids engaged, imaginative, and happy. So grab a snack (or a cup of coffee!), and let’s dive in!
What is Moon Sand?
Moon sand is a fluffy, moldable substance that’s perfect for sensory play. It feels like a blend between sand and dough, allowing kids to shape, build, and create unique textures. This sensory experience not only entertains but also enhances creativity and fine motor skills. Plus, it encourages imaginative play — think castles, moon bases, or even adorable sea creatures! The beauty of moon sand lies in its simplicity and versatility.
Why You Should Try Making Moon Sand
Creating moon sand is an engaging way to bond with your kids while allowing them the freedom to explore their creativity. Here are some fantastic benefits of moon sand play:
- Sensory Exploration: The texture of moon sand is engaging for little hands, encouraging kids to explore tactile sensations.
- Fine Motor Development: Molding, squeezing, and shaping the sand develop hand-eye coordination.
- Creative Expression: Kids can create whatever their minds envision, fostering imagination and independent play.
- Stress Relief: Creating with moon sand can be a calming activity for both children and parents!
Are you excited yet? Let’s get to the fun part — making moon sand!
How to Make Moon Sand: 2-Ingredient Recipe
Ingredients You’ll Need:
- Flour – 4 cups
- Vegetable Oil – 1/2 cup
Step-by-Step Instructions
- Gather Supplies: Grab a mixing bowl, measuring cups, and a mixing spoon. Lay down some newspaper or an old tablecloth to make clean-up easier.
- Mix Flour and Oil: In the mixing bowl, combine the flour and vegetable oil. Start with the flour first to prevent a mess.
- Combine: Use your hands or a spoon to mix thoroughly. Once mixed, you should get a texture similar to wet sand — soft but moldable.
- Adjust As Needed: If your moon sand is too dry, add a bit more oil. If it’s too oily, sprinkle in more flour.
- Playtime: Once your moon sand is ready, transfer it to a container or a sensory bin, and let the fun begin!
Sensory Play Ideas
While your kids dive into their moon sand masterpiece, you can enhance their playtime with a few extra touches:
Creative Tools
- Molds and Cutters: Use cookie cutters, cups, or any mold you have on hand!
- Spoons and Scoops: These can be great for pouring and transferring the sand.
- Toys: Little figurines, cars, or animals can spark imaginative play narratives.
Thematic Play
- Outer Space: Add star-shaped sprinkles or glitter for a space theme. Encourage kids to create planets or aliens!
- Underwater Fun: Incorporate seashells and small ocean animal toys.
- Construction Zone: Use toy trucks and shovels — the possibilities are endless.
Helpful Tips for a Successful Moon Sand Experience
Setup Your Space
- Contain the Chaos: To minimize mess, consider doing this activity outside or in the kitchen. A large plastic tub can keep the sand contained and make clean-up a breeze!
Storage Tips
- Keep It Fresh: Store your moon sand in an airtight container when not in use. It can last for weeks if stored properly!
Engaging Your Kids
- Ask Open-Ended Questions: While they play, engage your kiddos with questions about their creations. For example, “What kind of creatures live on your moon?” or “How tall is your sand castle?”
- Take Photos: Snap some pictures of their creations. Not only does it create lasting memories, but it also encourages them to share their work and be proud of their achievements.
The Role of Moon Sand in Emotional Development
As we navigate the ups and downs of parenting, it’s crucial to consider emotional development as well. Engaging in activities like playing with moon sand can have a profound impact on your child’s emotional well-being.
Expressing Emotions
Kids often struggle to express their feelings verbally. When they play, they might act out scenarios or share stories related to their day. This encourages them to articulate their emotions and provides an outlet for any stress or anxiety.
Building Confidence
Creating something tangible boosts children’s self-esteem. A completed project, no matter how small, shows them they can achieve their goals and express themselves. Celebrate their achievements, even little ones, to foster confidence!
Encouragement for Parents
I know the days can be long, and sometimes, you might feel overwhelmed. But remember: it’s perfectly okay to take a breather and allow your kids to explore on their own. Making moon sand — or engaging in any playtime activity — doesn’t have to be a pressure-filled experience. Embrace the moments, let your children shine, and always remind yourself that you’re doing an amazing job.
Conclusion
Making moon sand is such a delightful way to foster creativity, fine motor skills, and emotional expression in our little ones. Plus, it gives you a break from the typical whirlwind of family life. So go ahead, mix those two ingredients, and let the imaginative play unfold!
Remember, you don’t need to be a perfect parent to create magical moments. With little activities like this, you’ll find joy in the chaos and laughter in the everyday mess. Embrace the imperfections and cherish each moment — after all, these are the little joys that make family life truly special.
Thanks for joining me today at Little Life Society! I hope you feel inspired to try this activity and create some wonderful memories with your kids. Now, let’s get creating! 🌟
FAQs About Moon Sand
-
How do I store moon sand?
- Keep it in an airtight container to keep it fresh and moldable.
-
Can I add color to moon sand?
- Absolutely! You can mix in colored sand or food coloring for a fun twist.
-
What if my child has allergies?
- You can substitute vegetable oil with coconut oil or a safe alternative to accommodate allergies.
-
How can I clean up after playtime?
- Sweeping the area and using a damp cloth should help gather up any stray grains.
-
Is moon sand safe for toddlers?
- Yes! Just supervise them to ensure they don’t put it in their mouths. Always prioritize safety!
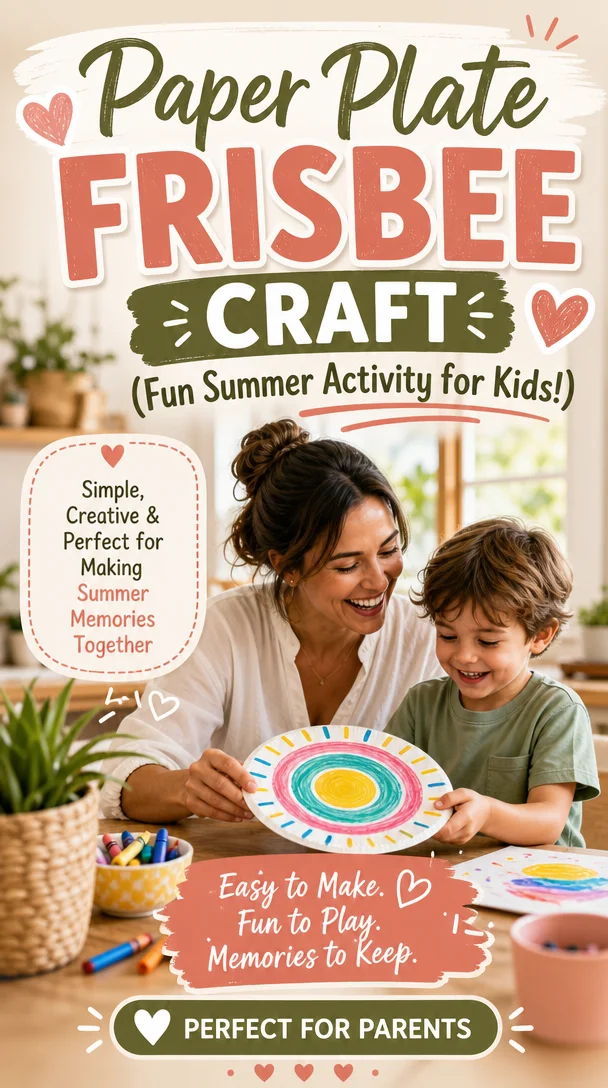
Paper Plate Frisbee Craft (Fun Summer Activity for Kids!)
Fun Summer Activity for Kids: DIY Paper Plate Frisbee Craft
Meta Description
Engage your kids with a fun DIY paper plate frisbee craft! Perfect for summer playdates and backyard fun, this easy project sparks creativity without breaking the bank.
Introduction
Ah, summer! The sun shines brightly, the days stretch long, and the kids are brimming with energy. As parents, we want to make the most of this beautiful season, but let’s be honest — keeping little ones entertained every day can feel like a monumental task. That’s where a simple yet fun idea comes into play: DIY paper plate frisbees!
Not only does this craft keep the kids creatively engaged, but it also provides an excellent opportunity for outdoor play, all while being budget-friendly. The best part? You don’t need to be an art expert to pull this off, and you get to witness those priceless, happy moments when your children race around, laughing with joy.
Let’s dive into how you can make this easy summer craft a cherished part of your family’s sunny adventures!
Why Paper Plate Frisbees?
Before we start crafting, let’s talk about why this paper plate frisbee activity is so fantastic:
- Budget-Friendly: With just a few materials, you can keep costs down while still providing hours of entertainment.
- Creative Expression: Kids can unleash their creativity by decorating their frisbees any way they please.
- Physical Activity: After making their frisbees, kids can enjoy endless outdoor fun, promoting physical fitness.
- Skill Development: This simple craft helps improve fine motor skills and hand-eye coordination.
Materials You’ll Need
Gather these easy-to-find supplies for your DIY paper plate frisbee craft:
- Paper plates: The sturdy kind works best.
- Colored markers or crayons: Bright colors make for eye-catching designs.
- Stickers: Let kids go wild with their favorite characters or themes.
- Scissors: For parents or older kids to help with cutting.
- String or yarn (optional): To create handles or attachments.
- Tape or glue: For adhering decorations and securing any additions.
- Outdoor space: A yard, park, or any open area will do!
Crafting Steps
Now, let’s get crafty! Here’s a straightforward step-by-step guide to creating your paper plate frisbees:
Step 1: Prep the Plates
Start by gathering the materials mentioned above. Hand each child a plain paper plate as their canvas. They can choose to flip it over so they decorate the bottom side first, if they like, as this adds a fun twist!
Step 2: Get Creative
Encourage your kiddos to unleash their inner artists! Here are a few decorating ideas:
- Colorful Designs: Let them use colored markers or crayons to create patterns, like stripes, polka dots, or rainbows.
- Stickers Galore: Include their favorite stickers, whether they’re superheroes, animals, or magical creatures.
- Nature-Inspired Art: Kids can draw sunflowers, butterflies, or even their favorite summer scenes.
Step 3: Add Functionality
If you want, enhance the frisbee’s functionality by cutting out a small hole in the center of the plate and looping a string through to create a handle. This adds an interactive element, making it easier for younger kids to toss and catch!
Step 4: Get Outside and Play!
Once the decorations dry (if using glue or wet markers), take the frisbees outside for some fun! Encourage kids to toss them back and forth, create target games, or even have a friendly frisbee competition.
Tips for Fun and Safety
Here are some helpful tips to make your paper plate frisbee activity even more enjoyable:
- Play with Friends: Invite over a few friends for a paper plate frisbee party. The more, the merrier!
- Set Up Games: Create target zones using hula hoops or chalk-drawn circles on the grass.
- Supervise Play: While this craft is safe, always keep an eye on younger kids during frisbee activities to ensure they play safely.
- Encourage Teamwork: Let kids work together on frisbee designs or team games. This fosters bonding and cooperation.
Encouraging Themes and Questions
While crafting and playing with the paper plate frisbees, consider sparking wonderful conversations. Here are some fun questions to ask your kids during the activity:
- What colors represent summer for you?
- If you could design your perfect frisbee, what would it look like?
- What would be the ultimate frisbee game to play, and why?
The Benefits of Outdoor Play
Let’s talk about why getting outside is crucial for kids’ well-being. Playing outdoors provides them with:
- Fresh Air and Sunshine: Vitamin D is vital for growth and development.
- Physical Health: Outdoor play promotes physical fitness, which is crucial during the growing years.
- Social Skills: Interacting with peers in a natural setting helps kids navigate social situations confidently.
Conclusion
Creating DIY paper plate frisbees isn’t just about crafting; it’s about making memories and lighting up your children’s summer days. Whether they’re busy at the craft table or running around in the yard, this fun activity brings a smile and fosters family bonding.
Remember, parenting may feel overwhelming at times, but it’s the simple moments that often shine the brightest. So, grab those paper plates, gather your supplies, and let’s get crafting! Every throw, every giggle, every bit of creativity shared fuels the joy in both your hearts as you navigate the beautiful chaos of family life.
Go ahead, enjoy this hands-on activity together — and relish in those little moments that make all the effort worthwhile. You’ve got this, and your little ones will cherish the time spent together.
Optional FAQ Section
Q: Can I use other materials instead of paper plates?
A: Absolutely! You can use sturdy cardboard, plastic lids, or even cloth to create frisbees. Just ensure the material is safe to use outdoors.
Q: What if my kids want to make more than one frisbee?
A: That’s a great idea! Encourage them to create different designs for various games. Each frisbee can represent a different theme or favorite character.
Q: How do I clean up after decorating?
A: Use wet wipes or damp cloths to clean up any mess. Having a designated craft area can help keep everything organized, making cleanup easier.
So, grab those crafting supplies and let the fun begin! Happy summer crafting! 🌞🏖️
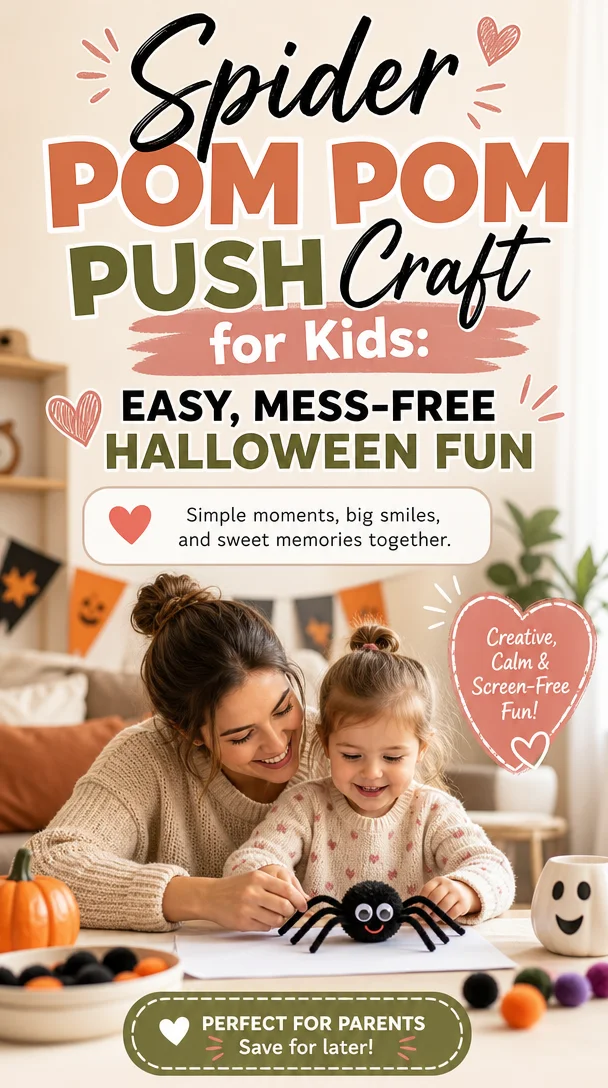
Spider Pom Pom Push Craft for Kids: Easy, Mess-Free Halloween Fun
Spider Pom Pom Push Craft: A Fun and Engaging Activity for Little Hands
Meta Description: Discover the Spider Pom Pom Push Craft! This creative activity boosts your child’s fine motor skills, color recognition, and emotional well-being. Dive in for tips!
Hey there, fellow parents! If you’re like me, you’ve found yourself searching for activities that not only entertain your little ones but also help them grow. Let’s face it: Parenting can feel overwhelming at times, and finding that perfect balance between fun and learning is essential. Today, I’m excited to share a delightful DIY project that checks all those boxes—the Spider Pom Pom Push Craft!
This simple yet engaging craft promotes fine motor skills, color matching, creativity, and even emotional well-being. Plus, it’s a fantastic way for you and your child to bond while diving into a world of imagination. So, grab your supplies, and let’s get crafting together!
Why Choose the Spider Pom Pom Push Craft?
Fine Motor Skills Development
As a parent, you probably know how important it is for toddlers to develop fine motor skills. These skills lay the groundwork for tasks like writing, buttoning clothes, and zipping up jackets. The Spider Pom Pom Push Craft requires your child to use their fingers to push tiny pom poms into a designated space. This simple motion strengthens their hand muscles, enhancing dexterity in a fun way.
Color Matching Fun
Who doesn’t love a splash of color? This craft also provides an excellent opportunity for color recognition and matching. By encouraging your little one to sort pom poms by color before pushing them into the spider’s body, you’re helping them develop their cognitive skills while having a blast!
Encouragement of Creativity
Children thrive on creativity, and this project allows them to explore their artistic side. As they create their spider, they can choose different colors and even add unique embellishments. Foster their imagination by letting them personalize their creation with stickers, googly eyes, or additional craft supplies from around the house!
Emotional Well-Being
Engaging in creative play can significantly impact your child’s emotional health. Crafting allows them to express their feelings, learn patience, and deal with frustrations—all while having tons of fun. The Spider Pom Pom Push Craft can even encourage storytelling opportunities, as they can come up with fun tales about their spooky spider!
How to Create Your Spider Pom Pom Push Craft
Now that we’ve talked about the benefits, let’s dive into how you can create this craft with your little ones. Here’s what you’ll need and step-by-step instructions to get started!
Supplies Needed
- Pom Poms (various colors)
- Cardstock or a sturdy piece of paper
- A printed template of a spider (or you can draw one!)
- A hole punch
- Glue (optional, for additional decorations)
- Tweezers (for added difficulty)
- A small basket or container for sorting the pom poms
Step-by-Step Instructions
Step 1: Prepare the Spider Template
Start by printing a spider template on cardstock. If you’re feeling adventurous, grab some markers and draw it together! Make sure your spider has a large open area on its body where the pom poms will go. The outline should also be clear and bold to guide your child.
Step 2: Use the Hole Punch
Next, use the hole punch to create small holes within the designated area of the spider’s body. Space them out evenly; this will serve as the spots where you or your child will push the pom poms through.
Step 3: Sort the Pom Poms
Provide your child with a variety of pom pom colors and place them in your small basket. Encourage them to sort the pom poms by color while excitedly discussing which color to use for their spider.
Step 4: Push and Play!
Now comes the fun part! Invite your child to push the pom poms through the holes in the spider’s body. You can either provide them with tweezers for added fine motor practice or let them use their fingers. Celebrate each pom pom they successfully add, encouraging “wow” moments to build their confidence!
Step 5: Decorate and Personalize
After filling the spider with colorful pom poms, let your child unleash their creativity! They can glue on googly eyes, draw a silly face, or add any other embellishments they can think of. The more unique, the better!
Helpful Tips to Enhance Your Crafting Session
-
Setting the Mood: Create a cozy crafting environment with some light music or a fun storytelling podcast playing in the background. This will get everyone into a creative spirit!
-
Focus on Language Development: As you work together, engage your child in conversations about colors, shapes, and emotions. Ask questions like, “What color do you want to use next?” or “How does the spider make you feel?”
-
Incorporate a Learning Moment: While crafting, introduce a learning opportunity by talking about spiders—what they eat, where they live, and how they spin webs. Kids love mixing learning with play!
-
Encourage Independence: If your child seems ready, allow them to take the reins. Watching them tackle the craft independently can boost their confidence!
-
Take Breaks: If your little one gets frustrated or loses interest, encourage a short break. Sometimes, a little distance is all they need to dive back in with renewed focus.
Encouragement for Parents
Crafting with your children is genuinely a journey filled with smiles, occasional messes, and meaningful moments. Every splash of color and every pushed pom pom signifies growth, not just for your child but also for the bond you share. Remember, parenting doesn’t come with a manual, but you’re doing an incredible job by seeking these creative outlets for your little one.
Whether your spider turns out perfect or a bit wonky, the essential part lies in the joy of creating something together. This Spider Pom Pom Push Craft is not just about the final product—it’s about the shared laughter, the silly stories that arise, and the quality time spent together. Take a deep breath, enjoy these tiny moments, and know that messy, imperfect days are the ones your child will remember with a smile.
Conclusion
The Spider Pom Pom Push Craft serves as more than a fun activity; it’s a wonderful way to support your child’s development while enjoying quality time together. As you watch their fine motor skills blossom and creativity flourish, you’ll feel a sense of pride knowing you’re creating lasting memories.
Now it’s your turn to gather those pom poms, connect with your child, and embark on this colorful crafting adventure! You’re doing amazing work, and remember, parenting is less about perfection and more about the love and laughter you share. Embrace those little moments, and let the craft (and your imagination) come alive!
FAQs
How long does this craft take?
Typically, around 30-45 minutes works well, depending on your child’s age and attention span.
Can I adapt this craft for older kids?
Absolutely! Older kids can help create more intricate spider designs or use smaller pom poms and tweezers to enhance the challenge.
What if my child loses interest halfway?
That’s completely okay! Taking breaks or switching to a different activity is part of the creative process. Enjoy it at their pace!
Happy crafting, and remember, you are doing better than you think!
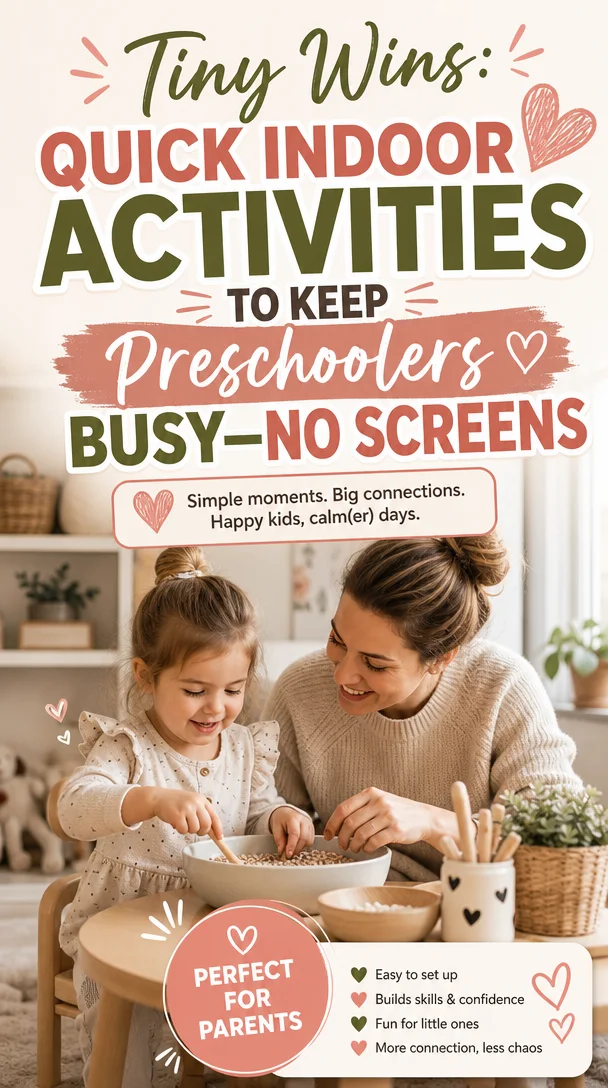
Tiny Wins: Quick Indoor Activities to Keep Preschoolers Busy—No Screens
Engage Young Minds: Screen-Free Activities for Kids Every Day
Meta Description
Looking for entertaining activities to keep your kids busy without screens? Discover creative ideas that promote learning and fun in everyday life!
Introduction
Hey there, fellow parents! If you’re anything like me, you’ve probably found yourself in a battle against screens, trying to keep your little ones engaged and entertained without the constant flicker of a device. I know it can feel overwhelming at times, but trust me — you can create magical moments and foster learning without screens.
We all want our kids to be smart, curious, and ready to take on the world, right? Let’s explore a treasure trove of simple activities to help you keep the kiddos busy, spark their imaginations, and — more importantly — give you a break without the guilt of turning on a screen. So grab a cup of your favorite coffee or tea, find a cozy spot, and let’s dive into some fun, screen-free ideas!
Why Screen-Free Activities Matter
In a world overflowing with gadgets, keeping our kids engaged without screens can feel daunting. Yet, screen-free activities benefit children’s development in so many ways:
- Boosts Creativity: Engaging in hands-on activities allows kids to explore their imagination and express themselves.
- Encourages Problem-Solving: Children learn to think critically and tackle challenges without digital assistance.
- Promotes Physical Activity: Many screen-free activities involve movement, helping kids stay active and healthy.
- Strengthens Social Bonds: Playing with others creates friendships and builds vital social skills.
These benefits not only help children thrive but also enable us to create meaningful connections. Let’s explore some fun, engaging activities that will keep your kids busy, learning, and far away from screens!
H2: 10 Creative Screen-Free Activities for Kids
1. Nature Scavenger Hunt
Take the fun outdoors! Create a simple scavenger hunt list featuring items like leaves, acorns, flowers, and interesting rocks. Head to your backyard or a nearby park and set your kiddos loose to discover the wonders of nature. They’ll build their observation skills while soaking up fresh air!
2. DIY Sensory Bins
Sensory play is not only fun, but it also engages kids’ senses! Fill a bin with rice, pasta, or dried beans, and toss in some toys or spoons. Let your little ones explore textures, colors, and sounds while they play. You can even theme your sensory bin — think ocean vibes with seashells or a dinosaur adventure with mini dino figures!
3. Build a Fort
Every child loves a cozy hideaway. Grab some blankets, pillows, and furniture to construct a magical fort together. Encourage them to invite stuffed animals or play pretend in their new space. It’s a perfect opportunity for imaginative play and storytelling!
4. Color Matching Dot Game
Here’s a simple and fun activity that promotes brain thinking and fine motor skills. Gather colored dots or paper cutouts, and have your mini match them to corresponding colors on sheets of paper. It’s easy and offers a hands-on learning experience without any screens involved.
5. Kitchen Science Experiments
Turn your kitchen into a science lab! Simple experiments, like making homemade volcanoes with baking soda and vinegar or exploring the magic of cornstarch and water (oobleck), can be tons of fun. Not only do they provide an exciting learning experience, but they also generate lasting memories!
6. Storytime Theatre
Encourage creativity by having your little ones create a short play! They can choose their favorite stories or invent their own. Provide costumes, props, and a space to perform, then grab your seat and enjoy the show. This activity not only sparks creativity but also builds confidence!
7. Get Crafty with Nature
Bring the outdoors inside! Gather natural materials like leaves, twigs, and flowers, and let your kids create unique art pieces. They can glue them onto paper or use them for printing designs. This simple art project allows for self-expression while nurturing their artistic side!
8. Puzzle Race
Puzzles can be a great way to keep little minds engaged! Set out several puzzles and time your children to see how quickly they can complete them. Challenge them to do puzzles of varying difficulty levels, encouraging them to problem-solve while having fun.
9. Gardening Together
Planting seeds or caring for houseplants introduces kids to the beauty of nature and teaches responsibility. Whether you create a small indoor herb garden or plant colorful flowers outside, gardening connects children with the earth.
10. Family Dance Party
Dance it out! Turn on your favorite tunes and have a spontaneous family dance party in your living room. This fun way of moving encourages family bonding while helping your children develop their rhythm and coordination.
H2: Tips for Success: Making Screen-Free Activities Work
1. Prepare in Advance
Set aside time to gather materials and plan activities. Having all your supplies ready will make it easier to dive in when your little ones are bouncing with energy.
2. Follow Their Lead
While you may have ideas in mind, don’t hesitate to let them explore their interests. If they show excitement for a particular activity, follow their lead and encourage their curiosity.
3. Set a Routine
Incorporate screen-free activities into your daily routine. Set aside dedicated time each day for creative play, allowing everyone to look forward to this special time together.
4. Share the Load
If you feel overwhelmed, reach out to fellow parents for ideas or organize playdates. Collaborating with others can alleviate the pressure and inspire fresh ideas!
H2: Encouragement for Busy Parents
It’s easy to feel like you’re spinning plates, trying to balance parenting responsibilities while giving your kids enriching experiences. Remember, it’s not about perfection — it’s about connection. Celebrate those small victories!
Some spontaneous moments will become beautiful memories, while other days might not go as planned. That’s okay! Your love and attention mean more than any structured activity ever could. So, embrace the chaos, offer genuine engagement, and allow each activity to evolve organically.
Every moment you spend with your kids strengthens your bond and nurtures their growth — and that’s truly what matters.
Conclusion
Creating screen-free activities can feel like a challenge, but it’s also a wonderful opportunity to engage with your kids and foster their development. By incorporating these simple activities into your family routine, you’ll inspire creativity, deepen connections, and promote learning — all while giving everyone a much-needed screen break!
Remember, you’re not alone in this parenting journey. Embrace the little moments, celebrate progress, and keep it real, just as you are. So put away those devices, and enjoy the beautiful, messy, exhausting, but oh-so-rewarding adventure of parenting. You’ve got this!
Optional FAQs
Q: How can I eliminate screen time without resistance?
A: Start small! Introduce screen-free activities gradually and consider creating a family pact for designated screen-free times, such as during meals or before bedtime.
Q: What are some additional resources for screen-free activities?
A: Look for parenting blogs, such as Little Life Society, or community groups that offer tips on fun activities and games. Pinterest can also be a goldmine for creative ideas!
Q: How do I make sure my kids stay engaged during activities?
A: Keep activities varied and flexible. If one doesn’t hold their interest, move on to another one! Involve them in the planning stage and let them take ownership.
By putting forth the effort to engage your children in creative, screen-free activities, you enrich their lives and build everlasting memories — and that, my friend, is a priceless achievement!