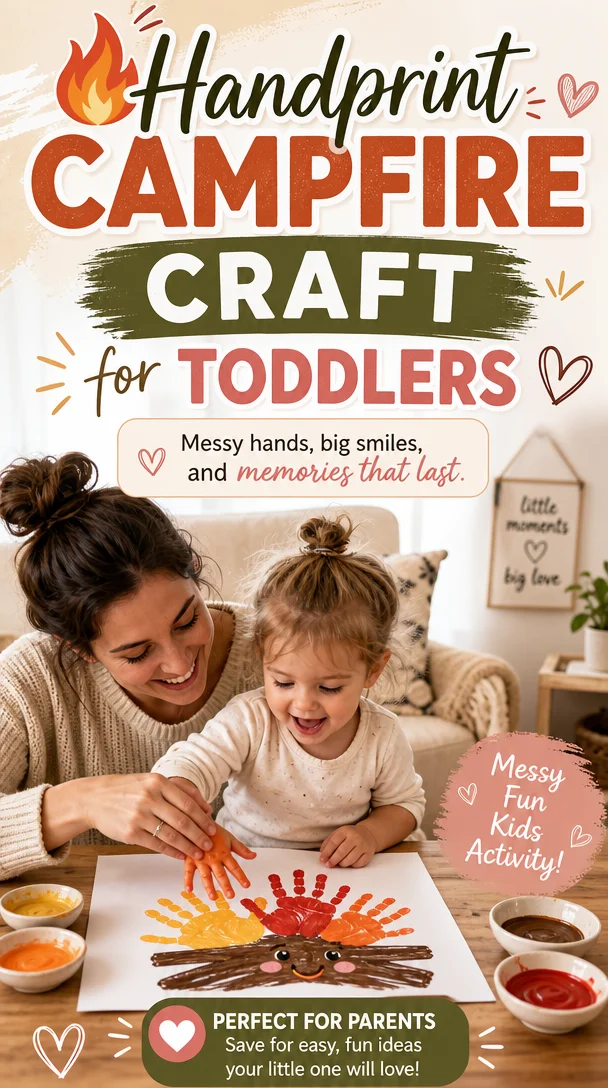
🔥 Handprint Campfire Craft for Toddlers (Messy Fun Kids Activity)
Spark Joy with a Handprint Campfire Craft for Toddlers: The Ultimate Messy Fun Kids Activity!
Meta Description
Discover a fun handprint campfire craft for toddlers that sparks creativity and sensory exploration! Perfect for summer activities and camping themes.
Introduction
Hey there, fellow parents! If you’re anything like me, you know that some of the most cherished moments with our little ones come from messy, hands-on activities. Today, I’m excited to share a heartwarming project that will ignite your child’s imagination and create some unforgettable memories—a delightful handprint campfire craft! 🌟
Imagine this: you and your toddler are sitting at the kitchen table, surrounded by bright colors and all the giggles that come with a little chaos. The table may look like a paint explosion occurred, but it’s all part of the fun! As your toddler dips their hands into bold, vibrant paints, they’ll not only create a glowing campfire but will also explore textures and unleash their creativity.
This activity isn’t just about making a craft; it’s about sharing a magical experience while reinforcing a love for art and play. So, grab those paint smocks, and let’s dive into this messy adventure together!
The Magic of Messy Play
Why Messy Play Matters
We all know that toddlers are naturally curious. They’re explorers at heart, eager to touch, feel, and discover new experiences. Engaging in messy activities like this handprint campfire craft helps them develop their fine motor skills, sensory awareness, and creativity. Plus, it’s great for bonding time!
A Fun Twist to Summer Activities
Whether you’re planning a camping-themed week or simply looking for ways to keep your little ones entertained this summer, this craft fits seamlessly into various themes. Even if you’re having one of those days where nothing seems to go as planned, this messy fun will surely alleviate some of that stress (and turn it into laughter).
Materials You’ll Need
To create your handprint campfire, gather the following materials:
- Bright, washable kids’ paints (orange, red, yellow, and brown)
- Large pieces of sturdy paper or cardboard (think poster board)
- Paint smocks or old T-shirts to protect clothes
- Child-safe scissors and glue
- Optional: glitter, sequins, or other decorative embellishments for added flair
Steps to Create Your Handprint Campfire
Step 1: Prepare Your Space
Find a designated area for crafting—preferably an easy-to-clean surface. Lay down some newspaper or an old tablecloth to catch any paint spills. Trust me; your future self will be thankful!
Step 2: Get Your Little Artist Ready
Dress your toddler in their paint smock or an old T-shirt. Make sure they’re ready to get a little messy—this is where the fun begins!
Step 3: Create the Flames
- Pour a small amount of orange, red, and yellow paint onto a palette or paper plate.
- Encourage your child to dip their hands into the paint, and then press their hand onto the paper, creating a flame shape.
- Mix and match colors; overlapping is encouraged! The more vibrant and varied, the better!
- Repeat this step until your paper is nicely layered with colorful handprints—these will be the flames of your campfire.
Step 4: Build the Campfire Base
- While the flames dry, we’ll move on to crafting the base of the campfire.
- Use brown paint to create handprints for logs. Encourage your child to use their fingers to add wood grain textures to the logs.
- Once the paints are dry, you can use scissors to cut out your flames and logs if needed.
Step 5: Assemble Your Campfire
- Display your little artist’s handiwork by gluing the logs onto the bottom of the flames.
- Add decorative elements like glitter or sequins for a bit of sparkle—just imagine those campfire embers glowing!
Step 6: Display Your Masterpiece
Once the project is complete, it’s time for a mini celebration. Hang their artwork in a special spot—maybe on the fridge or in a place that makes your toddler proud!
Helpful Tips for a Successful Crafting Session
Embrace the Mess
Let go of perfection! Toddlers love exploring different textures, and it’s essential to let them dive into the experience fully. Instead of worrying about the mess, focus on the joy of creating together.
Incorporate Language Development
Talk with your toddler about the different colors and textures as they paint. This simple conversation builds their vocabulary and fosters emotional connection.
Create a Routine Around Crafting
Consider making craft days a part of your weekly routine. This could be anything from a “Messy Monday” to a “Fun Friday.” Having predictable family activities cultivates excitement and gives everyone something to look forward to.
Explore Sensory Play Options
Once the craft session ends, consider extending your sensory play. Fill a container with dry pasta, rice, or even sand, and let your toddler explore different materials. Fine motor skills flourish through these experiences!
Use This Activity for Emotional Development
Invite your child to express their feelings about camping or sitting by the fire. This could lead to storytelling time, where they can share their “camping” adventures, whether real or imagined.
Questions to Spark Connection
Here are a few conversation starters to deepen your connection during the craft:
- “What do you think it feels like to sit by a campfire?”
- “If you could roast marshmallows, what flavor would you pick?”
- “Tell me one adventure you’d like to have next time we camp!”
Encouraging Conclusion
Creating a handprint campfire craft with your toddler is not just a fun way to spend quality time together; it’s an opportunity to explore creativity, develop skills, and foster emotional connections. Every splash of color tells a story, and every messy moment becomes a cherished memory.
So next time you feel overwhelmed or uncertain about how to engage your toddler, remember that the messier the activity, the bigger the smiles. Each small win on this parenting journey matters, and you’re doing an amazing job! Now, go gather those supplies, dive into that paint, and enjoy every moment of this shimmering summertime adventure!
Optional FAQ Section
What should I do if my toddler is hesitant to get messy?
Encourage them by starting with a smaller brush or sponge. Emphasize the fun aspect of creating! Sometimes, leading by example can also help them feel inspired to dive in.
How can I adapt this craft for older kids?
Older kids can create more intricate designs by adding more details to their campfire or using different types of textures and materials to enhance their projects.
Can we do crafting outside?
Absolutely! If the weather permits, a backyard where they can be as free and messy as they want will surely add to the fun. Just remember to use washable paints for easy cleanup!
Now, go forth and let those tiny hands create their own masterpiece! Happy crafting, everyone! 💛
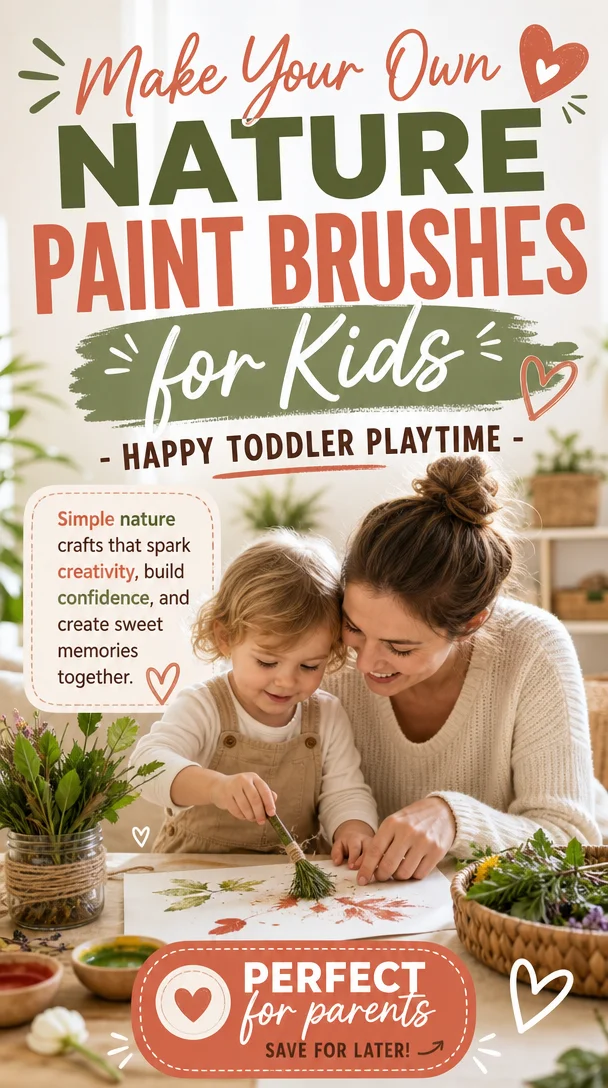
Make Your Own Nature Paint Brushes for Kids – Happy Toddler Playtime
Make Your Own Nature Paint Brushes: Happy Toddler Playtime
Meta Description: Create unique nature paint brushes with your kids! This fun, screen-free activity nurtures creativity while enjoying the great outdoors.
Introduction
As a parent, you know the challenges that come with keeping little ones engaged and happy. You juggle nap times, snack breaks, and seemingly endless energy, all while trying to find ways to encourage creativity. But let me assure you, you’re not alone!
Imagine heading outdoors, breath fresh with the scent of grass, and the excitement sparkling in your child’s eyes as they discover the beauty in simple twigs, leaves, and flowers. Not only does this little adventure provide an excellent opportunity for imaginative play, but it also sparks curiosity and creativity through a delightful art project: making your own nature paint brushes.
In this blog post, I’ll guide you step-by-step as we make nature paint brushes together. You’ll find tips, encouragement, and a sprinkle of fun along the way. Get ready to explore the world with your toddler and create some beautiful art that celebrates nature’s wonders!
The Benefits of Using Nature Paint Brushes
Before we dive into the how-to part, let’s chat about why this activity is not just a fun way to spend an afternoon but also a learning experience packed with developmental benefits.
Nurturing Creativity
Encouraging creativity is vital for young developing minds. Using nature items for painting opens up a whole new world of texture and color. Each brush you create represents a unique experience—each twig or flower petal embodies exploration.
Promoting Fine Motor Skills
Swirling, dipping, and painting with nature brushes improves fine motor skills. When toddlers grasp different brush materials, they practice coordination and control, all while having a splendid time!
Connecting with Nature
In a world filled with screens, getting outside and interacting with nature is crucial. This activity allows kids to discover the beauty around them while stimulating their senses. You’ll watch as they touch, smell, and, yes, even taste some of the different textures they find!
Quality Family Time
As you create these brushes and craft beautiful pieces of art together, you’re strengthening family bonds. Sharing laughs, insights, and the occasional surprise discovery makes lasting memories.
Crafting Your Own Nature Paint Brushes
Now that you’re excited about the rewards, let’s get into the nitty-gritty. This is a simple, screen-free activity that’s easy to set up. Grab your outdoor gear, and let’s head out!
What You’ll Need
-
Materials for Brushes:
- Twigs, sticks, or branches (consider different sizes and textures)
- Leaves (big and small)
- Flowers (safe and non-toxic)
- Pine needles (for a different texture)
- Grass (for a unique bristle effect)
-
Painting Supplies:
- Non-toxic paint (washable is best for little hands)
- Large paper or canvas (for your masterpieces)
- Paint plates or containers (something to hold the paint)
- A bowl of water (for cleaning up)
Step 1: Nature Scavenger Hunt
Start your adventure with a nature scavenger hunt! Give your toddler a small bag or basket and head out to collect materials. Encourage them to choose different shapes and sizes—this is their chance to explore!
You might say, “Look at this big leaf! Can you find a smaller one? What about that green twig over there? Let’s see how many different things we can gather!” This playful dialogue encourages observation and sparks excitement.
Step 2: Making the Brushes
Once you’ve gathered your treasures, it’s time to create your paint brushes. Depending on your child’s age, they might need some help with this part. Here’s how:
-
Twigs/Branches: Wrap the ends with the paintable material (leaves, flowers, etc.) using string or rubber bands. This will create a nice grip and a brush effect.
-
Grass Brushes: Gather a handful of grass, tie it tightly with string, and trim the ends for an even look.
-
Pine Needle Brushes: Use a twig and attach pine needles at the end by wrapping them with string.
Let your little ones help wherever they can, from holding the materials to wrapping the string. They’ll feel a sense of accomplishment in creation!
Step 3: Painting Time!
Now, it’s time for the fun part—painting! Set up your workspace outside or in a well-protected area. Pour the non-toxic paint into your containers and have your toddler dip their new brushes into the colors.
Encourage them to explore different techniques. Ask questions like, “What happens when we use the leaf brush versus the twig? Can we mix two colors and make something new?”
Tips for an Engaging Nature Painting Experience
This activity is full of opportunities to engage your toddler. Here are some tips to enhance the experience:
1. Create a Theme
If it’s autumn, collect colorful leaves and use them as inspiration for fall-themed paintings. In spring, encourage them to paint flowers or sunshine!
2. Story Time
As your kids paint, tell stories related to what they are creating. “Once upon a time, a little bird found a crown made of flowers!” This keeps their imagination flowing.
3. Fun Music
Set the mood with some lively music while you paint. Dancing and singing together doubles the fun.
4. Capture the Moment
Take pictures of your kid’s creations. Not only does this preserve memories, but it also shows your child how proud you are of their work. You can even make a little photo book as a keepsake!
Encouraging Open-Ended Exploration
It’s essential to create an environment that fosters imagination and creativity. Encourage your child to explore beyond just painting with their nature brushes.
-
Texture Exploration: Allow them to feel the different materials. Ask them which one they think will create the best marks.
-
Color Mixing: Provide different paint colors and prompt them to mix them for exciting new hues.
-
Nature Stories: Use the brushes to create a story on paper. They can paint their favorite animals or settings based on what they learned while exploring.
Each moment is a chance for learning, and as you support their creativity, you’ll be amazed at how this strengthens your bond.
Conclusion
Creating your own nature paint brushes is not just a craft; it’s a beautiful opportunity to nurture your child’s creativity, enhance their motor skills, and connect with the world around them. You’ll see the sheer joy on their faces as they explore, create, and tell stories through their art.
Remember, it’s not about perfection or the final piece but the experience shared—the laughter, the exploration, and the magical moments that make parenting so rewarding.
You’re doing an incredible job navigating this beautiful journey of parenthood, and each moment spent fostering creativity adds warmth and joy to your family life. So grab those nature brushes and paint the town—together!
Optional FAQs
Q: What materials work best for nature paint brushes?
A: Twigs, leaves, flowers, pine needles, and grass each bring unique textures and effects to your paintings. Experiment to find what works best for you and your child.
Q: How can I clean up after our painting session?
A: Since we used non-toxic and washable paints, cleanup involves a bowl of water and some paper towels or cloths. Encourage your child to rinse their brushes in the water after painting.
Q: Can we do this activity indoors?
A: Absolutely! Just make sure to cover your workspace with newspaper or a plastic sheet to protect surfaces from spills.
Now, go dive into nature and unleash the creativity that awaits. Happy crafting!
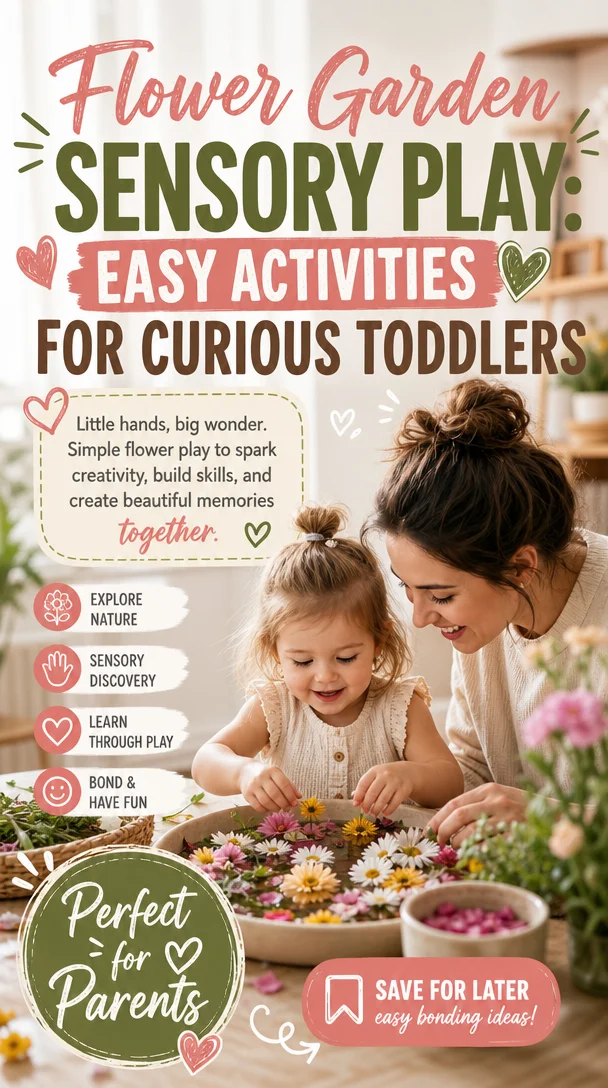
Flower Garden Sensory Play: Easy Activities for Curious Toddlers
Create a Vibrant Flower Garden Sensory Play Experience for Your Kids
Meta Description:
Discover the joy of a Flower Garden Sensory Bin! This engaging sensory play idea promotes creativity and development while providing an easy, fun activity for your toddlers.
Introduction
Do you ever feel like your little ones are brimming with energy, eager to explore every corner of your home? I get it! As a parent, those moments can feel both magical and overwhelming. But fear not! Engaging your child in creative play can turn that energy into a delightful experience. Today, let’s dive into a fun and easy sensory play idea that will keep their curiosity alive while fostering creativity: the Flower Garden Sensory Bin!
Imagine the joy of watching your child’s face light up as they dive into a world of colors, textures, and the joys of gardening—all from the comfort of your living room or backyard. This sensory bin not only captivates their imagination but also enhances their fine motor skills, encourages language development, and provides a fabulous opportunity for you to bond. So grab your supplies, and let’s get started on creating a beautiful garden without the muddy shoes!
What is a Sensory Bin?
Before we plant our gardening seeds, let’s quickly discuss what a sensory bin is, in case you’re new to this concept. A sensory bin is a container filled with materials that stimulate a child’s senses. It allows for open-ended play, where kids can explore, discover, and learn at their own pace. With a mix of tactile elements and creative themes—like our Flower Garden—you can transform any ordinary day into an extraordinary adventure of learning and discovery.
Setting Up Your Flower Garden Sensory Bin
Creating a Flower Garden Sensory Bin is an enjoyable activity you can do together with your children. Not only does it foster their engaging exploration, but it also allows them to connect with nature in a playful way. Here’s what you’ll need to set up your sensory garden:
Supplies Needed
-
Base Materials:
- A large plastic tub or bin (I love using clear bins so the kids can see the contents!)
- Kinetic sand or potting soil for a realistic gardening feel
- Rice, or even dried beans for added texture
-
Flower Supplies:
- Artificial flowers (think colorful blooms in various sizes)
- Small gardening tools (toy spades, rakes, watering cans)
- Pots for planting (you can even use recycled containers or cups)
- Natural elements (pine cones, pebbles, or real leaves)
-
Decorative Touches:
- Gardening gloves for your little ones (they’ll love wearing them!)
- Colorful bowls or scoops for sorting and playing
- Optional: Bug figurines or butterflies for added fun!
How to Assemble the Bin
-
Start with the Base: Pour the kinetic sand or potting soil into the bin. Spread it out evenly to create a gardening playground.
-
Add the Flowers: Place the artificial flowers strategically around the bin. Let your kids decide where each flower goes!
-
Incorporate Tools & Accessories: Scatter the gardening tools and pots throughout the sensory bin. This invites your child to engage in pretend play—“Let’s plant flowers!” “I need a watering can!”
-
Get Creative: Drop in some natural elements, like pebbles and leaves, to enhance the sensory experience and spark imagination.
-
Time to Play: Invite your child to explore. Allow them to dig, plant, water, and create their own floral masterpiece.
Engaging Activities with Your Flower Garden Sensory Bin
Your Flower Garden Sensory Bin serves as more than just a fun activity—it’s a multifaceted learning experience! Here are some ways to bring more depth to your child’s playtime:
1. Counting Flowers:
Encourage your little ones to count their flowers, pots, or gardening tools. Use this as an opportunity to practice counting together, or even introduce simple math concepts like addition and subtraction.
2. Talk About Colors and Shapes:
Engage your child’s imagination by discussing the colors of the flowers. Ask them to sort the flowers by color or shape, enhancing their language skills. For example, “Which flower is the biggest?” or “Can you find the purple flower?”
3. Role Play:
Tap into their imaginative side by role-playing as gardeners. Take turns from planting to watering, and even selling flowers! Dialogue like, “I’m planting a sunflower! What will you plant?” encourages creativity and communication.
4. Sensory Exploration:
Discuss the textures and scents they experience. Touch the sand, feel the smooth plastic flowers, and smell the fresh air. This encourages sensory awareness and vocabulary development.
5. Storytime Connection:
Create stories around their experiences. Ask, “What happens to the flowers if they don’t get water?” This activates their critical thinking and creativity.
Practical Tips for a Successful Sensory Play Experience
As you embark on this engaging sensory journey, here are a few practical tips to keep in mind:
-
Set Up Outside (If Possible): If you can, consider setting up the sensory bin outdoors. This not only allows for easier clean-up but also connects your little one directly to nature.
-
Control the Mess: Keep a dustpan and broom handy for easy cleanup afterwards. Sometimes the mess adds to the fun!
-
Supervise Closely: While sensory experiences are a great opportunity for independent play, always keep a close eye to ensure safe play.
-
Be Prepared for Questions: Your child’s curiosity will likely lead to a myriad of questions. Prepare yourself to engage in meaningful conversations about gardening, nature, and the world around them.
-
Rotate Materials: Change out some supplies every few weeks to keep the activity fresh and exciting.
Celebrating Small Wins in Sensory Play
Remember, the goal of sensory play is not just to entertain but to create meaningful moments. Celebrate the small wins: their first plant, their courage to explore new textures, or simply seeing the joy on their face. Every little step matters in building confidence and curiosity in your child.
Here’s a quick tip: take photos during their play! Capturing these moments not only preserves memories but also allows you to reflect on how they’ve grown, both in skills and confidence.
Encouraging Conclusion
As you and your child dig into this Flower Garden Sensory Bin, know that you are fostering their development in a fun, engaging way. Remember, parenting isn’t about being perfect — it’s about creating loving, learning experiences. Allowing your child the freedom to explore, observe, and play nurtures their imagination and fuels their sense of wonder.
So, what are you waiting for? Grab those supplies and watch as your little one blossoms into a joyful gardener! These small moments can offer big opportunities for connection, so lean into the fun and enjoy every second.
Optional FAQ Section
Q: How long can we keep the sensory bin active?
A: As long as you maintain the materials, the sensory bin can stay active for weeks! Just remember to periodically clean and check for any signs of wear.
Q: Can I tailor this idea for older kids?
A: Absolutely! Introduce more complex concepts like plant care, seed germination, or even discussions on ecosystems for older children.
Q: What if my child doesn’t seem interested?
A: Engage them by demonstrating the first few steps of play, or involve them in the setup process. Sometimes, the excitement comes from being part of the creation!
Invite your little ones into the magic of gardening with this Flower Garden Sensory Bin. Enjoy the laughter, the learning, and the beautiful chaos that comes with it! Happy parenting! 🌼
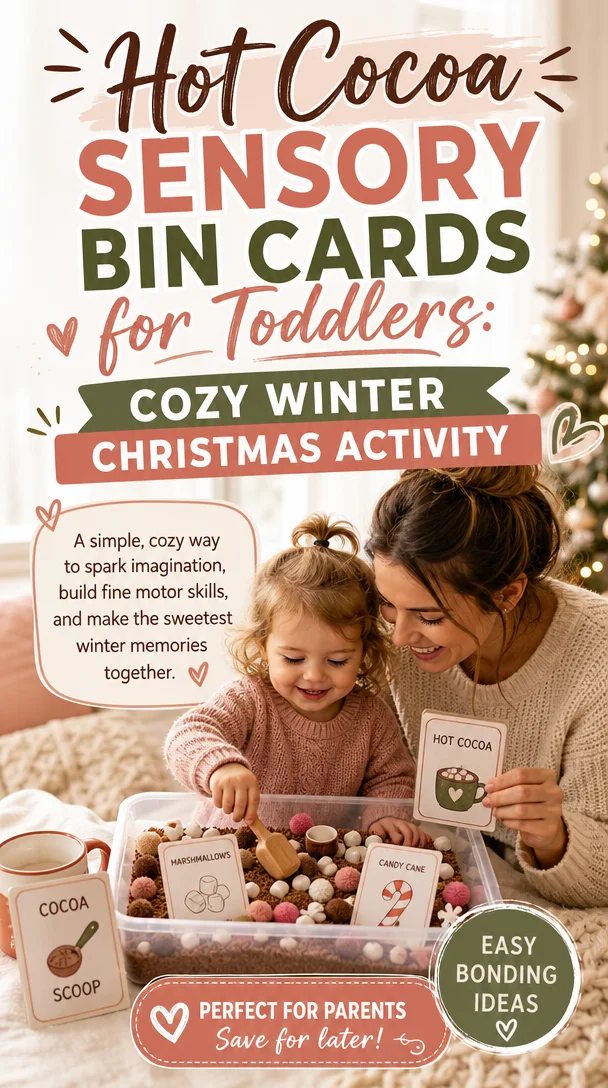
Hot Cocoa Sensory Bin Cards for Toddlers: Cozy Winter Christmas Activity
Cozy Up with Hot Cocoa Sensory Bin Cards: A Winter Wonderland Activity for Toddlers
Meta Description
Explore our Hot Cocoa Sensory Bin Cards! This winter activity combines fun and learning for toddlers. Engage their imaginations while practicing early math concepts!
Introduction
As winter blankets our world in white, there’s something undeniably magical about this time of year. The chill in the air invites cozy moments, warm drinks, and opportunities for creative play. If you’ve ever found yourself chasing your toddler around the house, looking for ways to keep their little hands busy, I have a treat for you! Enter the Hot Cocoa Sensory Bin Cards—a delightful winter activity designed not just for fun, but for learning too!
Engaging toddlers in sensory play can feel like a daunting task, especially when life gets busy. But here’s the good news: with a sprinkle of imagination and a dash of creativity, you can turn a simple idea into a memorable experience. Whether it’s the playful rustle of materials in a sensory bin or the comforting warmth of hot cocoa, these cards will keep your child entertained while promoting early math skills and allowing their imagination to soar. Ready for a cozy adventure? Let’s dive in!
Why Choose Sensory Bins for Winter Activities?
H2: The Magic of Sensory Play
Sensory play involves activities that stimulate a child’s senses—sight, sound, touch, taste, and smell. This kind of play nurtures cognitive growth, encourages fine motor skills, and fosters creativity. And what’s better than a sensory activity that embodies the warmth of hot cocoa during the winter months?
H3: Benefits of Hot Cocoa Sensory Bin Cards
-
Early Math Skills: The Hot Cocoa Sensory Bin Cards come with 12 diverse cards that engage your child in play while reinforcing fundamental math concepts such as counting and sorting. Toddlers can practice recognizing numbers and even begin learning about simple addition and subtraction without any pressure.
-
Pretend Play Welcome: These charming cards also spark imaginative role-play. Imagine your toddler serving up hot cocoa to their stuffed animals or friends, fostering social skills and creativity as they create their winter café scenes.
-
Encouraging Curiosity: Every card can set your child off on a new adventure—whether they’re imagining themselves as a barista or exploring the different types of ingredients that go into a perfect cup of cocoa.
H2: Setting Up Your Hot Cocoa Sensory Bin
Now that you’re sold on the idea, let’s talk about setting up the sensory bin to create an inviting and engaging experience for your toddler.
H3: What You’ll Need
- Hot Cocoa Sensory Bin Cards: Purchase the digital download from Etsy and print them out on sturdy cardstock.
- Base Material: Choose a base for your sensory bin, such as dry cocoa powder, shredded paper, or even brown rice to mimic the cocoa!
- Toys and Tools: Incorporate small cups, spoons, scoops, and even plush toys to enhance the play experience.
- Additional Items: Consider adding small marshmallows (fake ones, of course!), chocolate coins, or winter-themed decorations for extra flair!
H3: Easy Steps to Set Up
- Gather Your Supplies: Print your Hot Cocoa Sensory Bin Cards and choose your base material.
- Create Your Sensory Bin: In a shallow container, pour in your base material and arrange the cards throughout.
- Add Fun Elements: Sprinkle in your additional items like fake marshmallows or toys. Encourage your toddler to explore.
- Invite Play: Engage with your child! Use the cards to prompt counting and sorting activities, or simply enjoy the playtime together.
Making the Most of Your Sensory Bin Experience
H2: Fun Engagement Ideas
H3: Interactive Conversations
As your toddler dives into their sensory bin adventure, make the most of this opportunity to engage them in conversation. Ask leading questions that prompt thought and creativity:
- “How many marshmallows can you count?”
- “What colors do you see in your hot cocoa?”
- “Can you make a pretend order for our winter café?”
H3: Incorporating Learning
While their hands are busy, weave in some learning moments too! For example, you might:
- Count Together: Count the number of items as they scoop them into their cups.
- Pattern Making: Use the cards to create patterns with the items they’re playing with.
H3: Celebrate Small Wins
Every little achievement is a big deal! Celebrate your toddler’s accomplishments, whether they recognize a number on a card or create a delicious concoction in their winter café. A simple, “Wow, you counted that all by yourself!” goes a long way in boosting their confidence.
Helpful Tips for a Successful Sensory Bin
-
Embrace Mess: Sensory play can get a bit messy, and that’s okay! Having a designated play area makes cleanup easier.
-
Stay Present: Your involvement makes a world of difference. Join in the fun, demonstrate activities, and let your child take the lead.
-
Frequency: Rotating toys and materials can keep the experience fresh and exciting. After a few uses, switch out some items or introduce new challenges.
-
Set a Timer: If your child loses interest, consider setting a timer for a set “play time.” This gentle structure can keep playtime lively and engaging.
The Beauty of Winter Moments
As you sip on a cup of cozy hot cocoa with your little one, remember that these moments, messy and magical alike, contribute to their growth and development. The holidays come with their own wonders, but they can also be overwhelming. Embracing activities like this sensory bin reminds us that joy often lies in the simple moments spent together.
Encouraging Conclusion
Creating a Hot Cocoa Sensory Bin is more than just a winter activity; it’s an avenue for learning, bonding, and unleashing creativity in your toddler. You don’t need to put pressure on yourself to create the “perfect” experience. Just being present and enjoying these sweet moments with your child can make all the difference.
So, grab your hot cocoa, gather those cards, and watch how this winter cosmos unfolds right at your kitchen table. Remember, parenting isn’t about perfection; it’s about connection—and you’re doing great!
Optional FAQ Section
Q: How do I access the Hot Cocoa Sensory Bin Cards?
A: Simply make a purchase on Etsy, and you’ll receive an email allowing you to download your cards directly.
Q: Can I use this sensory bin with multiple kids?
A: Absolutely! This activity encourages cooperative play and social interaction, making it perfect for playgroups or siblings.
Q: What are some alternative sensory bin themes?
A: Consider themes like snow, gingerbread, or winter animals to keep the excitement alive through the seasons!
By fostering creativity and exploration, you help your children grow in a supportive, nurturing environment—one fun-filled sensory bin at a time!
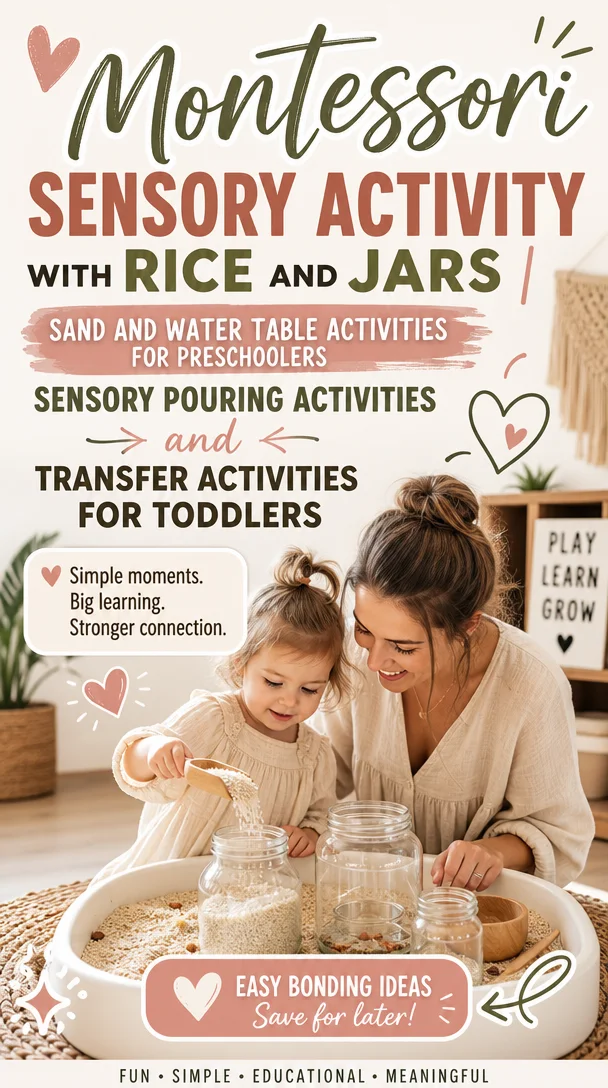
Montessori Sensory Activity with Rice and Jars | Sand and water table activities for preschoolers, Sensory pouring activities, Transfer activities for toddlers
Engaging Montessori Sensory Activities with Rice and Jars: Fun Ideas for Preschoolers
Meta Description: Discover fun Montessori sensory activities using rice and jars! Explore engaging pour and transfer activities for toddlers to enhance learning through play.
Introduction
Hey there, fellow parents! If you’re anything like me, you know that finding engaging activities for our little ones can sometimes feel like a monumental task. You want them to learn, explore, and have a blast, but where do you even start? Well, let’s make your life a bit easier today! 🌟
Imagine the gleeful giggles and endless curiosity as your child experiments with rice, jars, and their little hands. Today, I’m so excited to share Montessori-inspired sensory activities that utilize rice and jars, plus tips on how to create a magical sand and water table setup. These activities won’t just keep your toddler entertained; they will also support their emotional and cognitive development. Let’s dive in!
Why Sensory Play is Important
Before we jump into the fun, let’s take a moment to understand why sensory play, like pouring activities, is essential for our kiddos. Sensory play fosters creativity and curiosity while allowing children to explore various textures, sounds, and even smells. Here are some reasons why you should incorporate sensory activities into your child’s playtime:
- Boosts Fine Motor Skills: Manipulating objects like rice and jars encourages hand-eye coordination, which is crucial for writing later on.
- Encourages Problem Solving: Your child will face challenges—think spilling rice or pouring too much water—but these moments present valuable learning opportunities.
- Enhances Language Development: As you describe what they are doing, your little one picks up new vocabulary. Encourage them to express their feelings and thoughts about the activity.
- Provides Emotional Regulation: Sensory play is an excellent way for children to manage their emotions. The act of pouring, sorting, and feeling can be calming and grounding.
Feeling inspired? Let’s get started with our Montessori sensory activity using rice and jars!
Montessori Sensory Activities with Rice and Jars
The Basics of the Rice and Jars Activity
What You Need:
- Uncooked rice (white, brown, or colored for extra fun!)
- Clear jars (preferably with lids)
- A tray or large container to catch spills
- Measuring cups or scoops
- Small funnels (optional)
- A variety of scoops or cups (like spoons, small bowls, etc.)
How to Set Up:
-
Prepare Your Space: Lay down a blanket or use a tray to catch the inevitable spills. You can even set this up outside for easy cleanup!
-
Introduce the Materials: Present your child with the jars filled with rice and ensure various tools are available. Show them how to scoop and pour, modeling the activity before letting them explore.
-
Encourage Exploration: Invite your child to start pouring rice from one jar to another. Guide them to use different tools, helping them see what works best for each task.
Variations to Spice it Up
Once they’ve mastered the basics, here are some variations to keep the excitement going:
-
Color Sorting: If you use colored rice, encourage your child to sort the rice by color into different jars. This activity enhances their visual discrimination.
-
Size Exploration: Use jars of various sizes. Ask your child to figure out which jar can hold the most rice or how many small jars it takes to fill a larger one.
-
Sensory Exploration: Add a few drops of essential oils (like lavender) to the rice for aromatic sensory experiences. Ensure you’re using child-safe oils.
-
Sensory Challenges: Blindfold your child (with your supervision) and encourage them to identify different textures or sounds by feeling the jars or listening to the rice.
Sand and Water Table Activities
If you want to expand beyond rice-themed activities, let’s talk about setting up a sand and water table for even more sensory fun!
Creating Your Sand and Water Table
What You Need:
- Container: A shallow plastic container or a kiddie pool works well.
- Sand and Water: You can use kinetic sand, natural sand, or even substitute with dried rice instead of sand.
- Tools for Exploration: Include scoops, measuring cups, molds, and various cups. Don’t forget bath toys for some extra excitement!
How to Set Up:
-
Find a Suitable Location: Choose a space where water can splash around without causing too much worry—outdoors is ideal, but spread out towels indoors if needed!
-
Layer Your Materials: Fill half of your container with sand and the other half with water. Engage your child in the setup, showing them how they can move between the two environments.
-
Provide Varied Tools: Encourage your little one to fill, dump, sift, and pour using the tools you’ve provided. Challenge them with interesting tasks, like building sandcastles or collecting water in cups.
Activity Ideas for the Sand and Water Table
-
Transfer Tasks: Use cups to transfer just a small amount of sand into a jar. This activity helps develop fine motor control while practicing pouring.
-
Measurement Fun: Show your child how to measure larger vs. smaller cups of water, discussing concepts of volume and measurement.
-
Nature Exploration: Add natural items like rocks or leaves to the table, encouraging your child to create a mini-world and describe their creations.
-
Weather Experiments: Discuss what happens when water mixes with sand when making mud! Encourage your little one to describe the texture and what they observe changes.
Making the Activities Meaningful
When engaging in these activities, the goal is to keep them fun and meaningful. Here are some ideas to enhance the experience:
-
Ask Open-Ended Questions: Instead of giving directions, ask questions like, “What will happen if you pour that cup of water here?” This promotes critical thinking.
-
Encourage Language: Narrate your child’s actions—“Wow! Look how high you poured the rice!”—to enrich their vocabulary.
-
Celebrate Success: Acknowledge their small victories. If they manage to keep the rice from spilling, celebrate with high-fives or cheers!
Helpful Tips for a Smooth Experience
-
Set Rules: Decide in advance what the cleanup will look like. Will you allow spills, or will you provide specific areas for pouring? Ensure your child understands the guidelines.
-
Be Patient: Keep in mind that every child’s exploration looks different. Embrace the mess and be prepared to join in the fun too!
-
Limit Screen Time: These activities are a wonderful way to offer a screen-free alternative that engages your child deeply.
-
Encouraging Exploration: Provide diverse materials to play with and let your child take ownership of their learning journey.
Encouragement for the Journey Ahead
Remember, as parents, we’re all in this together, navigating the beautiful, messy chaos that is parenting. It’s easy to get overwhelmed, but when we find enjoyable activities like these, we foster not only their learning but also our own joy.
So, grab some rice, some jars, and maybe a few cups, and let the fun begin! You’ll not only have loads of smiles and giggles but also meaningful moments you’ll cherish.
Conclusion
Montessori sensory activities using rice and jars, along with engaging sand and water tables, offer countless opportunities for exploration and learning. You don’t need to be perfect; your love and involvement are what matter most to your child. So, embrace the mess, celebrate the little victories, and watch your little ones thrive in their imaginative play!
Want to share your experiences or your favorite tips? I’d love to hear from you! Let’s keep the conversation going, and support one another on this wild ride called parenting.
By incorporating these sensory activities into your daily routine, you provide a world of learning through play for your little ones—one joyful moment at a time. 💛
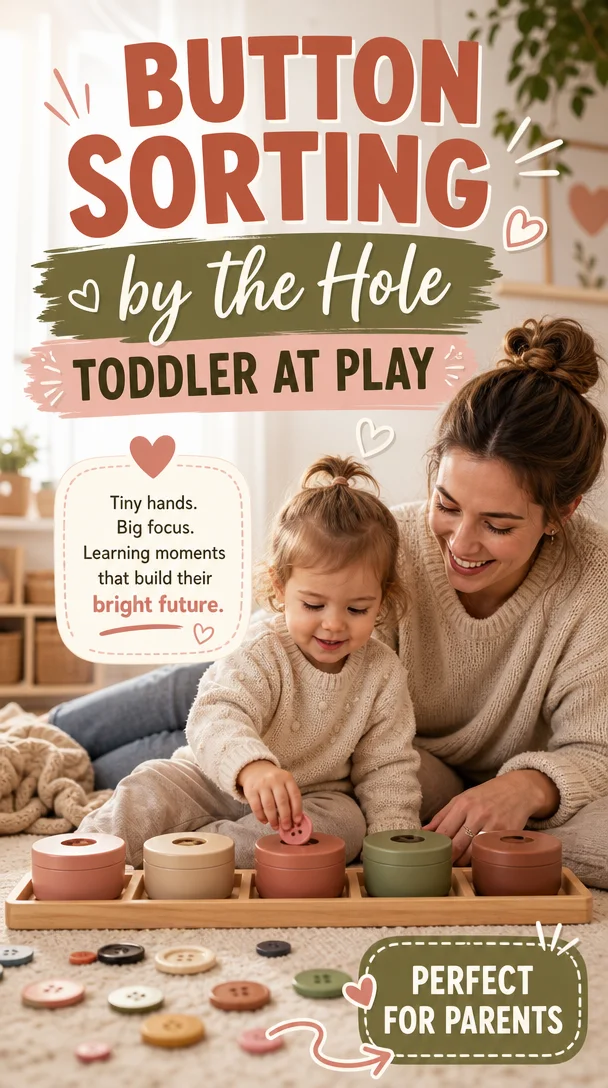
Button Sorting by the Hole – Toddler at Play
Fun and Engaging Button Sorting by the Hole: A DIY Activity for Toddlers
Meta Description: Discover an easy and fun button sorting activity for toddlers that promotes focus and learning! Keep little hands busy with this simple, screen-free idea.
Introduction
Hey fellow parents! If you ever find yourself in the thick of toddler chaos — toys scattered everywhere, fingers itching for a screen, and a schedule that feels a little too hectic — you might just be on the lookout for a fun, engaging, and interactive activity. Let’s be real; parenting is a beautiful, messy journey, and we all need a little helping hand sometimes.
Today, I’m excited to share a simple and delightful activity that brings you smiles and keeps those tiny hands busy: Button Sorting by the Hole! This activity captivates toddlers, supports their learning, and fosters a sense of achievement — and the best part? It requires minimal prep and everyday materials you probably already have at home. So, grab a snack, get comfy, and let’s explore just how magical a little sorting can be!
Why Button Sorting is Such a Hit with Toddlers
Boosting Fine Motor Skills
Sorting buttons might seem like just a fun way to pass the time, but it does wonders for those little hand muscles! As your child picks up buttons, manipulates them, and fits them into holes, they strengthen those crucial fine motor skills that serve as the foundation for writing, drawing, and countless other future activities.
Promoting Focus and Concentration
Does your little one have a tendency to bounce from one activity to the next? Button sorting is fantastic for helping them hone their attention span. It gives them a chance to settle into a focused activity while boosting their concentration in a calming, non-overwhelming environment.
Fostering Cognitive Development
By sorting buttons by size, color, or even shape, you engage your toddler’s emerging cognitive skills. They begin to understand concepts like categorization and differences, which builds important critical thinking skills in an enjoyable setting. Plus, who knew sorting could be so educational?
Setting Up Button Sorting by the Hole: Step-by-Step Guide
Gather Your Supplies
Before diving in, let’s gather the materials you’ll need. No need to head out to the store; this activity keeps it simple:
- Buttons: Collect a variety of buttons in different sizes and colors. You can raid your sewing kit or thrift shop for some treasures!
- A container: Use an old muffin tin, a cardboard box, or any small containers you have on hand.
- A surface to work on: Spread out a blanket on the floor or set up at the kitchen table.
Creating the Activity
-
Sort the Buttons: Start by sorting buttons into different areas. Keep some grouped by size, color, or shape, which creates fun challenges for your toddler.
-
Demonstrate: Show your child how to sort the buttons by fitting them into different holes or sections. If using a muffin tin, you can demonstrate how to place a button in each cup based on its size.
-
Let Them Explore: Now, it’s their turn! Encourage them to sort the buttons by themselves, but feel free to guide them as they begin. Celebrate their successes, even the small ones!
Variations to Keep Button Sorting Fun
Switch things up a bit! Here are some engaging twists on this activity you can try:
Color Matching
Challenge your toddler to match buttons to the correct colored section in their sorting area. They’ll hone their color recognition skills while having fun!
Shape Sorting
If you have a mix of buttons with different shapes, encourage your little one to sort them based on shape. This adds an extra layer of difficulty and reinforces their understanding of different physical properties.
Size Sorting
Have them practice sorting buttons from smallest to largest. Introducing concepts like "big," "medium," and "small" in a physical way helps solidify their understanding of sizes!
Creative Arts and Crafts
Once you have sorted the buttons, why not turn them into an art project? Use glue to make fun pictures or patterns! Transforming sorting into an art activity adds a whole new layer of creativity to the experience.
Tips for Success
-
Be Prepared for Mess: Embrace the chaos! Allowing your child to freely explore might lead to a scattered button mess, but remember that exploration is part of the fun (and learning).
-
Make It a Game: Add a timer and see how many buttons they can sort before it goes off! This increases engagement and excitement.
-
Keep It Short: Toddlers have short attention spans! If you sense their interest waning, it’s perfectly okay to wrap things up and revisit button sorting another day.
-
Encourage Communication: As they sort, ask open-ended questions about what they are doing. “Which button do you like the most?” or “What color do you see?” This brings in opportunities for language development and connection.
-
Add a Reward: Celebrate their accomplishments with a sticker, a stamp, or just verbal praise! Positive reinforcement encourages them to keep trying new things.
Finding Joy in Everyday Moments
As we glide through the beautiful chaos of parenting, it’s essential to seize those little moments of joy. Button Sorting by the Hole might seem simple, but it holds the powerful potential to enrich your child’s development while bringing you closer together. Remember, you don’t have to be a perfect parent; just being present and available makes a world of difference.
So, lean into the mess and embrace every giggle, every concentration face, and every triumphant button placed just right. Your child is learning and growing at their own pace, and you’re right there alongside them, cheering them on!
Conclusion
Creating fun, screen-free activities is a wonderful way to connect with your toddler and support their growth. Button sorting brings together learning, fun, and the chance for quality time — and you can do it with materials you already have on hand!
Next time chaos brews, reach for a handful of buttons instead of electronic distractions. You might just find that the simplest of activities can spark joy and connection in ways you never expected!
Here’s to warmer, lighter, and more joyful parenting, one little moment at a time. You’ve got this!
Optional FAQ Section
Q: Can I do this activity with a group of toddlers?
Absolutely! Button sorting can be a fantastic activity for playdates. Just make sure to have plenty of buttons available, and encourage sharing and teamwork!
Q: How do I clean up after the activity?
Have your child help you gather the buttons back into the container. It teaches responsibility and keeps the cleanup process fun!
Q: What if my toddler gets frustrated?
If frustration arises, take a break or shift to a different activity. Some days are just not for sorting, and that’s perfectly okay!
Feel free to adapt this guide to suit your child’s needs and interests, and most importantly, enjoy the process!
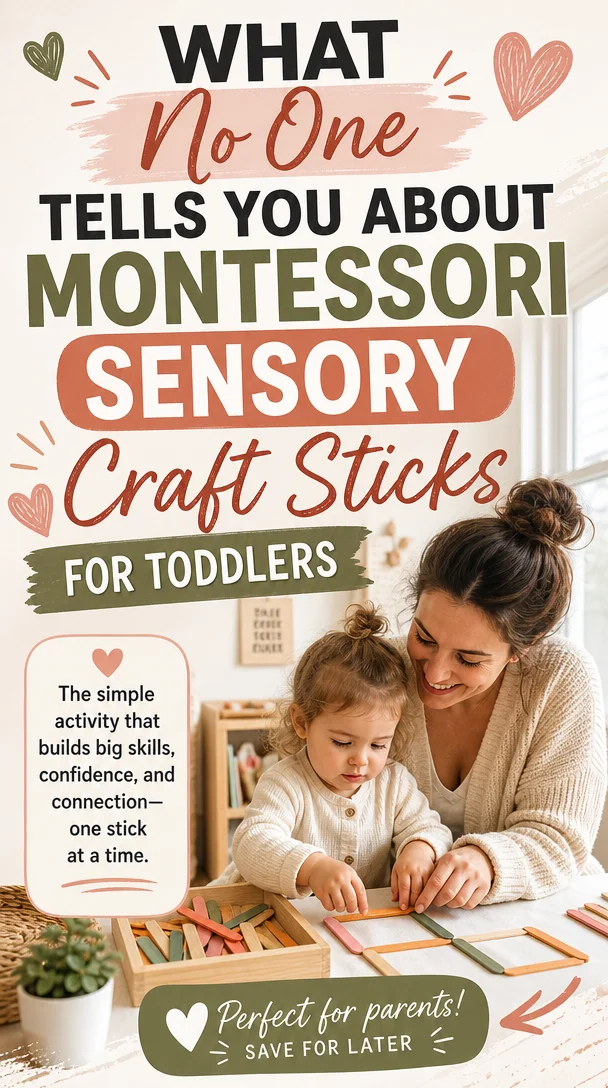
What No One Tells You About Montessori Sensory Craft Sticks for Toddlers
Montessori DIY Tactile Sensory Craft Sticks Toddler Activity
Meta Description
Create engaging and educational tactile sensory craft sticks with your toddler using this easy DIY guide, perfect for enhancing sensory exploration and development.
Introduction
Parenting comes with its own unique set of joys and challenges, doesn’t it? If you’re like me, some days you just want to create a warm, enriching environment for your little one while also finding moments of connection amidst the chaos. Today, I’ve got a fantastic activity for you that not only sparks creativity but also supports your child’s sensory exploration: DIY Tactile Sensory Craft Sticks.
Imagine your toddler sitting at the table, fully engaged with a selection of colorful, textured craft sticks, each one representing a new sensory adventure. With just a few materials, you can bring the Montessori method into your home in a way that feels natural and enjoyable. Let’s dive into this simple, engaging activity that not only builds fine motor skills but also nurtures your child’s curious mind.
What Are Tactile Sensory Craft Sticks?
Tactile sensory craft sticks are beautifully versatile tools used to explore textures and sensations. In the Montessori approach, sensory experiences are vital for a child’s development—they help little hands practice coordination and exploration while offering opportunities for imaginative play and learning.
Why Opt for a DIY Version?
Creating your own tactile sensory craft sticks means you can customize them to your toddler’s interests and developmental needs. Plus, using materials you already have at home makes this a budget-friendly and environmentally conscious choice. Let’s look at how you can get started!
How to Create Your Own Tactile Sensory Craft Sticks
Materials You’ll Need
- Craft sticks (popsicle sticks work great)
- Textured materials: Felt, sandpaper, fabric scraps, cotton balls, or textured wallpaper
- Glue: Non-toxic craft glue or a hot glue gun (with supervision)
- Markers or paint (optional for decoration)
- Small containers for organizing materials
Step-by-Step Instructions
Step 1: Gather Your Materials
Collect all your materials and set up a crafting station. You could even involve your toddler in picking out textures, fostering their ability to choose and express preferences.
Step 2: Prep Your Craft Sticks
Start by decorating your craft sticks with markers or paint if you wish. This adds a fun artistic flair! You can let your toddler get imaginative here, using colors that resonate with them.
Step 3: Apply the Textures
Now comes the exciting part. Choose a texture for each stick and apply it using glue. You can talk to your child about what they see and feel—encourage them to express their observations. For example, "How does the sandpaper feel?" or "Is this cotton soft or rough?"
Step 4: Let Them Dry
Once you’ve applied all the textures, set the sticks aside to let them dry completely. This could be a great time to chat about colors, shapes, and the various textures they’ve picked out!
Step 5: Play and Explore
Your tactile sensory craft sticks are now ready for exploration! Encourage your toddler to touch, feel, and describe the different textures. You can guide them through activities, like sorting the sticks by feel—“Which one feels the softest?”—or creating little games, like matching sticks with similar textures.
Expanding the Activity: Less Mess, More Fun
If you want to add more engaging aspects, consider these tips:
Create a Sensory Board
After making the craft sticks, how about turning them into a sensory board? Use a piece of cardboard or a small wooden board to attach various sticks, allowing your toddler to explore textures at different heights and angles.
Incorporate Movement
Create a mini scavenger hunt around your house where your child collects items that match the textures on your craft sticks—like a soft pillow, a smooth book cover, or a bumpy rock outside.
Encourage Language Development
As you play, take the time to describe textures and sensations. Use rich vocabulary words and ask your child open-ended questions, like, “How does this feel compared to this one?” This not only enhances language skills but also builds deeper connections with you.
Encouraging Inclusive Play
Montessori principles embrace independence and personal growth. Encourage your little one to show their creations to siblings or other family members, fostering social skills and inclusive play. This is where those beautiful bonds grow as they share findings and discoveries.
Helpful Tips for Success
-
Use what you have: Look around your home for materials you might repurpose for textures. Old magazines, fabrics, or even sponges can offer unique sensory experiences.
-
Mix textures: Combine rough with smooth, soft with hard, and colorful with muted materials. This diversity keeps things interesting and stimulates various senses.
-
Focus on the process: Remember, it’s about discovery and play, not perfection. Encourage your child to experiment and even mix textures on the same stick!
-
Stay engaged: Be present during the activity. Your involvement can transform this simple craft into a cherished bonding moment.
-
Keep it screen-free: Craft time promotes creativity and imagination, giving you and your toddler a refreshing break from screens.
Connecting Through Play: The Real Benefits
Activities like these do more than entertain—they strengthen emerging skills and nurture emotional development. By encouraging exploration and communication, you pave the way for your child to become more confident in discovering their environment.
Imagine the delight on your child’s face when they realize their ideas and choices lead to something fun! This kind of hands-on discovery cements essential life skills like problem-solving and creativity.
Concluding Thoughts: Parenting, One Moment at a Time
Being a parent is all about finding those little moments among the busy, chaotic days. When you dive into simple activities like DIY sensory craft sticks, you create cherished memories that last a lifetime. Remember, it’s perfectly okay if things don’t go perfectly as planned. Celebrate the great attempts and enjoy the experience—messy play is part of the journey!
So grab those craft sticks, gather your textures, and let the magic unfold! You’re doing wonderfully, even when it feels overwhelming. Embrace the imperfections and enjoy every precious moment with your little one. Remember, you’re not alone on this journey. You’ve got this!
FAQs
Q: What age is this activity suitable for?
A: This activity typically suits toddlers aged 18 months and older, but it can be adapted for younger kids with supervision.
Q: How often should we do sensory activities?
A: Feel free to incorporate sensory activities once or twice a week to keep the experiences fresh and engaging.
Q: Are there any safety considerations?
A: Always supervise toddlers during crafting to prevent any accidents with small materials.
Let’s continue weaving meaningful moments into your parenting journey, because every little touch counts!

What No One Tells You About Fall Toddler Activities in Daycare
Easy Daycare Activities: Fall Themes for Toddlers
Meta Description
Explore easy daycare activities perfect for fall! Discover creative toddler art and simple seasonal ideas to spark joy and learning in your little ones.
Introduction
Ah, fall! The air turns crisp, leaves transform into stunning hues of orange and gold, and for parents everywhere, it’s the perfect opportunity to create fun, engaging activities for toddlers. If you’re anything like me, you often find yourself balancing the desire to keep your little ones entertained with the lack of time and energy. You’re not alone! Parenting can be a whirlwind, but with a few simple fall-themed activities, you can inspire creativity and joy without the overwhelm.
In this post, I’ll share easy daycare activities centered around beloved fall themes. These activities spark creativity, encourage learning, and bring families closer together. Let’s celebrate the little moments this season brings, with art, exploration, and connection.
Fall-Themed Toddler Activities
Nature Scavenger Hunt
One of the simple joys of fall is the beauty of nature. Why not take advantage of this colorful season with a nature scavenger hunt? This activity encourages exploration and gets everyone moving!
What You Need:
- Printable scavenger hunt list (you can easily find templates online)
- A small bag or basket for collecting items
- Your toddler’s enthusiastic spirit!
How to Do It:
- Print or create a scavenger hunt list featuring items like acorns, colorful leaves, pine cones, and rocks.
- Take your toddler on a short walk outdoors. Hold their hand and point out the beauty around you.
- As they find each item, encourage them to talk about what they see and how it feels. For instance, "Look at this smooth rock! What color is it?"
This activity not only supports fine motor skills but also fosters a love for nature. Plus, it’s a fantastic way to bond over shared discoveries!
Leaf Printing Fun
Embrace the beautiful fall foliage with leaf printing art. It’s a perfect blend of nature and creativity!
What You Need:
- Colorful leaves
- Washable paint
- A large sheet of paper
- Paintbrushes or sponges
How to Do It:
- Help your toddler collect various leaf shapes during your nature walk.
- Once back home, pour some washable paint onto a plate.
- Show them how to paint one side of a leaf and press it onto the paper. Let them experiment with colors and techniques!
Encourage them to mix colors or make patterns. The resulting artwork will not only be stunning but also a keepsake of their fall adventure!
Pumpkin Sensory Bin
Pumpkins bring such joy in the fall! Create a sensory bin to explore their textures and colors. This activity is stimulating and encourages independent play.
What You Need:
- A small bin or large bowl
- Mini pumpkins or soft pumpkin toys
- Various sensory items (dried corn, leaves, twigs, or even small gourds)
How to Do It:
- Fill your bin with mini pumpkins and sensory items.
- Invite your toddler to explore with their hands. Discuss the textures, colors, and shapes of what they feel.
- Ask open-ended questions, such as, “How does this pumpkin feel?” or “What color do you see?”
Sensory play promotes cognitive development and fine motor skills, all while having a great time!
Fall-Themed Crafts
Crafts are always a hit with toddlers. Here are a few quick ideas to embrace the season:
Paper Plate Pumpkins
- Use orange paper plates as the base.
- Let your toddler paint or color the plates.
- After it dries, allow them to glue on green paper cutouts for leaves.
Leaf Collages
- Collect fallen leaves in various shapes and sizes.
- Provide your toddler with glue and a large piece of construction paper.
- Help them arrange and stick leaves onto the paper in a fun collage.
These crafts don’t just inspire creativity; they also improve hand-eye coordination!
Storytime Adventures
Every toddler can benefit from snuggling up with a good book, especially when it’s themed around fall. Take this time to bond, stir their imagination, and grow their love for reading.
Suggestions:
- “The Pigeon Finds a Hot Dog!” by Mo Willems
- “Leaf Man” by Lois Ehlert
- “Spookley the Square Pumpkin” by Joe Troiano
How to Make It Interactive:
- Choose a cozy spot with a warm blanket.
- As you read, encourage your toddler to articulate their favorite characters or ask questions about the story.
- After reading, spark their creativity by asking what they would do if they were in the story.
This cozy activity builds their listening skills and creates a sense of safety and connection.
Helpful Tips for a Successful Fall Season
-
Make It Routine: Choose a day of the week, like “Fall Fun Fridays,” dedicated to your fall activities and crafts. Routines create excitement and give your little ones something to look forward to!
-
Get Other Parents Involved: Organize playdates with friends or neighbors to expand the toddler fun. Sharing experiences and ideas with other parents often leads to new insights and creativity.
-
Keep It Simple: Remember that the goal is to enjoy these activities together, not to create something Pinterest-perfect. Focus on the laughter and joy that come with sharing these moments.
-
Capture the Memories: Take pictures of your toddlers as they engage in these fall activities. Creating a seasonal scrapbook or digital album can serve as a delightful keepsake!
-
Be Flexible: Depending on your child’s mood or energy levels, adapt the activities to suit their needs. If they prefer painting to a nature walk, go with it! The most important thing is that they enjoy themselves.
Encouraging Conclusion
As we step into the vibrant embrace of fall, remember that you have all the tools you need to create lasting memories with your toddler. These easy daycare activities don’t just fill the day; they build a foundation of creativity, exploration, and connection.
You don’t need to be the “perfect” parent. Celebrate the small wins, cherish these moments of play, and remember that it’s the love and laughter you share that matters most. Whether your days are filled with leaf printing or storytime adventures, lean into the joy that parenting can bring. You’re doing an amazing job, and every moment counts.
So grab those mini pumpkins, gather your leaves, and dive into the vibrant world of fall activities with open hearts! You belong here, and together, we can make this season magical one little moment at a time. Enjoy every step along the way, and don’t forget to share your autumn adventures — I’d love to see what you create!
Optional FAQ Section
What are some other easy fall activities for toddlers?
You might also try baking pumpkin muffins together, creating homemade apple cider, or visiting a local pumpkin patch for a day of exploration!
How can I make activities more educational?
Incorporate counting or color recognition during crafts and play. Ask your toddler questions to reinforce what they have learned during your activities.
How do I manage messy play with toddlers?
Use a designated play area, and have cleaning supplies nearby. Lay down a plastic sheet or old newspaper to catch any spills or mess!
Let the fall fun begin! 🍂
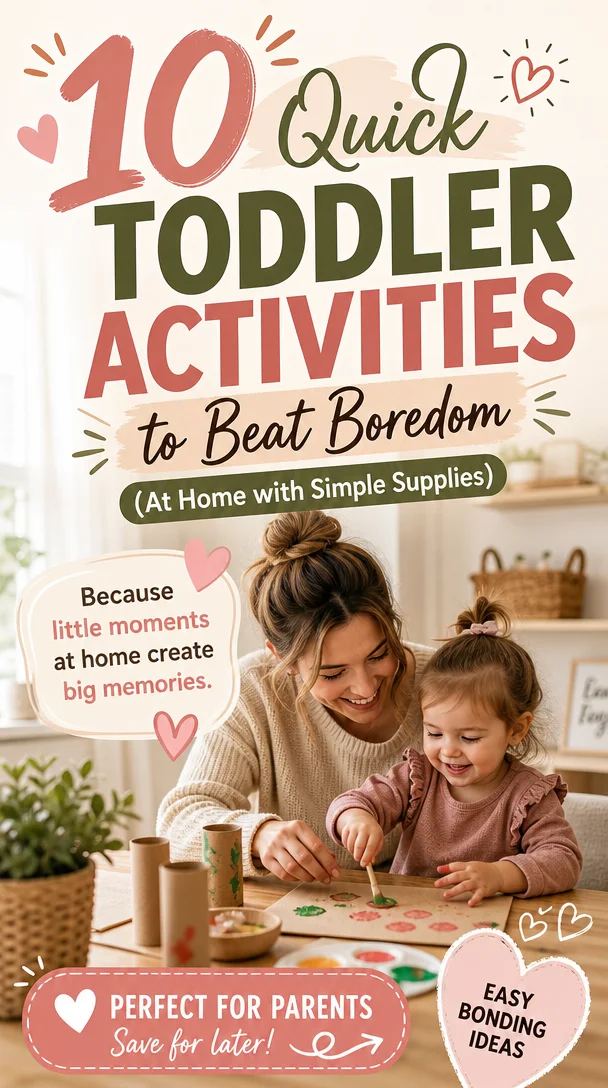
Quick Toddler Activities to Beat Boredom (At Home with Simple Supplies)
The Best Toddler Activities: Engaging Fun for Your Little One
Meta Description
Discover engaging and purposeful toddler activities for 16- to 18-month-olds. Foster development with these fun ideas that make parenting easier and joyful!
Introduction
Ah, the magic of toddlerhood! Those tiny hands, curious eyes, and the way they light up with every new discovery can make your heart swell with joy. But let’s be real — parenting a toddler can also feel like navigating a miniature whirlwind. As they enter the 16 to 18-month phase, these little explorers crave engagement, and finding the right activities can be a game-changer for both of you.
You may wonder how to nurture their natural curiosity while also staving off the chaos. Spoiler alert: it doesn’t require any magic wands, just a sprinkle of creativity and a dash of purpose! In this article, I’ll share a treasure trove of toddler activities designed to stimulate their minds and fine-tune those growing motor skills while keeping the “messy” part of parenting surprisingly delightful.
Let’s jump in and explore the best toddler activities that’ll have your little one giggling, learning, and maybe even napping a little better. Grab your coffee (while it’s still warm!) and let’s make this journey through toddlerhood a joyful one.
Open-Ended Play: The Key to Imaginative Learning
What is Open-Ended Play?
Open-ended play involves toys and activities that allow your toddler to explore freely and creatively. Unlike toys with preset functions, these activities let them experiment, creating their own narratives and scenarios.
Examples of Open-Ended Activities
-
Sensory Bins: Fill a shallow bin with rice, beans, or pasta and hide small toys or scoops for them to discover. This tactile experience develops fine motor skills while satisfying their innate curiosity.
-
Building Blocks: Invest in a variety of building blocks. Encourage your toddler to build tall towers or even replicate what they see around them. Celebrate their creations, no matter how wobbly!
-
Art Station: Set up a dedicated art corner with crayons, washable markers, and paper. Let them scribble away freely to express themselves. Remember, it’s more about the process than the product!
The Joy of Messy Play
Absolutely embrace the mess! While you may cringe at the thought of paint splatters or glitter explosions, messy play is essential for their development. It fosters creativity and builds problem-solving skills as they navigate textures and colors.
Practical Life Activities: Learning by Doing
What Are Practical Life Activities?
These activities mimic daily tasks that adults perform, giving toddlers a sense of ownership and responsibility. They help develop fine and gross motor skills while giving them real-world context.
Examples of Practical Life Activities
-
Transferring Objects: Use small cups or scoops and teach them to transfer items from one bowl to another. Be it beans, buttons, or even pieces of fruit — the focus is on honing those motor skills.
-
Water Play: Fill a shallow basin with a bit of water and give them cups, sponges, or small toys. Not only does this develop coordination, but it also offers a calming sensory experience.
-
Simple Cooking Tasks: Get your little chef involved in the kitchen! Let them mix, stir, or even help wash fruits and vegetables. Kids feel proud being part of family meals, and they learn vital skills along the way.
Montessori-Inspired Activities: Isolating Skills in a Fun Way
What is Montessori Play?
The Montessori approach emphasizes self-directed, hands-on learning. By isolating specific skills in playful contexts, toddlers can cultivate independence and confidence.
Examples of Montessori Activities
-
Puzzle Play: Provide simple wooden puzzles that incorporate shapes and animals. Discuss the pieces and their names as they fit them together.
-
Color Sorting: Use colorful pom-poms or blocks and a muffin tin. Have your toddler sort them by color, fostering both color recognition and classification skills.
-
Buttoning Frames: Create or buy frames that allow them to practice buttoning, zipping, and snapping. This not only aids in fine motor skill development but also builds their self-sufficiency.
Screen-Free Activities: Keeping It Real
In our tech-savvy world, it’s easy to slip into screen time, but let’s prioritize enriching play that engages their minds and bodies.
Screen-Free Ideas
-
Nature Walks: Take them outside and explore the wonders of nature. Collect leaves, stones, or flowers, and discuss colors, shapes, and textures.
-
Dance Party: Play music you both enjoy and have a mini dance-off. Just remember, it’s not about being graceful but about having fun and expressing joy!
-
Storytime Adventures: Choose colorful storybooks with vibrant imagery or interactive textures. Discuss the characters and ask questions to enhance comprehension and social skills.
Tips for Intentional Playtime
1. Set Up a Routine
Establish a flexible daily schedule that includes focused playtime. It could be as simple as:
- Morning: Open-ended play
- Midday: Practical life activities
- Afternoon: Montessori-inspired tasks
2. Be Present
Put away distractions and immerse in the activity together. Your engagement transforms ordinary moments into extraordinary connections.
3. Celebrate Progress
Acknowledge their achievements, no matter how small. “Wow, look how high that tower is!” reinforces their sense of accomplishment and encourages them to keep exploring.
Encouraging Emotional Development
1. Model Emotional Awareness
Talk about feelings openly. Use scenarios from their play to contextually teach empathy — "How do you think that character feels?"
2. Introduce Gentle Discipline
Encourage gentle boundaries. Instead of “No hitting,” rephrase to “We use our hands to help, not hurt.” This redirects behavior positively and cultivates understanding.
3. Engage in Play with Purpose
Use role-play or storytelling to introduce ideas like sharing or taking turns. Narrate actions to gently guide emotional development while keeping it light and fun.
Conclusion
Raising a toddler can feel overwhelming at times, but remember, you’re not alone in this journey. As you explore these engaging and purposeful activities, celebrate each small victory, whether it’s a new word spoken or a tower built. These moments of connection will build a sturdy foundation for their development while making the everyday chaos a little easier to manage.
Embrace the mess, the giggles, and the wondrous exploration. You’re doing an amazing job, and as our little ones grow, so do we as parents. Keep creating those meaningful moments, and let the magic of childhood unfold — one delightful activity at a time.
FAQs about Toddler Activities
Q: How do I choose the right activities for my toddler?
A: Observe what your child enjoys. Choose activities that excite them and introduce new ones gradually to keep their curiosity alive.
Q: What if my toddler loses interest quickly?
A: That’s completely normal! It’s okay to switch activities, keeping things fresh. Follow their lead and adapt as necessary.
Q: Are screen-free activities truly beneficial?
A: Yes! Engaging in screen-free activities promotes cognitive development and nurtures creativity, allowing toddlers to explore the world around them actively.
Remember, in this ever-changing phase of parenting, just know: you’ve got this! Let every little moment count.