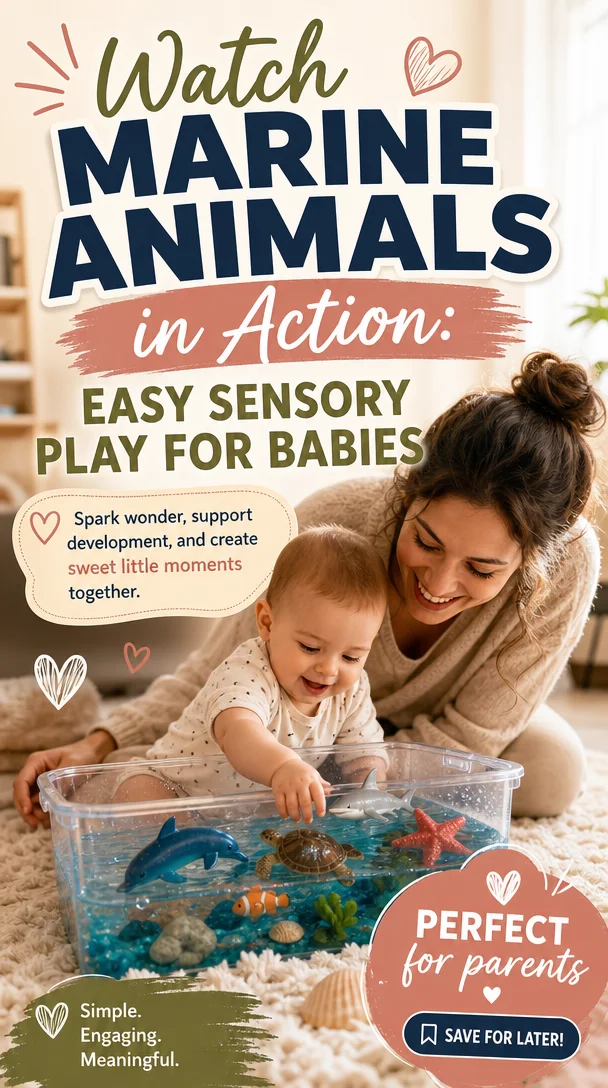
Watch Marine Animals in Action: Easy Sensory Play for Babies
5 Engaging Sensory Bag Ideas for Babies: Exploring the Wonders of Ocean Life
Meta Description
Discover 5 simple sensory bag ideas for babies that promote exploration, motor skills, and curiosity! Dive into ocean-themed fun and learning today!
Introduction
As a parent, you know that every little splash of joy helps your baby grow. Sensory play might just be the most magical aspect of early childhood development. It opens up a world of exploration, wonder, and learning—all while having a great time! Today, let’s dive into five amazing sensory bag ideas centered around the enchanting theme of ocean life. These activities will not only captivate your little one’s imagination but also help them develop essential motor skills and visual attention.
Whether it’s their first encounter with the ocean or a way to blend play with learning, these sensory bags make every moment feel special. After all, parenting isn’t about being perfect; it’s about creating moments that matter. Let’s explore!
Why Sensory Play Matters
The Benefits of Sensory Activities
When it comes to your baby’s development, every interaction counts. Sensory activities stimulate the brain and encourage exploration, curiosity, and creativity. They help to:
- Enhance motor skills: Grasping and manipulating objects build coordination and strength in tiny hands.
- Encourage visual attention: Engaging colors and shapes draw your baby’s eyes and keep them focused.
- Spark curiosity: Interactive and dynamic experiences foster a natural desire to explore the world.
Through sensory play, your little one learns not just about textures and colors but also about cause and effect, which is fundamental for their cognitive development.
1. Pom-Poms + Water = Colorful Fun!
Imagine a watery world filled with colorful pom-poms bobbing around. This activity is not only visually appealing, but it also promotes a variety of sensory experiences.
What You’ll Need
- A ziplock bag or clear container
- Assorted pom-poms (various sizes and colors)
- Water
- Optional: a few drops of food coloring for added flair
How to Create It
- Start by filling your bag or container with water, leaving some space at the top.
- Drop in the pom-poms and a splash of food coloring if using.
- Seal the bag tightly, ensuring no leaks, or secure the container’s lid.
Developmental Benefits
Your baby will enjoy the feel of the soft pom-poms while manipulating them in the water, enhancing their fine motor skills. As they watch the bright colors shift, their visual coordination also improves.
2. Mess-Free Painting with Tints
Painting can create wonderful memories, but the mess is often overwhelming. Enter: mess-free painting!
What You’ll Need
- Ziplock bags
- Washable paint
- White paper
- Optional: transparent contact paper
How to Create It
- Squeeze a few dollops of washable paint into one corner of the ziplock bag.
- Seal the bag, ensuring there’s no air trapped inside.
- Let your baby push, squish, and explore the colors. You can place a piece of white paper underneath the bag to see their colorful artwork through the bag!
Developmental Benefits
This activity promotes creativity and visual tracking as your baby discovers how colors mix and blend without the stress of cleanup. It also enhances their motor skills as they maneuver and push the paint around, keeping parents sane and happy!
3. Sparkly Sequins + Water
Who doesn’t love a little sparkle? This sensory bag idea adds an element of surprise and intrigue—perfect for your little explorer!
What You’ll Need
- A ziplock bag or clear container
- Assorted sequins
- Water
- Optional: a bit of glitter for extra shimmer
How to Create It
- Add sequins and water to your bag or container.
- If using, sprinkle in some glitter.
- Seal it tight and let your baby shake and explore!
Developmental Benefits
The shimmering sparkles and their movement when the bag is shaken will capture your baby’s attention and encourage them to explore. It’s a delightful way to enhance visual exploration and tactile experiences. Plus, the act of shaking helps develop their gross motor skills!
4. Ocean Treasures: Marine Animals + Water
Bring the ocean to your home with this incredibly interactive sensory bag that introduces your little one to marine life.
What You’ll Need
- A ziplock bag
- Small ocean-themed toys (like marine animals)
- Water
- A few drops of blue food coloring for realism
How to Create It
- Fill your ziplock bag with water and drop in the marine animals.
- Add food coloring for a vibrant sea effect and seal securely.
Developmental Benefits
This imaginative activity lets babies interact with ocean life, fostering a connection with nature. As they explore the movement of the water and toys, they enhance their sensory development and understanding of their environment. Plus, it opens up opportunities for conversations about different sea creatures!
5. Exploring the Mixing World: Water + Oil + Dye
This sensory experiment demonstrates something magical: how liquids interact!
What You’ll Need
- A clear container (preferably with a lid)
- Water
- Vegetable oil
- Food coloring
How to Create It
- Fill the container halfway with water.
- Slowly add vegetable oil until it almost fills the container (you’ll see it float on top).
- Drop in a few drops of food coloring and close it tightly.
- Let your baby shake it up and watch the colors mix!
Developmental Benefits
This fascinating activity not only captures your baby’s attention with vibrant colors, but it also facilitates an introduction to scientific concepts like density and mixing, all while developing their visual curiosity and hand-eye coordination!
Helpful Tips for Sensory Play
Safety First
When it comes to sensory play, safety is your priority. Always ensure everything you include in bags is non-toxic and that containers are securely sealed to avoid spills. Supervision is key to keeping play safe and enjoyable.
Make It Engaging
Talk to your baby while they play! Describe colors, textures, and actions. Encouragement helps build early language skills and emotional connections.
Rotate Activities
To keep sensory play fresh, rotate the materials and themes regularly. Introduce different items, colors, and textures! This keeps both you and your little one excited about playtime.
Share the Joy
Capture those adorable moments on your phone and share the joy with friends! Sensory activities can spread warmth and ideas among parent communities, making the experience even more enjoyable.
Conclusion
Creating sensory bags can transform everyday moments into incredible adventures for you and your little one. By fostering curiosity and exploration, you provide a nurturing environment for development without the overwhelm of perfect parenting. Remember, it’s all about enjoying these fleeting moments together. Embrace the mess, celebrate the small wins, and, most importantly, enjoy the journey of parenthood.
You’re doing amazing, and every splash of love counts. Here’s to many joyful moments ahead as you dive into sensory exploration. You’ve got this, and your little one will thank you with every giggle and smile!
Optional FAQ Section
Q: How often can we use sensory bags?
You can use sensory bags daily! Rotate the themes and materials to keep things engaging for your baby.
Q: Can older kids enjoy sensory bags too?
Absolutely! You can tailor the contents to suit different age groups. For older children, involve them in making the sensory bags and discussing the science behind them.
Q: How do I store sensory bags?
Seal them tightly and store them in a cool, dry place. Ensure they’re safe from any sharp objects and away from direct sunlight to maintain their integrity.
Let’s make every day a little brighter and a lot more playful! Happy exploring!
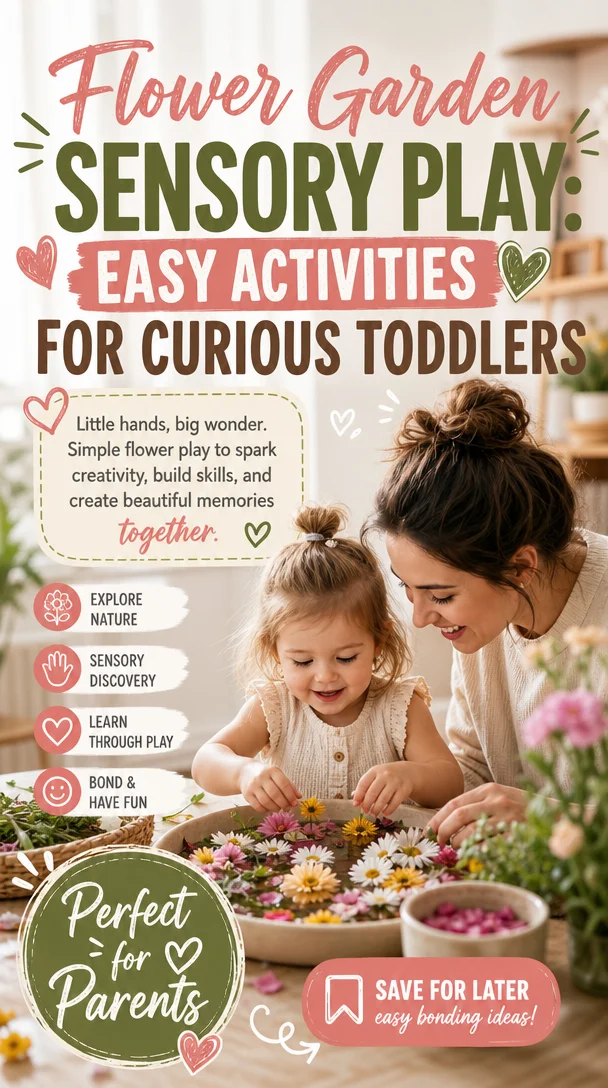
Flower Garden Sensory Play: Easy Activities for Curious Toddlers
Create a Vibrant Flower Garden Sensory Play Experience for Your Kids
Meta Description:
Discover the joy of a Flower Garden Sensory Bin! This engaging sensory play idea promotes creativity and development while providing an easy, fun activity for your toddlers.
Introduction
Do you ever feel like your little ones are brimming with energy, eager to explore every corner of your home? I get it! As a parent, those moments can feel both magical and overwhelming. But fear not! Engaging your child in creative play can turn that energy into a delightful experience. Today, let’s dive into a fun and easy sensory play idea that will keep their curiosity alive while fostering creativity: the Flower Garden Sensory Bin!
Imagine the joy of watching your child’s face light up as they dive into a world of colors, textures, and the joys of gardening—all from the comfort of your living room or backyard. This sensory bin not only captivates their imagination but also enhances their fine motor skills, encourages language development, and provides a fabulous opportunity for you to bond. So grab your supplies, and let’s get started on creating a beautiful garden without the muddy shoes!
What is a Sensory Bin?
Before we plant our gardening seeds, let’s quickly discuss what a sensory bin is, in case you’re new to this concept. A sensory bin is a container filled with materials that stimulate a child’s senses. It allows for open-ended play, where kids can explore, discover, and learn at their own pace. With a mix of tactile elements and creative themes—like our Flower Garden—you can transform any ordinary day into an extraordinary adventure of learning and discovery.
Setting Up Your Flower Garden Sensory Bin
Creating a Flower Garden Sensory Bin is an enjoyable activity you can do together with your children. Not only does it foster their engaging exploration, but it also allows them to connect with nature in a playful way. Here’s what you’ll need to set up your sensory garden:
Supplies Needed
-
Base Materials:
- A large plastic tub or bin (I love using clear bins so the kids can see the contents!)
- Kinetic sand or potting soil for a realistic gardening feel
- Rice, or even dried beans for added texture
-
Flower Supplies:
- Artificial flowers (think colorful blooms in various sizes)
- Small gardening tools (toy spades, rakes, watering cans)
- Pots for planting (you can even use recycled containers or cups)
- Natural elements (pine cones, pebbles, or real leaves)
-
Decorative Touches:
- Gardening gloves for your little ones (they’ll love wearing them!)
- Colorful bowls or scoops for sorting and playing
- Optional: Bug figurines or butterflies for added fun!
How to Assemble the Bin
-
Start with the Base: Pour the kinetic sand or potting soil into the bin. Spread it out evenly to create a gardening playground.
-
Add the Flowers: Place the artificial flowers strategically around the bin. Let your kids decide where each flower goes!
-
Incorporate Tools & Accessories: Scatter the gardening tools and pots throughout the sensory bin. This invites your child to engage in pretend play—“Let’s plant flowers!” “I need a watering can!”
-
Get Creative: Drop in some natural elements, like pebbles and leaves, to enhance the sensory experience and spark imagination.
-
Time to Play: Invite your child to explore. Allow them to dig, plant, water, and create their own floral masterpiece.
Engaging Activities with Your Flower Garden Sensory Bin
Your Flower Garden Sensory Bin serves as more than just a fun activity—it’s a multifaceted learning experience! Here are some ways to bring more depth to your child’s playtime:
1. Counting Flowers:
Encourage your little ones to count their flowers, pots, or gardening tools. Use this as an opportunity to practice counting together, or even introduce simple math concepts like addition and subtraction.
2. Talk About Colors and Shapes:
Engage your child’s imagination by discussing the colors of the flowers. Ask them to sort the flowers by color or shape, enhancing their language skills. For example, “Which flower is the biggest?” or “Can you find the purple flower?”
3. Role Play:
Tap into their imaginative side by role-playing as gardeners. Take turns from planting to watering, and even selling flowers! Dialogue like, “I’m planting a sunflower! What will you plant?” encourages creativity and communication.
4. Sensory Exploration:
Discuss the textures and scents they experience. Touch the sand, feel the smooth plastic flowers, and smell the fresh air. This encourages sensory awareness and vocabulary development.
5. Storytime Connection:
Create stories around their experiences. Ask, “What happens to the flowers if they don’t get water?” This activates their critical thinking and creativity.
Practical Tips for a Successful Sensory Play Experience
As you embark on this engaging sensory journey, here are a few practical tips to keep in mind:
-
Set Up Outside (If Possible): If you can, consider setting up the sensory bin outdoors. This not only allows for easier clean-up but also connects your little one directly to nature.
-
Control the Mess: Keep a dustpan and broom handy for easy cleanup afterwards. Sometimes the mess adds to the fun!
-
Supervise Closely: While sensory experiences are a great opportunity for independent play, always keep a close eye to ensure safe play.
-
Be Prepared for Questions: Your child’s curiosity will likely lead to a myriad of questions. Prepare yourself to engage in meaningful conversations about gardening, nature, and the world around them.
-
Rotate Materials: Change out some supplies every few weeks to keep the activity fresh and exciting.
Celebrating Small Wins in Sensory Play
Remember, the goal of sensory play is not just to entertain but to create meaningful moments. Celebrate the small wins: their first plant, their courage to explore new textures, or simply seeing the joy on their face. Every little step matters in building confidence and curiosity in your child.
Here’s a quick tip: take photos during their play! Capturing these moments not only preserves memories but also allows you to reflect on how they’ve grown, both in skills and confidence.
Encouraging Conclusion
As you and your child dig into this Flower Garden Sensory Bin, know that you are fostering their development in a fun, engaging way. Remember, parenting isn’t about being perfect — it’s about creating loving, learning experiences. Allowing your child the freedom to explore, observe, and play nurtures their imagination and fuels their sense of wonder.
So, what are you waiting for? Grab those supplies and watch as your little one blossoms into a joyful gardener! These small moments can offer big opportunities for connection, so lean into the fun and enjoy every second.
Optional FAQ Section
Q: How long can we keep the sensory bin active?
A: As long as you maintain the materials, the sensory bin can stay active for weeks! Just remember to periodically clean and check for any signs of wear.
Q: Can I tailor this idea for older kids?
A: Absolutely! Introduce more complex concepts like plant care, seed germination, or even discussions on ecosystems for older children.
Q: What if my child doesn’t seem interested?
A: Engage them by demonstrating the first few steps of play, or involve them in the setup process. Sometimes, the excitement comes from being part of the creation!
Invite your little ones into the magic of gardening with this Flower Garden Sensory Bin. Enjoy the laughter, the learning, and the beautiful chaos that comes with it! Happy parenting! 🌼
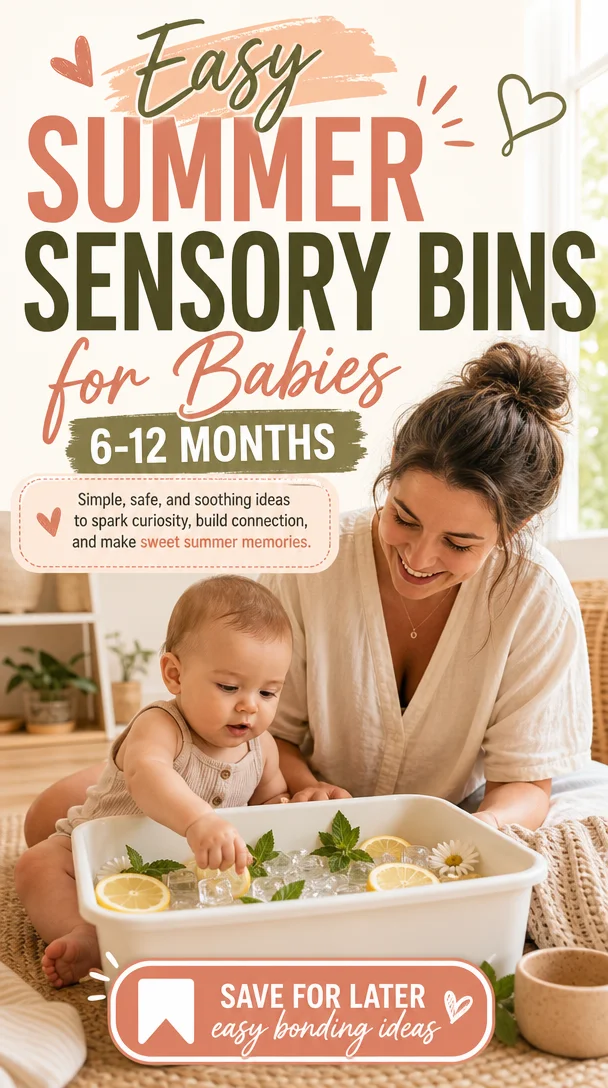
Easy Summer Sensory Bins for Babies 6-12 Months
Summer Sensory for Infants: Engaging Sensory Bins for 6-12 Months
Meta Description
Explore delightful summer sensory bins for infants aged 6-12 months. Discover engaging activities that boost development and create joyful, messy memories!
Introduction
Ah, summer days! The sun shines bright, outdoor adventures await, and yet, as parents of little ones, we sometimes wonder how to keep our babies entertained during those hot months. If you have an infant between 6-12 months, you know they love to explore the world around them. But let’s face it—playing outside can feel a bit overwhelming when you’re wrangling a tiny human who’s just discovered the wonders of their senses.
That’s where summer sensory bins come into play! They offer a fantastic opportunity for sensory exploration right in the comfort of your home. Imagine your little one squishing, splashing, and experimenting with different textures—all while you relax (or grab that much-deserved cup of coffee). In this guide, let’s delve into the beauty of summer sensory bins for infants, packed with practical ideas, easy setups, and heartfelt encouragement. You’ve got this, and I’m here to help!
The Benefits of Sensory Play for Infants
Sensory play is not just for fun; it’s a vital part of your baby’s development. Engaging in sensory activities nurtures their curiosity and helps them develop critical skills such as:
- Motor Skills: Gripping, pouring, and manipulating different materials enhances fine motor skills.
- Cognitive Development: Exploring textures and tastes introduces concepts of cause and effect.
- Emotional Growth: Sensory play promotes feelings of joy, leading to happier and more relaxed babies.
- Social Interaction: Sharing materials and playing together fosters connection and bonding.
Setting Up Your Summer Sensory Bin: What You’ll Need
Creating your sensory bin is easier than it seems! Here are some simple items you can use to make the perfect tactile playground for your little one:
Bin Ideas
- Water Table: A shallow plastic container filled with water.
- Sand Bin: A container of kinetic sand or play sand for digging.
- Nature Bin: A collection of leaves, flowers, and small natural objects like pinecones and rocks.
Sensory Materials
- Water: Use cold water or warm water, adding colorful dishes or bath toys for extra fun.
- Sand: Consider adding safe toys like cups, shovels, and even spoons for scooping.
- Ice: Freeze small toys or fruits in ice blocks for a cool summer exploration.
- Plants: Use fresh herbs like mint or basil for smelling and touching.
Fun Summer Sensory Ideas for 6-12 Month Infants
Now that you know what you can use, let’s dive into some specific sensory bin themes perfect for summer!
1. Tropical Water Adventure
Fill a shallow bin with water and add colorful plastic ocean animals. You can include small cups, spoons, sand toys, or even a few splashes of food coloring for vibrant colors!
Tip: Create a shaded area outside with a blanket or umbrella to keep your baby comfortable while they splash!
2. Beach Day with Sand
Provide a bin of kinetic sand along with small beach toys. Let your baby squish, mold, and explore. Add scoops and spades to encourage mess-making!
Tip: Head outside and let your baby dig in the sand (make sure it’s safe!). Bring along some small buckets to collect treasures!
3. Nature’s Colors
Collect various natural items like leaves, flowers, and smooth stones. Create a sensory bin that introduces your child to different textures and colors.
Tip: Encourage your little one to smell the flowers and feel the leaves. The local park or garden can be a perfect place for this activity!
4. Ice Block Exploration
Freeze small toys or fruits in ice blocks. This is a wonderful way for your baby to experience temperatures and textures. As the ice melts, let them explore!
Tip: Use warm water to speed up the melting process or provide towels for the drips!
5. Sensory Soup
Fill a bin with a mixture of water, bubbles, and toys. Let your baby pour, splash, and play in a bubbly sensory soup!
Tip: Add bath toys and even some safe kitchen tools like measuring cups to enhance the fun.
Helpful Tips for Success
As with any parenting activity, we want to keep things safe and enjoyable! Here are some handy tips for sensory play with infants:
- Supervise Closely: Always stay within arm’s reach during sensory play to ensure safety, especially with water or small objects.
- Choose Non-Toxic Materials: Ensure any objects used are safe and suitable for mouthing, as infants often explore through their mouths.
- Be Ready for a Mess: Sometimes sensory play gets messy! Set up in easily cleanable spaces or outside to minimize stress.
- Follow Your Baby’s Lead: Pay attention to what your infant enjoys and let them explore at their own pace. Don’t pressure them to engage if they seem uninterested.
Encouraging Your Child’s Sensory Exploration
Helping your little one engage with sensory bins can deepen their experience and spark curiosity. Here’s how:
Ask Open-Ended Questions
Encourage your baby’s exploration by asking simple questions, even if they can’t answer yet. For instance:
- “What does that feel like?”
- “Can you splash the water?”
- “How does the sand feel on your fingers?”
Offer Gentle Guidance
If they seem unsure, demonstrate how to play, but let them take over immediately. Your excitement can be contagious!
Celebrate Little Wins
When your baby makes discoveries—like splashing water or feeling grass for the first time—celebrate with smiles and cheers! These joyful moments foster a strong emotional bond.
Create a Routine
Incorporate sensory play into your weekly routine. For instance, make Wednesdays "Sensory Play Day" where you try something new! This anticipation builds excitement.
Summer Sensory Play and Connection
Remember, summer sensory play isn’t just about sensory learning; it’s about creating meaningful moments. Infants thrive in environments filled with love and attention. Here are some connection ideas to deepen those special summer days:
- Storytime: While playing, narrate a story that incorporates their sensory experiences. "The ocean feels cool and the sand tickles your toes!"
- Hold and Explore: Encourage them to hold different objects and name them, fostering language skills.
- Music and Movement: Play gentle summer music while they play, prompting them to move and wiggle. Happy babies mean happy summer memories!
Conclusion
You’re doing an incredible job navigating the beautiful challenges of parenting. Creating summer sensory bins for your little one is a delightful way to foster development, connection, and that joyful messiness that makes childhood so magical.
As you enjoy these simple, heartfelt activities, remember that perfect parenting doesn’t exist—your love and presence are the most important gifts you can offer. So grab those bins, get creative, and savor these moments of sensory exploration. Here’s to a summer filled with laughter, messy hands, and warm, cozy memories! You’ve got this!
Optional FAQ Section
Q: Can sensory play be messy?
A: Yes, it can! But that’s part of the fun. Set up your sensory play area in a space that’s easy to clean or take it outdoors.
Q: What if my baby doesn’t seem interested in sensory play?
A: That’s perfectly normal! Follow their lead and offer different materials or activities. Sometimes engaging them in the moment can ignite their curiosity.
Q: How often should I set up sensory bins?
A: You can set up sensory bins as often as you like—try once a week to keep things fresh and exciting!
Pin It for Later!
Don’t forget to save this article for ideas on summer sensory bins for infants! Share it with your parent friends and let’s create a supportive community around joyful parenting. 💛
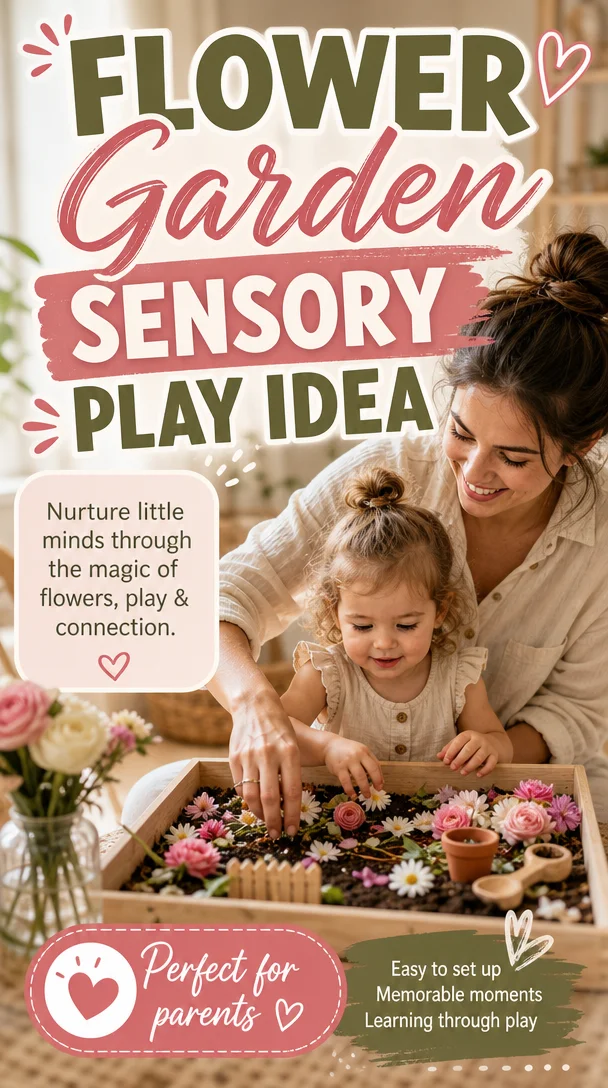
Flower Garden Sensory Play Idea
Discover the Magic of Flower Garden Sensory Play: A Heartwarming Experience for Kids
Meta Description
Engage your kids with this fun Flower Garden Sensory Bin! Discover easy steps to create a magical sensory play experience that inspires creativity.
Introduction
Hey there, fellow parent! Have you ever found yourself in a sea of toys, crafts, and endless “what do we do now?” moments, wishing for a simple way to spark creativity and joy in your children? Trust me, you’re not alone! Raising little ones can be both beautiful and chaotic, and sometimes we all need a little breather—or in our case today, something fresh and inspiring to get the family playing happily together.
Enter the Flower Garden Sensory Bin, an engaging and easy sensory play idea that allows your children to dive into a world of color, texture, and imagination. This activity not only enables kids to explore the wonders of gardening in a hands-on way, but it also provides an outlet for their sensory development, creativity, and even fine motor skills. And let’s face it, who doesn’t want a quick-win moment for both themselves and their children?
So, grab a snack, settle in, and let’s stroll through the vibrant world of sensory play with this delightful flower garden experience!
What is a Flower Garden Sensory Bin?
A Flower Garden Sensory Bin is more than just a container filled with items; it’s a creativity hub where your little ones can dig, plant, and explore different textures and colors. Think of it as a miniaturized garden that allows your kids to engage in imaginative play while also developing their senses.
Why Sensory Play Matters
Sensory play is crucial for young children as it fosters exploration and encourages them to process the world around them. Through sensory experiences, kids can:
- Enhance Motor Skills: Digging, scooping, and pouring help develop fine and gross motor skills.
- Encourage Imagination: Open-ended play stimulates creativity and storytelling.
- Stimulate Senses: Different textures and scents offer rich sensory experiences that are integral for brain development.
How to Create Your Flower Garden Sensory Bin
Ready to get started? Creating your own Flower Garden Sensory Bin requires minimal supplies and offers maximum fun. Here’s what you’ll need to gather:
Supplies You’ll Need
-
A Container: Use a shallow bin or plastic tub. Clear ones are awesome as kids can see the colorful items inside!
-
Base Materials: Start with a base like soil, sensory sand, or colored rice to mimic garden soil. For a sensory twist, consider adding some potting mix or play dough.
-
Plastic Flowers and Seeds: Use plastic flowers for fun visuals. Don’t forget some toy seeds—these can be actual craft beads or pom-poms.
-
Gardening Tools: Get small shovels, brushes, and watering cans. You can easily find these at a craft or dollar store!
-
Scoops and Bowls: Include measuring cups or scoops to encourage pouring and transferring.
-
Natural Elements: If you’re feeling adventurous, you can add small pebbles, sticks, or even real flower petals to add different textures.
Step-by-Step Instructions
Now that you have your supplies ready, let’s put this bin together:
-
Prepare the Base: Fill your container with the base material. Aim for about 3-4 inches deep, allowing plenty of room for digging and exploring.
-
Add the Elements: Distribute the plastic flowers and any natural elements evenly across the base. Feel free to hide some seeds in the soil for an element of surprise!
-
Include Tools: Toss in the gardening tools, scoops, and any other items you want to encourage kids to use freely.
-
Engage Your Kids: Present the sensory bin to your children and allow them to explore independently. Ask them open-ended questions about what they see, feel, and want to create.
Making It Special: Tips for Engagement
Once you have your Flower Garden Sensory Bin assembled, consider these tips to enrich the experience further:
Invite Imagination
Encourage storytelling! Let your kids create a narrative around their garden. What flowers are they planting? What’s happening in their magical garden world? You might say something like, “What do you think is hiding beneath the soil?”
Introduce Routine Play Activities
Add some structure to playtime by introducing small challenges. For instance, ask them to plant five flowers in one row or to scoop a specific number of ‘seeds’ from one bucket to another. This can gently incorporate counting or simple math!
Keep It Seasonal
Change your bin’s theme based on the seasons. During spring, introduce pastel colors; in autumn, explore earthy tones with leaves. This not only keeps the activity fresh but also teaches kids about the cycles of nature.
Helpful Tips for Success
-
Supervision is Key: Always supervise your kids during sensory play. They may want to taste everything, and it’s a great time for gentle reminders about what’s safe.
-
Embrace the Mess!: Sensory play can get messy, and that’s OK! Lay down a protective mat under your bin to make clean-up easier, and remind yourself that mess often equals fun!
-
Incorporate Learning: Use this time to introduce new vocabulary words, like ‘soil,’ ‘petal,’ or ‘gardening’, making it both educational and entertaining.
Conclusion: Nurturing Little Moments of Joy
As parents, we wear many hats, and some days just getting through the routine feels like an achievement. However, introducing simple and joyful activities like the Flower Garden Sensory Bin can create lasting memories and provide your children with invaluable experiences. Remember, you don’t need to be a perfect parent to raise happy, loved kids—sometimes, it’s these little moments that ignite their imagination and inspire growth.
So, I encourage you to try this sensory play idea! Dive into those messes, celebrate the small wins, and remember—the world of parenting is as much about enjoying the journey as it is about teaching and guiding our children.
Happy gardening, my friends! 🌼
Optional FAQ Section
Q: How long can I expect my kids to play with the sensory bin?
A: Engagement can vary, but most kids will find joy in it for at least 30 minutes to an hour. Rotate out elements occasionally to keep the interest alive!
Q: Can I introduce this idea with older kids?
A: Absolutely! Adjust the complexity by encouraging older children to create intricate designs, share gardening tips, or incorporate mini gardening projects.
Q: What if my child has allergies to certain plants?
A: Always err on the side of caution. There are plenty of synthetic flower options available, and you can always just skip using any natural materials altogether if in doubt.
So, what are you waiting for? Grab those supplies and start your flower garden adventure today!
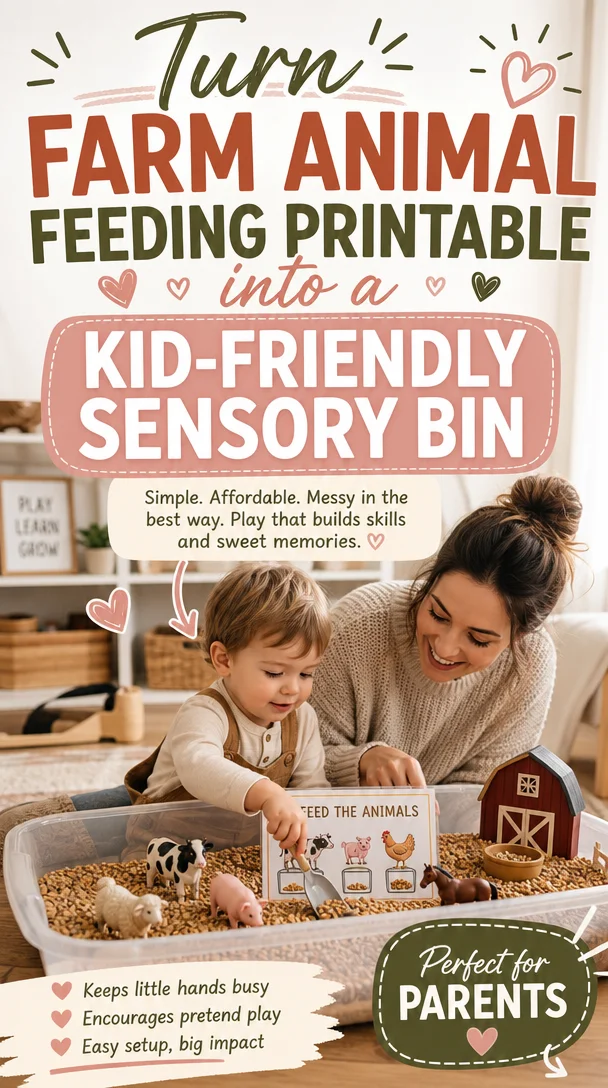
Turn Farm Animal Feeding Printable into a Kid-Friendly Sensory Bin
Engage Your Little Ones: Farm Animal Feeding Printable for Kids (Sensory Bin Activity)
Meta Description
Discover a fun Farm Animal Feeding Sensory Bin Activity! With free printables, help your kids enhance fine motor skills while enjoying sensory play!
Introduction
Ah, parenting! It’s like juggling while riding a unicycle—exhilarating yet challenging. Do you ever catch your little ones lost in their own world, making delightful messes with simple things? I completely understand—transitions into play can often feel overwhelming, yet they hold such magic! Today, I want to share a sensory bin activity that will make your kiddo’s eyes light up while keeping the chaos contained.
The Farm Animal Feeding Sensory Bin Activity is a perfect blend of fun and learning. It’s an engaging way for children to develop their fine motor skills while discovering the wonderful world of farm animals. So, grab your favorite cozy beverage, take a seat, and let’s dive into how to create this delightful activity!
What is a Sensory Bin?
Sensory bins are engaging play areas filled with materials that stimulate the senses. They invite kids to explore textures, sounds, and even smells, enhancing their sensory development. Unlike traditional toys that dictate their play, sensory bins give children the freedom to express their creativity, making every moment an adventure!
Why Farm Animal Feeding?
Farm animals captivate children’s imaginations. Their sounds, textures, and colors intrigue even the youngest explorers. By incorporating a feeding activity, you not only spark their interest but also create a fantastic hands-on experience. Children can practice scooping, pouring, and feeding—all while discovering what each animal eats. It’s a win-win!
Getting Started: What You Need
Before we get all excited about the fun, let’s gather our supplies! Here’s a quick checklist to help you prepare:
- Free Printable Farm Animal Faces: These are essential for bringing your sensory bin to life. You can find adorable printable templates online that you can cut out and stick on jars.
- Containers/Jars: Use small jars, bowls, or recycled containers to hold the "food".
- Sensory Materials: Choose from options like dried corn, rice, oats, or even shredded paper. Each offers a unique texture and sound.
- Scoopers: Provide small scoops, cups, or even spoons for your kids to use while “feeding” the animals.
- Tablecloth or Tray: Set up your sensory bin area with a splash mat or tablecloth to catch any spills.
- Optional – Small Farm Animal Figures: If you have any cute animal figurines, include them for even more play!
Setting Up Your Sensory Bin
- Prepare the Printables: First, print out the adorable farm animal faces. Cut them out and glue or tape them to your containers or jars. Each jar will represent a different animal.
- Pour Your Sensory Material: Next, fill the jars with your chosen sensory materials. I love using corn for pigs, rice for chickens, and oats for horses—each correlates with the animals that eat them!
- Create a Play Area: Set up your sensory bin on a table or tray. Invite your little ones to explore, and watch them engage with each element as they discover what each animal eats.
How to Encourage Learning Through Play
Now that your sensory bin is ready, how can you make the most of this activity? Here are some practical tips to enhance the experience:
Engaging Questions
Ask open-ended questions to promote language development and thinking skills. For example:
- “What do you think the pig likes to eat?”
- “How does this rice feel in your hand?”
Demonstrate and Model
Allow your little ones to watch how you scoop and pour. Demonstrate how to feed the animals, reinforcing the connection between the animal and their food. Make it a fun game! Pretend to hear the sounds of each animal as you feed them, bringing the experience to life.
Encourage Group Play
If you have multiple children, involve them all! Group play enhances social skills and teamwork. Create a challenge by timing how quickly they can feed the animals or see who can fill their jar first.
Incorporate Learning Themes
Use the sensory bin as a springboard for lessons on animal habitats, sounds, and even their life cycles. For instance, after feeding, ask them where they think cows live or what noise a sheep makes.
Additional Activities to Try
You might also consider these activities for more fun and learning:
- Animal Sounds Game: After the sensory play, have your children identify each animal by its sound.
- Story Time Integration: Read a story about farm animals to extend the learning. “Click, Clack, Moo” is a favorite!
- Nature Walk: If possible, visit a nearby farm or petting zoo for real-life experiences. Discuss what animals eat and see if it matches your sensory bin!
Helpful Tips to Enhance the Experience
While sensory play can get a bit messy, it’s also incredibly rewarding! Here are some helpful tips to keep the activity enjoyable and stress-free:
Use a Splash Mat
Consider laying down a waterproof mat or old sheet to collect spills and messes. This makes clean-up easier and allows for stress-free exploration.
Keep It Short and Sweet
For younger kiddos, limit the sensory bin time to about 15-20 minutes to maintain their interest. Follow their lead—if they’re captivated, feel free to extend the activity!
Review and Reflect
After the activity, take a moment to discuss what they enjoyed and what they learned. Did any animals stand out to them? This reflection fosters communication skills and builds their understanding.
Storage Options
When the fun is over, store the materials in a designated bin for future use. Encourage your child to help clean up as part of the routine and ease of access for the next play session!
Encouraging Conclusion
As you embark on this Farm Animal Feeding Sensory Bin Activity, remember that parenting doesn’t have to be perfect to be wonderful. Every little connection you create with your children matters. Whether it’s through messy play or exploring the world of farm animals, these moments leave lasting impressions.
When you observe their eyes fill with curiosity or hear their delighted squeals of joy, know you are doing a fantastic job! Embrace the chaos, celebrate the small wins, and keep making memories together.
So, the next time your little one asks what’s for lunch, why not throw a farm animal feeding party? It could be as easy as pulling out that sensory bin! Enjoy every moment and remember, you are not alone on this parenting journey. Let’s make it lighter, warmer, and more joyful—one little moment at a time!
FAQ
Q: What age is this activity suitable for?
A: This sensory bin activity is perfect for toddlers and preschoolers, typically ages 2-5.
Q: Can I adapt this sensory bin for older kids?
A: Absolutely! You can turn it into a more complex game for older children by introducing math concepts, such as counting or sorting.
Q: How can I change the sensory materials?
A: Feel free to swap out different materials based on seasonal themes or holidays, such as adding colorful fall leaves in autumn or snowflakes made from cotton balls in winter!
Q: What if we don’t have farm animal figures?
A: No problem! Your kids can use the printables alone and let their imagination take over. Paper cutouts can still create immersive play.
Let’s make parenting feel a little easier and embrace the beauty of the everyday chaos together! Happy feeding!
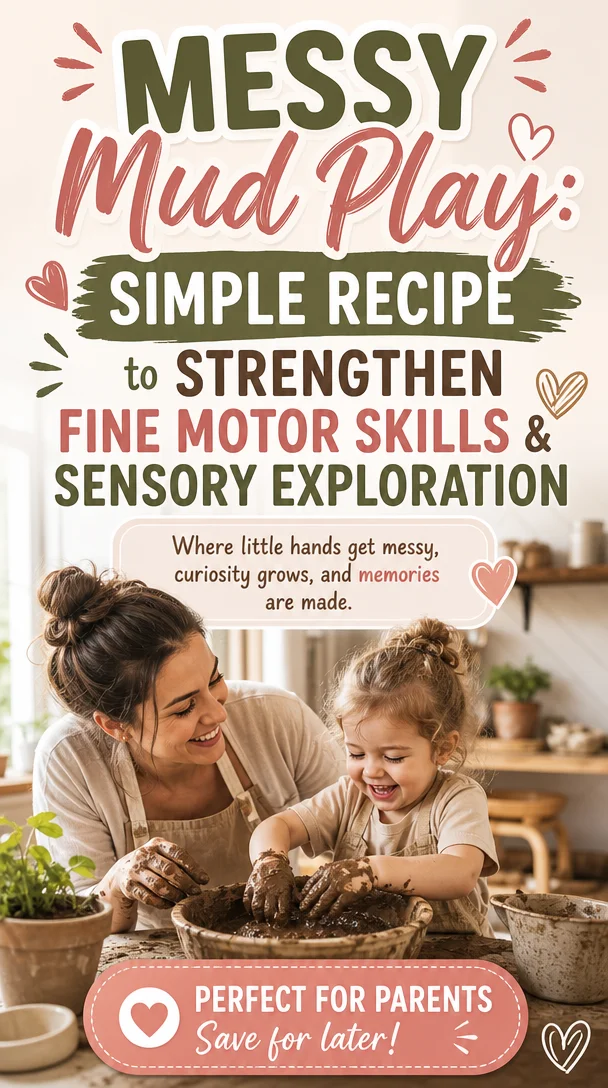
Messy Mud Play: Simple Recipe to Strengthen Fine Motor Skills & Sensory Exploration
Play Mud Recipe: Strengthening Fine Motor Skills Through Sensory Play
Meta Description
Engage your child’s fine motor skills with our easy play mud recipe! Discover how this sensory play is a fun way to learn and grow together.
Introduction
As parents, we all know that children learn best through play. It’s astonishing how something as simple as mud can open up a world of exploration and learning. Have you ever watched your little one joyfully squishing their hands in a muddy puddle or digging in the dirt? Those moments are more than just messy fun; they’re instrumental in developing essential skills like fine motor control and sensory awareness.
Today, I want to share an exciting play mud recipe that’s incredibly easy to make, requires just a few household ingredients, and will keep your little ones engaged for hours. Plus, we’ll discuss how to incorporate insect figurines into the play for an extra layer of exploration. So, grab your apron, and let’s get our hands dirty—figuratively and literally!
Why Play Mud Matters
Fostering Fine Motor Skills
Fine motor skills are essential for everyday tasks. From writing to buttoning shirts, strengthening these skills early on helps set our kids up for success. The act of squishing, rolling, and molding play mud requires coordination and dexterity, which naturally develops these critical abilities.
Enhancing Sensory Experiences
Sensory play is vital for toddlers and preschoolers. Engaging with different textures stimulates their senses and enhances cognitive development. Play mud not only feels cool and squishy but also smells earthy, providing a holistic sensory experience.
The Perfect Play Mud Recipe
Here’s the best part; you can whip up this play mud using items you likely have around your home. Here’s how:
Ingredients
- 2 cups all-purpose flour
- 1 cup water
- 1 tablespoon vegetable oil
- Food coloring (optional)
- 1/2 cup cocoa powder (optional, for color and scent)
Instructions
- Mix Dry Ingredients: In a large bowl, combine the flour and cocoa powder (if using). Stir well until combined.
- Add Wet Ingredients: Slowly add water and vegetable oil to the dry mixture. If you want colored mud, now is the time to add a few drops of food coloring.
- Knead the Mud: With your hands, knead the mixture until you achieve a smooth, pliable consistency. If it feels too wet, add a little more flour. If it’s too dry, add a spoonful of water.
- Store Smarter: Keep your play mud in an airtight container or resealable bag to maintain freshness.
Adding Insect Figurines for Extra Fun
To enhance your sensory experience, consider incorporating small insect figurines into your play mud. These tiny creatures can inspire imaginative play and offer endless opportunities for learning about nature. You could:
- Conduct a “bug rescue” mission where kids dig to find hidden insects.
- Create a mini ecosystem in the mud, explaining how each bug plays a role in the environment.
- Use the figurines to talk about different habitats and behaviors.
Helpful Tips for an Engaging Play Experience
- Set Up a Play Station: Create a designated play area with a tarp or old blanket. This way, cleanup becomes a breeze, allowing everyone to enjoy the activity without worrying about the mess.
- Use Tools: Provide your child with tools like small shovels, spoons, or even cookie cutters. These tools encourage manipulation, enhancing fine motor skills while also making play more engaging.
- Incorporate Themes: Change the play scenario week to week. One week could focus on a bug adventure, while another could revolve around a beach or construction theme—endless opportunities for creativity!
Engaging Conversation Starters
As your child plays, engage them with simple questions to encourage conversation and curiosity:
- “What colors do you see in the mud?”
- “How does it feel in your hands?”
- “What do you think these insects are doing?”
The Importance of Process Over Perfection
As you embark on this messy adventure, remind yourself that this is all part of the process. It’s not about creating the perfect mud sculpture; it’s about the joy of exploration, the giggles, and the learning that occurs through the experience. Celebrate those small wins—whether it’s your child befriending a bug or realizing they can make a mud pie!
Wrapping Up
Engaging in sensory play with your child doesn’t just bolster their fine motor skills; it creates opportunities for bonding, exploration, and joy. Remember, parenting often involves embracing the messy parts of life, and play mud offers a fantastic way to celebrate those moments.
So, get ready to mix some mud, let your imagination run wild with those bug figurines, and enjoy this wonderful opportunity to bond with your little ones. And remember, you’re doing an incredible job navigating this parenting journey. Celebrate the small victories, like warm coffee and messy hands!
FAQs
Can I store play mud for later use?
Yes! Keep it in an airtight container or a plastic bag. It should last for about a week or two if stored properly.
Is this play mud safe for younger children?
Absolutely! All the ingredients are safe; however, always supervise young kids to prevent any accidental ingestion.
What if my child doesn’t enjoy the texture?
That’s okay! Some children are sensitive to touch. Try introducing the texture gradually or allow them to engage in other ways, like scooping with tools.
Join the Little Life Society community for more ideas, encouragement, and tips on navigating this beautiful, messy journey of parenting! 💛
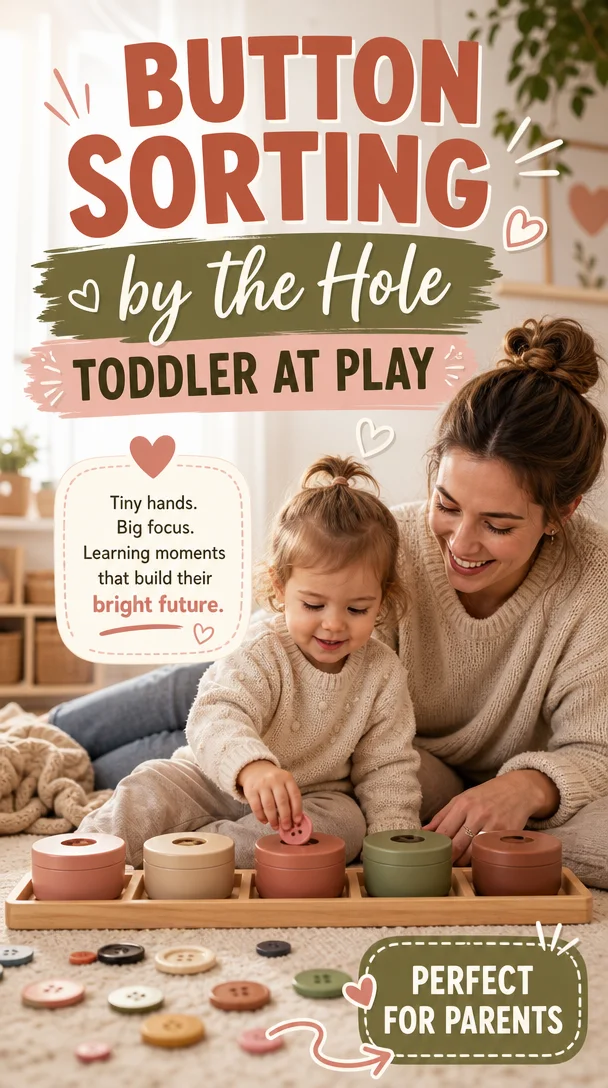
Button Sorting by the Hole – Toddler at Play
Fun and Engaging Button Sorting by the Hole: A DIY Activity for Toddlers
Meta Description: Discover an easy and fun button sorting activity for toddlers that promotes focus and learning! Keep little hands busy with this simple, screen-free idea.
Introduction
Hey fellow parents! If you ever find yourself in the thick of toddler chaos — toys scattered everywhere, fingers itching for a screen, and a schedule that feels a little too hectic — you might just be on the lookout for a fun, engaging, and interactive activity. Let’s be real; parenting is a beautiful, messy journey, and we all need a little helping hand sometimes.
Today, I’m excited to share a simple and delightful activity that brings you smiles and keeps those tiny hands busy: Button Sorting by the Hole! This activity captivates toddlers, supports their learning, and fosters a sense of achievement — and the best part? It requires minimal prep and everyday materials you probably already have at home. So, grab a snack, get comfy, and let’s explore just how magical a little sorting can be!
Why Button Sorting is Such a Hit with Toddlers
Boosting Fine Motor Skills
Sorting buttons might seem like just a fun way to pass the time, but it does wonders for those little hand muscles! As your child picks up buttons, manipulates them, and fits them into holes, they strengthen those crucial fine motor skills that serve as the foundation for writing, drawing, and countless other future activities.
Promoting Focus and Concentration
Does your little one have a tendency to bounce from one activity to the next? Button sorting is fantastic for helping them hone their attention span. It gives them a chance to settle into a focused activity while boosting their concentration in a calming, non-overwhelming environment.
Fostering Cognitive Development
By sorting buttons by size, color, or even shape, you engage your toddler’s emerging cognitive skills. They begin to understand concepts like categorization and differences, which builds important critical thinking skills in an enjoyable setting. Plus, who knew sorting could be so educational?
Setting Up Button Sorting by the Hole: Step-by-Step Guide
Gather Your Supplies
Before diving in, let’s gather the materials you’ll need. No need to head out to the store; this activity keeps it simple:
- Buttons: Collect a variety of buttons in different sizes and colors. You can raid your sewing kit or thrift shop for some treasures!
- A container: Use an old muffin tin, a cardboard box, or any small containers you have on hand.
- A surface to work on: Spread out a blanket on the floor or set up at the kitchen table.
Creating the Activity
-
Sort the Buttons: Start by sorting buttons into different areas. Keep some grouped by size, color, or shape, which creates fun challenges for your toddler.
-
Demonstrate: Show your child how to sort the buttons by fitting them into different holes or sections. If using a muffin tin, you can demonstrate how to place a button in each cup based on its size.
-
Let Them Explore: Now, it’s their turn! Encourage them to sort the buttons by themselves, but feel free to guide them as they begin. Celebrate their successes, even the small ones!
Variations to Keep Button Sorting Fun
Switch things up a bit! Here are some engaging twists on this activity you can try:
Color Matching
Challenge your toddler to match buttons to the correct colored section in their sorting area. They’ll hone their color recognition skills while having fun!
Shape Sorting
If you have a mix of buttons with different shapes, encourage your little one to sort them based on shape. This adds an extra layer of difficulty and reinforces their understanding of different physical properties.
Size Sorting
Have them practice sorting buttons from smallest to largest. Introducing concepts like "big," "medium," and "small" in a physical way helps solidify their understanding of sizes!
Creative Arts and Crafts
Once you have sorted the buttons, why not turn them into an art project? Use glue to make fun pictures or patterns! Transforming sorting into an art activity adds a whole new layer of creativity to the experience.
Tips for Success
-
Be Prepared for Mess: Embrace the chaos! Allowing your child to freely explore might lead to a scattered button mess, but remember that exploration is part of the fun (and learning).
-
Make It a Game: Add a timer and see how many buttons they can sort before it goes off! This increases engagement and excitement.
-
Keep It Short: Toddlers have short attention spans! If you sense their interest waning, it’s perfectly okay to wrap things up and revisit button sorting another day.
-
Encourage Communication: As they sort, ask open-ended questions about what they are doing. “Which button do you like the most?” or “What color do you see?” This brings in opportunities for language development and connection.
-
Add a Reward: Celebrate their accomplishments with a sticker, a stamp, or just verbal praise! Positive reinforcement encourages them to keep trying new things.
Finding Joy in Everyday Moments
As we glide through the beautiful chaos of parenting, it’s essential to seize those little moments of joy. Button Sorting by the Hole might seem simple, but it holds the powerful potential to enrich your child’s development while bringing you closer together. Remember, you don’t have to be a perfect parent; just being present and available makes a world of difference.
So, lean into the mess and embrace every giggle, every concentration face, and every triumphant button placed just right. Your child is learning and growing at their own pace, and you’re right there alongside them, cheering them on!
Conclusion
Creating fun, screen-free activities is a wonderful way to connect with your toddler and support their growth. Button sorting brings together learning, fun, and the chance for quality time — and you can do it with materials you already have on hand!
Next time chaos brews, reach for a handful of buttons instead of electronic distractions. You might just find that the simplest of activities can spark joy and connection in ways you never expected!
Here’s to warmer, lighter, and more joyful parenting, one little moment at a time. You’ve got this!
Optional FAQ Section
Q: Can I do this activity with a group of toddlers?
Absolutely! Button sorting can be a fantastic activity for playdates. Just make sure to have plenty of buttons available, and encourage sharing and teamwork!
Q: How do I clean up after the activity?
Have your child help you gather the buttons back into the container. It teaches responsibility and keeps the cleanup process fun!
Q: What if my toddler gets frustrated?
If frustration arises, take a break or shift to a different activity. Some days are just not for sorting, and that’s perfectly okay!
Feel free to adapt this guide to suit your child’s needs and interests, and most importantly, enjoy the process!
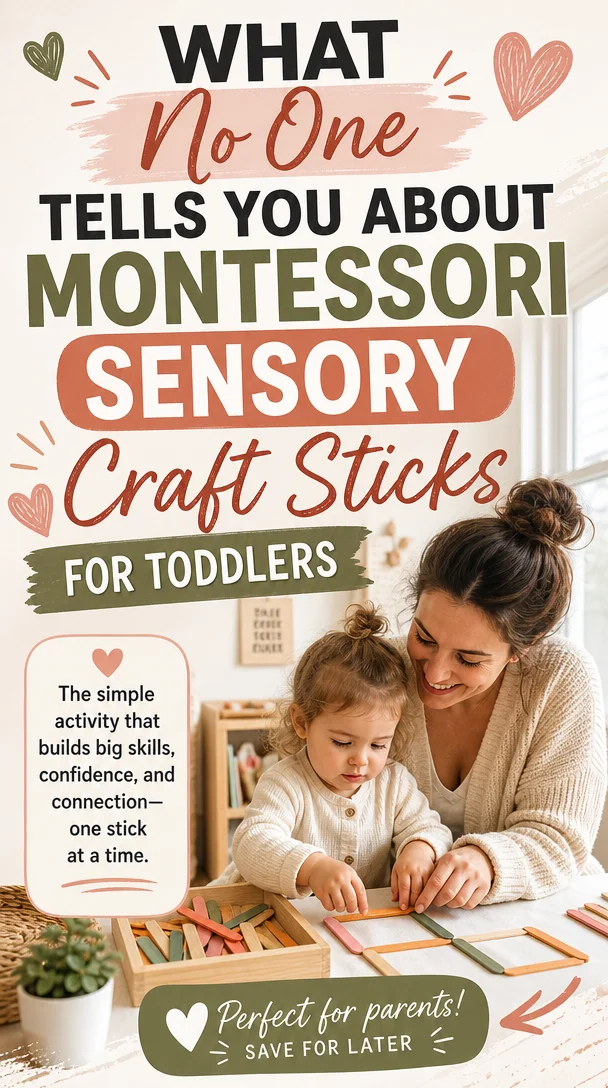
What No One Tells You About Montessori Sensory Craft Sticks for Toddlers
Montessori DIY Tactile Sensory Craft Sticks Toddler Activity
Meta Description
Create engaging and educational tactile sensory craft sticks with your toddler using this easy DIY guide, perfect for enhancing sensory exploration and development.
Introduction
Parenting comes with its own unique set of joys and challenges, doesn’t it? If you’re like me, some days you just want to create a warm, enriching environment for your little one while also finding moments of connection amidst the chaos. Today, I’ve got a fantastic activity for you that not only sparks creativity but also supports your child’s sensory exploration: DIY Tactile Sensory Craft Sticks.
Imagine your toddler sitting at the table, fully engaged with a selection of colorful, textured craft sticks, each one representing a new sensory adventure. With just a few materials, you can bring the Montessori method into your home in a way that feels natural and enjoyable. Let’s dive into this simple, engaging activity that not only builds fine motor skills but also nurtures your child’s curious mind.
What Are Tactile Sensory Craft Sticks?
Tactile sensory craft sticks are beautifully versatile tools used to explore textures and sensations. In the Montessori approach, sensory experiences are vital for a child’s development—they help little hands practice coordination and exploration while offering opportunities for imaginative play and learning.
Why Opt for a DIY Version?
Creating your own tactile sensory craft sticks means you can customize them to your toddler’s interests and developmental needs. Plus, using materials you already have at home makes this a budget-friendly and environmentally conscious choice. Let’s look at how you can get started!
How to Create Your Own Tactile Sensory Craft Sticks
Materials You’ll Need
- Craft sticks (popsicle sticks work great)
- Textured materials: Felt, sandpaper, fabric scraps, cotton balls, or textured wallpaper
- Glue: Non-toxic craft glue or a hot glue gun (with supervision)
- Markers or paint (optional for decoration)
- Small containers for organizing materials
Step-by-Step Instructions
Step 1: Gather Your Materials
Collect all your materials and set up a crafting station. You could even involve your toddler in picking out textures, fostering their ability to choose and express preferences.
Step 2: Prep Your Craft Sticks
Start by decorating your craft sticks with markers or paint if you wish. This adds a fun artistic flair! You can let your toddler get imaginative here, using colors that resonate with them.
Step 3: Apply the Textures
Now comes the exciting part. Choose a texture for each stick and apply it using glue. You can talk to your child about what they see and feel—encourage them to express their observations. For example, "How does the sandpaper feel?" or "Is this cotton soft or rough?"
Step 4: Let Them Dry
Once you’ve applied all the textures, set the sticks aside to let them dry completely. This could be a great time to chat about colors, shapes, and the various textures they’ve picked out!
Step 5: Play and Explore
Your tactile sensory craft sticks are now ready for exploration! Encourage your toddler to touch, feel, and describe the different textures. You can guide them through activities, like sorting the sticks by feel—“Which one feels the softest?”—or creating little games, like matching sticks with similar textures.
Expanding the Activity: Less Mess, More Fun
If you want to add more engaging aspects, consider these tips:
Create a Sensory Board
After making the craft sticks, how about turning them into a sensory board? Use a piece of cardboard or a small wooden board to attach various sticks, allowing your toddler to explore textures at different heights and angles.
Incorporate Movement
Create a mini scavenger hunt around your house where your child collects items that match the textures on your craft sticks—like a soft pillow, a smooth book cover, or a bumpy rock outside.
Encourage Language Development
As you play, take the time to describe textures and sensations. Use rich vocabulary words and ask your child open-ended questions, like, “How does this feel compared to this one?” This not only enhances language skills but also builds deeper connections with you.
Encouraging Inclusive Play
Montessori principles embrace independence and personal growth. Encourage your little one to show their creations to siblings or other family members, fostering social skills and inclusive play. This is where those beautiful bonds grow as they share findings and discoveries.
Helpful Tips for Success
-
Use what you have: Look around your home for materials you might repurpose for textures. Old magazines, fabrics, or even sponges can offer unique sensory experiences.
-
Mix textures: Combine rough with smooth, soft with hard, and colorful with muted materials. This diversity keeps things interesting and stimulates various senses.
-
Focus on the process: Remember, it’s about discovery and play, not perfection. Encourage your child to experiment and even mix textures on the same stick!
-
Stay engaged: Be present during the activity. Your involvement can transform this simple craft into a cherished bonding moment.
-
Keep it screen-free: Craft time promotes creativity and imagination, giving you and your toddler a refreshing break from screens.
Connecting Through Play: The Real Benefits
Activities like these do more than entertain—they strengthen emerging skills and nurture emotional development. By encouraging exploration and communication, you pave the way for your child to become more confident in discovering their environment.
Imagine the delight on your child’s face when they realize their ideas and choices lead to something fun! This kind of hands-on discovery cements essential life skills like problem-solving and creativity.
Concluding Thoughts: Parenting, One Moment at a Time
Being a parent is all about finding those little moments among the busy, chaotic days. When you dive into simple activities like DIY sensory craft sticks, you create cherished memories that last a lifetime. Remember, it’s perfectly okay if things don’t go perfectly as planned. Celebrate the great attempts and enjoy the experience—messy play is part of the journey!
So grab those craft sticks, gather your textures, and let the magic unfold! You’re doing wonderfully, even when it feels overwhelming. Embrace the imperfections and enjoy every precious moment with your little one. Remember, you’re not alone on this journey. You’ve got this!
FAQs
Q: What age is this activity suitable for?
A: This activity typically suits toddlers aged 18 months and older, but it can be adapted for younger kids with supervision.
Q: How often should we do sensory activities?
A: Feel free to incorporate sensory activities once or twice a week to keep the experiences fresh and engaging.
Q: Are there any safety considerations?
A: Always supervise toddlers during crafting to prevent any accidents with small materials.
Let’s continue weaving meaningful moments into your parenting journey, because every little touch counts!
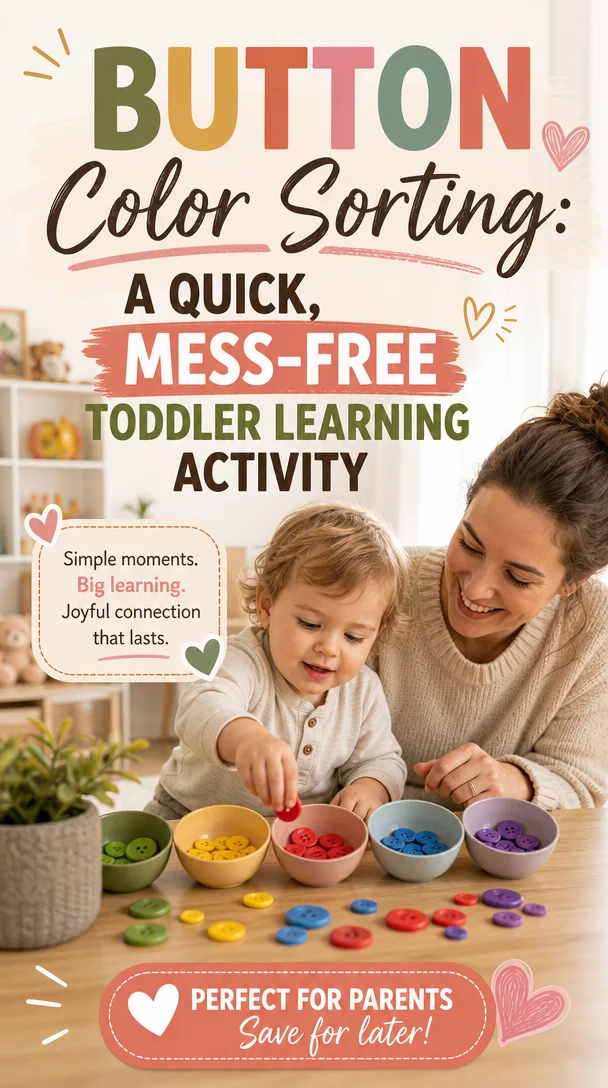
Button Color Sorting: A Quick, Mess-Free Toddler Learning Activity
Fun and Easy Button Color Sorting: Engage Your Kids While Enhancing Their Skills
Meta Description
Discover a fun Button Color Sorting activity to help your kids develop color recognition and fine motor skills using everyday craft supplies.
Introduction
Do you ever find yourself wishing you could turn everyday moments into magical learning experiences with your kids? Well, if you’ve been looking for an engaging way to help your little ones recognize colors, then get ready for an adventure! Today, I’ll introduce you to a delightful Button Color Sorting game that not only captivates your child’s attention but also promotes essential skills like color identification and fine motor development.
Imagine your toddler’s excitement as they dive into a sea of colorful buttons, sorting and categorizing them with joy. With just a handful of inexpensive craft supplies, you can create a fun learning environment right at home. Not only will this activity take mere minutes to prepare, but it also allows you to sneak in a bit of education while creating lasting memories. Let’s jump right in and explore how to make and play this fabulous game together!
What You’ll Need for Button Color Sorting
Creating your Button Color Sorting game is quick and easy. Here are the supplies you’ll need:
- A mix of colorful buttons (you can use old ones from clothes or purchase a cheap set)
- A few small containers or bowls (plastic cups work great!)
- Optional: A colored sheet of paper or fabric to serve as a sorting base
Setting Up the Game
- Gather Your Buttons: Start by collecting buttons of various sizes, shapes, and colors. If you don’t have enough buttons at home, check your local craft store or online shop. It’s an inexpensive way to score lots of colors!
- Prepare Your Sorting Base: You can place a colored sheet of paper on the table to make this more visually appealing and inviting. This will also serve as a backdrop for the activity.
- Set Up Your Containers: Arrange your containers in a row or circle, labeling them with different colors if you want to make it a bit educational. For example, place a red container, a blue container, and so on.
With your materials ready, it’s time to play!
How to Play Button Color Sorting
This activity works beautifully for kids aged 2 and up. Here’s how to introduce the game to your little ones:
Step 1: Introduce the Colors
Start by discussing different colors with your child. Point out each one as you place buttons in front of them. “Look at this sunny yellow button! Where do you think it should go?” Prompt your child to identify the colors and encourage them to name the buttons they see.
Step 2: Sorting Time
Encourage your child to pick up the buttons one by one. Ask them to place each button into the correct container according to its color. Make this process playful by cheering them on or adding fun sounds as they successfully sort the buttons. “Woohoo! Great job with the blue one!”
Step 3: Count and Celebrate
Once your child sorted all the buttons, celebrate their efforts! Count how many buttons are in each container together. This little twist adds an element of numeracy to the activity, enhancing both their math and color recognition skills. You can say, “How many red buttons did you find? Let’s count together!”
Benefits of Button Color Sorting
Not only is Button Color Sorting a fantastic indoor activity for rainy days, but it also offers numerous benefits for your child’s development:
Enhances Fine Motor Skills
The act of picking up small buttons and placing them in specific containers encourages your child to practice their hand-eye coordination and dexterity. These skills are crucial as they prepare for more complex tasks like writing.
Promotes Color Recognition
Sorting colors reinforces your child’s ability to recognize and differentiate colors. By associating colors with objects they see daily, they’ll become more adept at identifying them in their environment.
Sparks Creativity
Feel free to expand this activity by adding more elements! Encourage your child to use larger items or different shapes. This creative exploration fosters imaginative thinking.
Encourages Problem-Solving Skills
As children sort buttons, they engage in problem-solving by determining the correct container for each button. This teaches them to think critically and make independent decisions.
Helpful Tips for Success
Here are some actionable parenting tips to make this activity even more enjoyable and educational:
Create a Colorful Environment
Set the tone by surrounding your child with colorful items. Decorate the play area with artwork featuring colors, or include colorful toys that they’re familiar with.
Add a Story Element
Make this activity more exciting by creating a story around it. Perhaps the buttons came from a magical land where colors come to life! This makes the experience both educational and imaginative.
Turn Competition into Teamwork
If you have multiple kids, create an informal team challenge. Who can sort their buttons the fastest? Keeping the spirit light and fun encourages collaboration rather than competition.
Expand the Lesson
Once your child masters sorting, introduce new concepts like primary and secondary colors, or mix colors to create new ones. After all, learning can happen in so many creative ways!
Share Your Experience
Capture the fun moments during the activity with photos and share them on social media. You can inspire other parents by highlighting the joy and learning that happens during these simple activities!
Conclusion
In the whirlwind of parenting, it’s often the simplest activities that create the most meaningful connections. Your little ones don’t need extravagant toys or elaborate setups; they just need your warmth and encouragement to flourish. Through this fun Button Color Sorting game, you’ll not only enhance their skills but also create precious memories that both you and your child will cherish for years to come.
Remember, no one expects you to be a “perfect” parent. It’s about finding these small moments of joy and learning together, and you’re doing wonderfully! So grab those buttons and embark on this colorful adventure with your little one. You’ve got this, and together, you can make precious moments that truly count!
FAQs
How many buttons do I need for the game? You’ll want to have a variety of buttons, but a great rule of thumb is to gather around 20-30 buttons for sorting.
What age is Button Color Sorting suitable for? This activity generally suits toddlers aged 2 years and up, but even older children can enjoy it with added complexity, like counting or creating patterns.
Can I use other items for sorting? Absolutely! Feel free to use pom-poms, stones, or colored paper clips. The key is to use items that are safe and manageable for your child.
What if my child gets frustrated? If they find it challenging, offer gentle guidance and reassurance. Turn it into a fun game rather than strictly adhering to the rules. The goal is to enjoy the moment!
Now it’s your turn to create a fun-filled learning experience with your kids. Happy sorting!