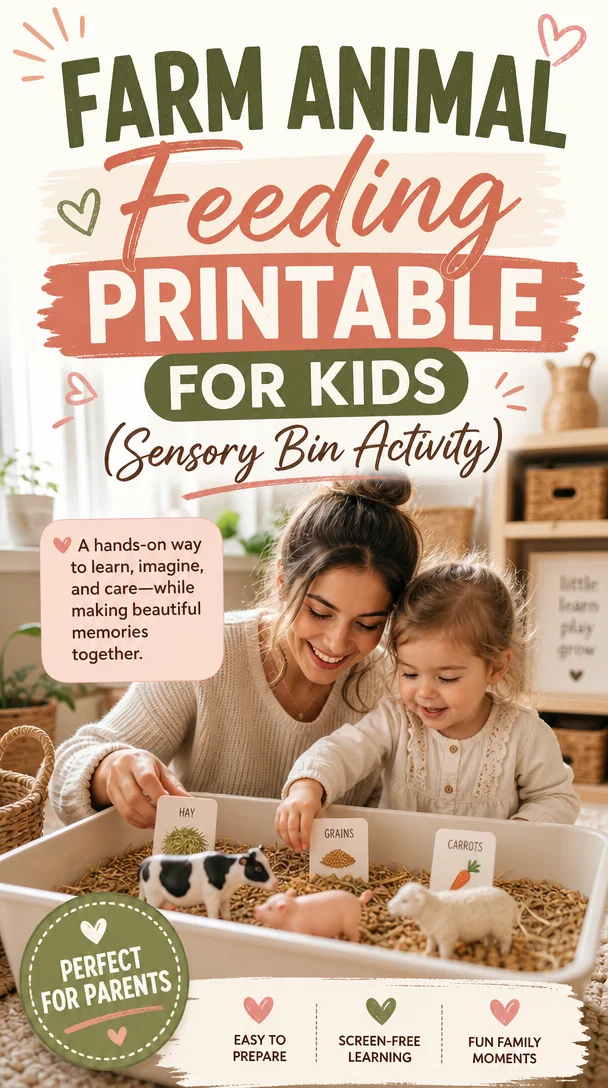
Farm Animal Feeding Printable for Kids (Sensory Bin Activity)
Engaging Farm Animal Feeding Sensory Bin Activity for Kids: Fun and Learning Combined!
Meta Description: Dive into fun with this Farm Animal Feeding Sensory Bin activity! Boost fine motor skills and learning through play with adorable animal printables.
Hey there, fellow parents! If you’ve ever felt overwhelmed while trying to engage your little ones, you’re not alone. Sometimes, it feels like we need a magic wand to transform an ordinary day into an exciting adventure. I’ve found that simple, hands-on activities can work wonders, and today, I want to share one of my favorites: the Farm Animal Feeding Sensory Bin Activity!
Imagine your child giggling as they scoop corn, rice, or oats into jars decorated with adorable farm animal faces. Not only does this activity spark joy and curiosity, but it also provides loads of benefits for fine motor skills and sensory development. Whether you’re a seasoned homeschooling parent or just looking for a fun weekend activity, this sensory bin will bring smiles and excitement to your home.
Ready to dive in? Grab a snack, and let’s get started on how to create this delightful experience for your child!
What is a Sensory Bin?
Before we jump into the Farm Animal Feeding activity, let’s take a moment to chat about sensory bins. Sensory bins are containers filled with materials that engage a child’s senses. They encourage exploration and creativity while developing fine motor skills, hand-eye coordination, and cognitive growth.
Why Sensory Play Matters
Kids learn best through play, and sensory activities like this one help to:
- Foster creativity and imagination
- Encourage problem-solving skills
- Provide opportunities for social interaction
- Reduce anxiety and stress by allowing kids to express themselves
As parents, creating immersive experiences strengthens the bond we share with our little ones while supporting their development. And the best part? Kids love it!
Farm Animal Feeding Sensory Bin: What You’ll Need
Let’s gather our supplies! Creating the Farm Animal Feeding Sensory Bin is a simple and engaging process. Here’s what you’ll need:
Materials
- Animal Printables: You can find adorable farm animal face printables online. Make sure to choose ones that will delight your little ones!
- Jars or Containers: Empty spice jars, mason jars, or similar containers work wonders for this activity.
- Base Material: Choose from corn kernels, rice, or oats. Each has its unique texture, and the kids can explore the differences.
- Scoops: Small measuring cups, spoons, or scoops make excellent tools for little hands.
- Tray or Bin: A large, shallow tray or bin keeps things tidy while allowing ample space for play.
Setting Up the Sensory Bin
Creating your sensory bin only takes a few minutes. Here’s how to do it:
-
Print and Prepare Animal Faces: Print out your farm animal face templates and cut them out. Attach them to the jars or containers with glue or tape.
-
Fill the Base Material: Pour your chosen base (corn, rice, or oats) into the bin or tray to create a sensory-rich environment.
-
Add the Jars: Arrange the jars in the bin, ensuring they are accessible for your little ones to reach.
-
Provide Tools: Place scoops and small cups beside the bin, ready for those little hands to explore.
Now you’re ready to watch the magic happen!
Engaging the Kids: Let the Fun Begin!
When your sensory bin is all set up, it’s time to get your little ones involved. Here are some ideas to maximize the fun and make the most of learning through play:
Get Creative with Playtime
-
Feed the Animals: Encourage your child to scoop the grains and feed each animal in the jars. Talk about the different animals and what they eat to incorporate some fun facts along the way.
-
Sorting Games: As your child plays, you can ask them to sort the different grains into the jars. This not only reinforces their understanding of categories but also develops cognitive skills.
-
Imaginative Play: Prompt your child to create stories about their farm animals and what adventures they might have. This subtly enhances language skills and imaginative thinking.
-
Counting and Math: Use the jars to practice counting. “How many scoops do we need for the cow? Let’s count together!”
-
Sensory Descriptions: Encourage your child to describe what they feel while playing. Is the rice smooth? Is the corn making a sound? This exercise nurtures vocabulary building and sensory awareness.
Tackle Messes with Ease
Let’s keep it real—sensory play can get messy. But as a seasoned parent, I can tell you that a little mess means a lot of fun! Here are a few tips to tackle it head-on:
-
Designate a Play Area: Set up your sensory bin in a space that can handle a little mess—like the kitchen or outside.
-
Use a Tarp or Blanket: Lay down a tarp or blanket under the bin to catch any grains that escape during play. This practice makes for easy cleanup.
-
Involve Your Child: Encourage them to help clean up afterward. It’s a great opportunity to teach responsibility while reinforcing teamwork.
Additional Tips for Success
To ensure your sensory bin experience goes smoothly, here are some extra tips!
Encourage Independent Play
Allow your child to explore the sensory bin independently. This nurturing of autonomy not only boosts their confidence but also enables self-directed learning. Just step back and observe. You’ll be amazed at how engaged they become!
Join the Fun
Sometimes, joining in on the sensory play creates the most beautiful moments. Sharing playful experiences strengthens your bond, builds lasting memories, and enhances their enthusiasm for learning.
Rotate Sensory Materials
To keep the excitement alive, rotate the materials in your sensory bin every few weeks. Try switching from corn to different textures like sand or beans, bringing new experiences to the table.
Celebrate Every Moment
Remember, parenting isn’t about perfection; it’s about enjoying the journey together. Celebrate every little win, whether it’s your child’s creativity, newfound skills, or simply the joy of learning. These moments will become cherished memories over time!
Conclusion
In wrapping up, the Farm Animal Feeding Sensory Bin Activity is much more than just a fun way to occupy your kids for a while. It’s a delightful combination of learning, sensory exploration, and bonding. By incorporating simple materials and engaging play, you nurture your child’s development without overwhelming them—or yourself.
So, grab those printables, get creative with your sensory bin, and enjoy the laughter and joy that fills your home. Remember, you’re doing an amazing job, and every small effort counts! Keep shining as the incredible parent you are.
And if you found these tips helpful, don’t forget to share your sensory bin experience with other parents. Together, we can lighten the parenting load one joyful moment at a time!
FAQs
Q: How long can I leave the sensory bin set up?
A: You can keep it set up for as long as your child remains interested! Just be sure to store the materials properly if you plan to take breaks.
Q: What if my child loses interest?
A: It’s normal for kids to fluctuate in interest. You can refresh the setup or introduce new items to re-engage their curiosity.
Q: Can I adapt this for older children?
A: Absolutely! For older kids, you can introduce more complex concepts like measuring, making patterns, or even thematic learning around farms and animals.
By embracing the fun in sensory play, you’re already paving the way for significant growth and learning in your child. Enjoy every scoop!
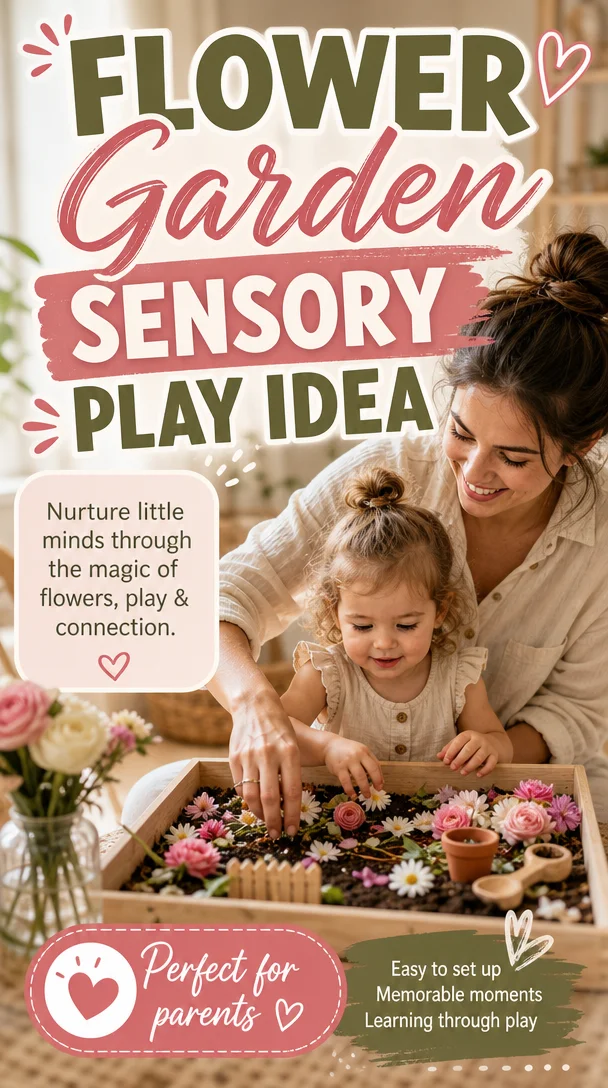
Flower Garden Sensory Play Idea
Discover the Magic of Flower Garden Sensory Play: A Heartwarming Experience for Kids
Meta Description
Engage your kids with this fun Flower Garden Sensory Bin! Discover easy steps to create a magical sensory play experience that inspires creativity.
Introduction
Hey there, fellow parent! Have you ever found yourself in a sea of toys, crafts, and endless “what do we do now?” moments, wishing for a simple way to spark creativity and joy in your children? Trust me, you’re not alone! Raising little ones can be both beautiful and chaotic, and sometimes we all need a little breather—or in our case today, something fresh and inspiring to get the family playing happily together.
Enter the Flower Garden Sensory Bin, an engaging and easy sensory play idea that allows your children to dive into a world of color, texture, and imagination. This activity not only enables kids to explore the wonders of gardening in a hands-on way, but it also provides an outlet for their sensory development, creativity, and even fine motor skills. And let’s face it, who doesn’t want a quick-win moment for both themselves and their children?
So, grab a snack, settle in, and let’s stroll through the vibrant world of sensory play with this delightful flower garden experience!
What is a Flower Garden Sensory Bin?
A Flower Garden Sensory Bin is more than just a container filled with items; it’s a creativity hub where your little ones can dig, plant, and explore different textures and colors. Think of it as a miniaturized garden that allows your kids to engage in imaginative play while also developing their senses.
Why Sensory Play Matters
Sensory play is crucial for young children as it fosters exploration and encourages them to process the world around them. Through sensory experiences, kids can:
- Enhance Motor Skills: Digging, scooping, and pouring help develop fine and gross motor skills.
- Encourage Imagination: Open-ended play stimulates creativity and storytelling.
- Stimulate Senses: Different textures and scents offer rich sensory experiences that are integral for brain development.
How to Create Your Flower Garden Sensory Bin
Ready to get started? Creating your own Flower Garden Sensory Bin requires minimal supplies and offers maximum fun. Here’s what you’ll need to gather:
Supplies You’ll Need
-
A Container: Use a shallow bin or plastic tub. Clear ones are awesome as kids can see the colorful items inside!
-
Base Materials: Start with a base like soil, sensory sand, or colored rice to mimic garden soil. For a sensory twist, consider adding some potting mix or play dough.
-
Plastic Flowers and Seeds: Use plastic flowers for fun visuals. Don’t forget some toy seeds—these can be actual craft beads or pom-poms.
-
Gardening Tools: Get small shovels, brushes, and watering cans. You can easily find these at a craft or dollar store!
-
Scoops and Bowls: Include measuring cups or scoops to encourage pouring and transferring.
-
Natural Elements: If you’re feeling adventurous, you can add small pebbles, sticks, or even real flower petals to add different textures.
Step-by-Step Instructions
Now that you have your supplies ready, let’s put this bin together:
-
Prepare the Base: Fill your container with the base material. Aim for about 3-4 inches deep, allowing plenty of room for digging and exploring.
-
Add the Elements: Distribute the plastic flowers and any natural elements evenly across the base. Feel free to hide some seeds in the soil for an element of surprise!
-
Include Tools: Toss in the gardening tools, scoops, and any other items you want to encourage kids to use freely.
-
Engage Your Kids: Present the sensory bin to your children and allow them to explore independently. Ask them open-ended questions about what they see, feel, and want to create.
Making It Special: Tips for Engagement
Once you have your Flower Garden Sensory Bin assembled, consider these tips to enrich the experience further:
Invite Imagination
Encourage storytelling! Let your kids create a narrative around their garden. What flowers are they planting? What’s happening in their magical garden world? You might say something like, “What do you think is hiding beneath the soil?”
Introduce Routine Play Activities
Add some structure to playtime by introducing small challenges. For instance, ask them to plant five flowers in one row or to scoop a specific number of ‘seeds’ from one bucket to another. This can gently incorporate counting or simple math!
Keep It Seasonal
Change your bin’s theme based on the seasons. During spring, introduce pastel colors; in autumn, explore earthy tones with leaves. This not only keeps the activity fresh but also teaches kids about the cycles of nature.
Helpful Tips for Success
-
Supervision is Key: Always supervise your kids during sensory play. They may want to taste everything, and it’s a great time for gentle reminders about what’s safe.
-
Embrace the Mess!: Sensory play can get messy, and that’s OK! Lay down a protective mat under your bin to make clean-up easier, and remind yourself that mess often equals fun!
-
Incorporate Learning: Use this time to introduce new vocabulary words, like ‘soil,’ ‘petal,’ or ‘gardening’, making it both educational and entertaining.
Conclusion: Nurturing Little Moments of Joy
As parents, we wear many hats, and some days just getting through the routine feels like an achievement. However, introducing simple and joyful activities like the Flower Garden Sensory Bin can create lasting memories and provide your children with invaluable experiences. Remember, you don’t need to be a perfect parent to raise happy, loved kids—sometimes, it’s these little moments that ignite their imagination and inspire growth.
So, I encourage you to try this sensory play idea! Dive into those messes, celebrate the small wins, and remember—the world of parenting is as much about enjoying the journey as it is about teaching and guiding our children.
Happy gardening, my friends! 🌼
Optional FAQ Section
Q: How long can I expect my kids to play with the sensory bin?
A: Engagement can vary, but most kids will find joy in it for at least 30 minutes to an hour. Rotate out elements occasionally to keep the interest alive!
Q: Can I introduce this idea with older kids?
A: Absolutely! Adjust the complexity by encouraging older children to create intricate designs, share gardening tips, or incorporate mini gardening projects.
Q: What if my child has allergies to certain plants?
A: Always err on the side of caution. There are plenty of synthetic flower options available, and you can always just skip using any natural materials altogether if in doubt.
So, what are you waiting for? Grab those supplies and start your flower garden adventure today!
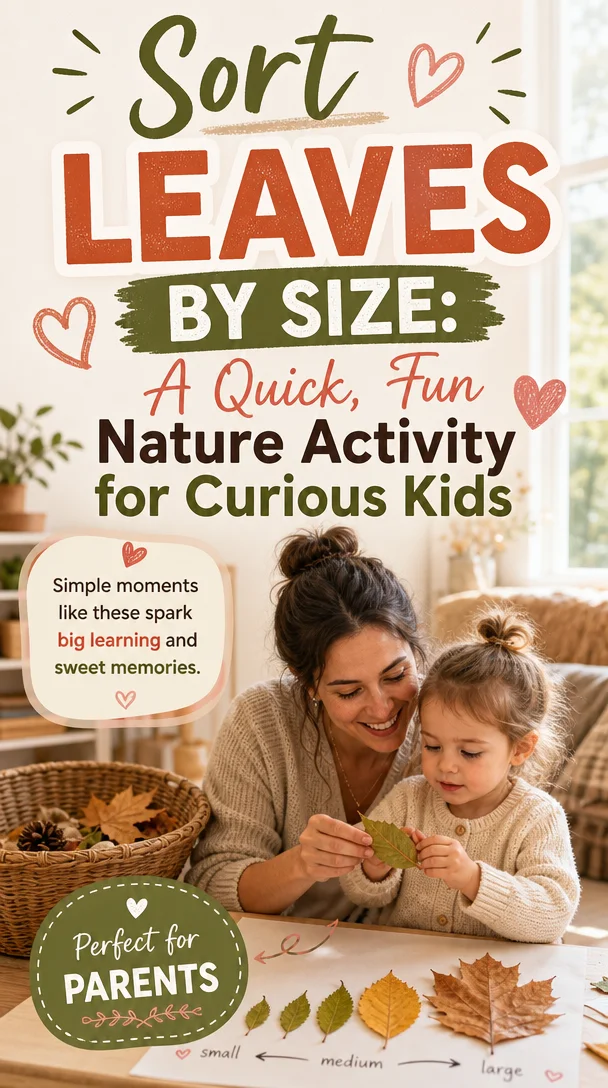
Sort Leaves by Size: A Quick, Fun Nature Activity for Curious Kids
Leaves Size-Sorting Kids Activity: A Fun Way to Engage Your Little Ones
Meta Description: Dive into a creative leaves size-sorting activity that supports your child’s learning and development. Get ready for fun, exploration, and family bonding!
Introduction
Picture this: it’s a crisp autumn morning, and your children are bursting with energy and curiosity as they step outside. Leaves of all shapes and sizes scatter the ground, creating a beautiful, colorful canvas for exploration. As parents, we want to create meaningful, engaging experiences that spark our little ones’ imaginations and foster a love for learning. That’s why today, I’m excited to share a delightful leaves size-sorting activity that not only captivates your child’s attention but also teaches valuable skills along the way!
We often find ourselves juggling various roles—and if you’re like me, you sometimes wonder how to combine fun with education without adding pressure to your already busy schedule. This leaves size-sorting activity is here to help! It’s simple, engaging, and offers a beautiful opportunity for connection with your kids. So, grab a warm cup of coffee, and let’s dive into this creative adventure that you can easily integrate into your family life!
Why Size-Sorting Activities Matter
Engaging your children in size-sorting activities brings numerous developmental benefits. Sorting helps enhance fine motor skills, boosts cognitive development, and teaches classification—skills that lay the foundation for early math understanding. Moreover, size-sorting activities encourage children to observe their surroundings, think critically, and express their discoveries.
The Benefits of the Leaves Size-Sorting Activity
- Fine Motor Skills Development: Picking up different sizes of leaves fosters dexterity and hand-eye coordination.
- Cognitive Growth: Children learn to compare, classify, and draw connections as they sort leaves based on size.
- Nurturing Creativity: This hands-on activity encourages imagination as children invent stories and scenarios about their findings.
- Emotional Bonding: Working together fosters a sense of teamwork and connection as you share in the excitement of discovery.
How to Set Up Your Leaves Size-Sorting Activity
Now that we understand the benefits, let’s explore how to create this enchanting leaves size-sorting activity! You don’t need elaborate materials or a large space; just some creative energy and a few simple steps!
Step 1: Gather Your Materials
- Leaves: Go on a nature walk to collect a variety of leaves in different sizes. Encourage your children to select leaves they find interesting, whether they are large oak leaves or tiny maple ones.
- Containers/Baskets: Use small baskets or containers to create sorting stations. You can even recycle old boxes to make it eco-friendly!
- Markers and Paper: Provide different colored markers and blank paper for your child to document their findings if they wish.
Step 2: Explore and Sort
Once you have collected your leaves, lay them out on a flat surface, and let the sorting begin! Here’s how you can guide your children through the activity:
- Discuss Sizes: Start by discussing the different sizes of leaves. Ask questions like, “Can you find a leaf that is bigger than your hand?” or “Which leaf is the smallest?”
- Sorting Time: Encourage your little ones to sort the leaves into different containers based on size—small, medium, and large. You’ll be amazed at how they interact with the leaves and each other during this process!
Tips for a Successful Sorting Experience
To ensure this activity is both enjoyable and educational, here are some practical tips:
- Be Patient: Allow your child to take the lead. If they want to sort leaves by color or shape instead, that’s perfectly fine! Follow their lead and let their creativity shine.
- Encourage Dialogue: Engage in conversations as they sort. Ask open-ended questions about their preferences and thoughts, like “Why do you think this leaf is larger than that one?”
- Integrate Learning: Use this opportunity to introduce concepts like weight or texture. Feel the leaves and discuss which ones are light and which are thick and sturdy.
Incorporating Other Learning Elements
If you want to expand this simple activity, consider adding other educational elements:
Additional Sorting Themes
- Colors: Sort the leaves by color, creating a vibrant spectrum.
- Textures: Talk about the differences in texture—smooth versus rough.
- Shapes: Incorporate shape sorting by categories, like pointy versus round leaves.
Nature Journals
Encourage your child to create a nature journal! After sorting, they can draw or write about their favorite leaves, what they learned, and the adventure of collecting them. This practice helps develop literacy skills while reminding them of the day’s discoveries!
Fun Conversations to Spark Imagination
Use this activity as a launching point for imaginative storytelling. Encourage your little ones to create tales about the leaves they collected. Ask questions like:
- “If this leaf could talk, what story would it tell?”
- “What adventures do you think this leaf has been on?”
These types of conversations not only stimulate their creativity but also enhance their communication skills. You’ll find yourself sharing laughter and creating beautiful memories with each story that unfolds.
Encouraging Teamwork and Family Bonding
Invite siblings, or the whole family, to join the leaves size-sorting fun! Working as a team allows everyone to learn from one another and encourages cooperative play. Plus, it’s an excellent way to bond as a family. Here are a few ideas to enhance teamwork during this activity:
- Create Groups: Split into teams and see who can find the highest number of leaves within a certain time. Celebrate the efforts of all with high-fives or snacks afterward!
- Build a Leaf Castle: Challenge your family to use the sorted leaves to construct a ‘leaf castle’ or ‘leaf monster.’ Collaborate on designs and enjoy the process together—this is where the magic happens!
Conclusion: Embrace the Joy in Simple Moments
Parenting isn’t just about teaching; it’s also about creating joyful, shared experiences with our children. The leaves size-sorting activity offers an effortless way to blend learning while embracing all the little magical moments springing from everyday life. Each leaf represents not only a unique feature of nature but also an opportunity for emotional connection and foundational education.
So, gather your family, head outdoors, and let the wonders of nature inspire your everyday learning. Remember, you don’t need to be a perfect parent; the goal is to raise happy, loved kids while still having a ton of fun along the way! You’re all doing a fantastic job, and every little effort counts. Happy sorting, and here’s to brighter days filled with laughter and discovery!
Optional FAQ Section
Q: What age group is this activity suitable for?
A: This activity can be adapted for children aged 2 and up. Toddlers can simply enjoy collecting and feeling the leaves, while older kids can engage with sorting and categorizing.
Q: Can this activity be done indoors?
A: Absolutely! If the weather isn’t ideal, you can collect leaves ahead of time and sort them indoors on a flat surface.
Q: How long should this activity take?
A: The duration can vary, but you can plan for about 20-30 minutes. However, your little ones may want to carry on longer, and that’s perfectly okay!
By making connections through simple activities like the leaves size-sorting, we build a foundational layer of love, learning, and laughter that lasts a lifetime. Happy parenting!