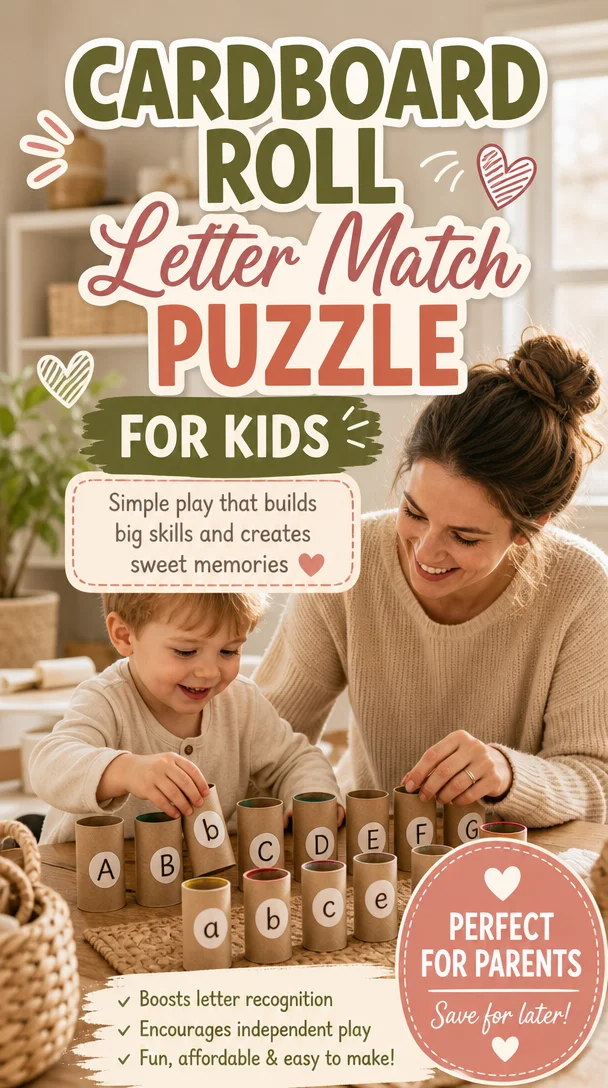
Cardboard Roll Letter Match Puzzle for Kids – Taming Little Monsters
Unlocking Fun and Learning: Cardboard Roll Letter Match Puzzle for Kids
Meta Description
Discover a fun and easy DIY Cardboard Roll Letter Match Puzzle that helps kids develop fine motor skills and letter recognition. Perfect for rainy days or busy bags!
Introduction
As a parent, you sometimes struggle to keep your little ones engaged while nurturing their minds. You know those moments when the rain pours outside, and you hear the dreaded, “I’m bored!”? Trust me, you’re not alone! We all want to create enriching experiences for our young explorers without feeling overwhelmed.
Cue the Cardboard Roll Letter Match Puzzle! This delightful and simple DIY project not only entertains but also enhances your child’s fine motor skills and letter recognition. Imagine your preschooler joyfully peeling and matching stickers! In just five minutes, you can set this up, making it an ideal activity for rainy days or busy bag adventures. Let’s dive into the fun and benefits of this educational puzzle!
Why Choose DIY Activities for Learning?
Creating engaging, hands-on learning experiences at home presents countless benefits. Here’s why you should consider DIY activities like the Cardboard Roll Letter Match Puzzle:
1. Encourages Independent Play
When kids dive into a DIY project, they take ownership of the activity, allowing you to catch a breather (or sip your now-warm coffee!). This independence also fosters creativity, giving them the freedom to experiment with their learning.
2. Supports Fine Motor Skills
Children develop necessary fine motor skills through hands-on activities. Your little ones will enhance their dexterity by peeling and matching stickers. Plus, it prepares them for activities like writing and buttoning shirts down the line!
3. Boosts Letter Recognition
As children play and learn, they become more familiar with the alphabet. This playful approach captures their interest better than flashcards, making it more likely they’ll remember their letters.
4. Perfect for Various Settings
Rainy days, busy bags, or quiet time at home—the Cardboard Roll Letter Match Puzzle fits seamlessly into any situation. This versatility keeps you prepared, no matter what life throws at you.
How to Create Your Cardboard Roll Letter Match Puzzle
Gather Your Materials
Let’s make this fun! Here’s what you’ll need:
- Cardboard rolls (think paper towel or toilet paper rolls)
- Colorful stickers or dots (make sure to have letters on them)
- Glue (optional)
- Markers or paints (optional, great for decoration)
- Scissors
Step-by-Step Instructions
-
Prep Your Rolls: Grab a few cardboard rolls and cut them to your desired sizes. Typically, cutting them in half works beautifully.
-
Decorate (If You Want): Use markers or paints to spruce up those rolls! This step adds a personalized touch, making the activity even more exciting for your child.
-
Create Letters: Write or stick letters on each roll. You can opt for uppercase, lowercase, or a mix—whatever best suits your child’s learning level.
-
Prepare Matching Stickers: Gather your colorful stickers or dots. Ensure you have the same number of letters as you have rolls.
-
Set Up the Game: Place the rolls in front of your child and scatter the stickers nearby. Watch them get excited as they see what they’ll be doing!
Playtime Begins!
Here’s where the real magic happens! Encourage your little one to pick a letter roll, find the corresponding sticker, and peel it off to stick on or match with the correct roll.
Tips for a Successful Puzzle Activity
Keep It Fun
Engagement is key! Use playful language, such as “Let’s go on a letter hunt!” to maintain your child’s excitement. Make it a game, and they’ll learn without even realizing it.
Incorporate Movement
Challenge them to hop to the stickers or do a little dance every time they successfully match a letter. This physical interaction keeps the energy high and reinforces their learning through movement!
Celebrate Small Wins
Positive reinforcement works wonders! Each time your child matches a letter correctly, celebrate with enthusiastic cheers or high-fives. This builds their confidence and motivates them to keep going.
Extension Ideas for Continued Learning
Now that your child has mastered the basics, how about building on that knowledge? Here are some fun extension activities:
Word Building
After they finish the matching puzzle, introduce simple words. Encourage your child to form short words using the letter rolls. It’s a natural next step that sparks curiosity about language!
Alphabet Games
Turn those rolls into a game! Mix them up and ask your child to arrange them in alphabetical order. You can also challenge them to say words that start with each letter they pick.
Themed Activities
Consider different themes for the stickers. Use animals, colors, or even favorite cartoon characters that match the letters! This personalization keeps your child invested and excited about learning.
Encouraging Emotional Growth
Remember, as parents, we play a pivotal role in shaping our children’s emotional development. Here are some strategies to incorporate into playtime:
Open Conversations
Alongside learning, use this time to engage your child in conversations about feelings and emotions. Ask questions like, “How do you feel when you find the letter ‘M’?” Such discussions help them identify their feelings and learn to articulate them.
Share Your Own Struggles
Show them that making mistakes is okay. Share a story when you found something challenging and how you overcame it. This builds resilience and normalizes struggles, helping your child understand that growth often comes from trying again.
Conclusion
Creating the Cardboard Roll Letter Match Puzzle empowers you and your child while turning learning into a joyful, memorable experience! Embrace the messiness of parenting and celebrate those small wins with your little monster. By fostering their fine motor skills and letter recognition through this simple DIY, you build a strong foundation for their future learning—without piling on any extra pressure.
Remember, you don’t have to be a perfect parent to provide enriching experiences. Each little moment contributes to their growth, and you’re doing an incredible job just by being there for them!
So the next time the clouds roll in, or you find yourself needing a low-stress activity, whip out those cardboard rolls and let the fun—and learning—begin! You’ve got this, mama (or dad)!
Optional FAQ Section
Q: Can I use different types of stickers?
A: Absolutely! Use any stickers that your child enjoys. You can even let them decorate the letters with pictures of their favorite characters.
Q: What age group is this activity suitable for?
A: This activity typically works well for preschoolers, but you can adjust the complexity for older children by adding more letters or encouraging them to create words.
Q: How can I make it more educational?
A: You can add fun facts or words associated with each letter. For example, "A is for Apple! What’s your favorite fruit?" Keep the conversation flowing.
Q: Can I participate in the activity?
A: Involve yourself! Kids love when parents join in. Play together to make it a bonding moment that fosters learning and fun.
May your days be filled with laughter, love, and learning!
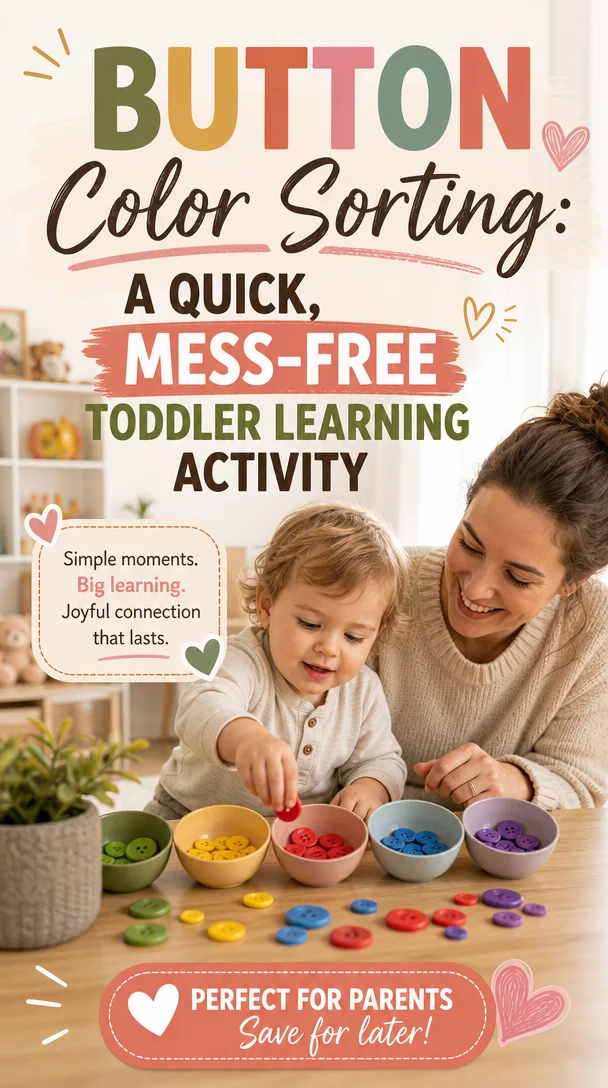
Button Color Sorting: A Quick, Mess-Free Toddler Learning Activity
Fun and Easy Button Color Sorting: Engage Your Kids While Enhancing Their Skills
Meta Description
Discover a fun Button Color Sorting activity to help your kids develop color recognition and fine motor skills using everyday craft supplies.
Introduction
Do you ever find yourself wishing you could turn everyday moments into magical learning experiences with your kids? Well, if you’ve been looking for an engaging way to help your little ones recognize colors, then get ready for an adventure! Today, I’ll introduce you to a delightful Button Color Sorting game that not only captivates your child’s attention but also promotes essential skills like color identification and fine motor development.
Imagine your toddler’s excitement as they dive into a sea of colorful buttons, sorting and categorizing them with joy. With just a handful of inexpensive craft supplies, you can create a fun learning environment right at home. Not only will this activity take mere minutes to prepare, but it also allows you to sneak in a bit of education while creating lasting memories. Let’s jump right in and explore how to make and play this fabulous game together!
What You’ll Need for Button Color Sorting
Creating your Button Color Sorting game is quick and easy. Here are the supplies you’ll need:
- A mix of colorful buttons (you can use old ones from clothes or purchase a cheap set)
- A few small containers or bowls (plastic cups work great!)
- Optional: A colored sheet of paper or fabric to serve as a sorting base
Setting Up the Game
- Gather Your Buttons: Start by collecting buttons of various sizes, shapes, and colors. If you don’t have enough buttons at home, check your local craft store or online shop. It’s an inexpensive way to score lots of colors!
- Prepare Your Sorting Base: You can place a colored sheet of paper on the table to make this more visually appealing and inviting. This will also serve as a backdrop for the activity.
- Set Up Your Containers: Arrange your containers in a row or circle, labeling them with different colors if you want to make it a bit educational. For example, place a red container, a blue container, and so on.
With your materials ready, it’s time to play!
How to Play Button Color Sorting
This activity works beautifully for kids aged 2 and up. Here’s how to introduce the game to your little ones:
Step 1: Introduce the Colors
Start by discussing different colors with your child. Point out each one as you place buttons in front of them. “Look at this sunny yellow button! Where do you think it should go?” Prompt your child to identify the colors and encourage them to name the buttons they see.
Step 2: Sorting Time
Encourage your child to pick up the buttons one by one. Ask them to place each button into the correct container according to its color. Make this process playful by cheering them on or adding fun sounds as they successfully sort the buttons. “Woohoo! Great job with the blue one!”
Step 3: Count and Celebrate
Once your child sorted all the buttons, celebrate their efforts! Count how many buttons are in each container together. This little twist adds an element of numeracy to the activity, enhancing both their math and color recognition skills. You can say, “How many red buttons did you find? Let’s count together!”
Benefits of Button Color Sorting
Not only is Button Color Sorting a fantastic indoor activity for rainy days, but it also offers numerous benefits for your child’s development:
Enhances Fine Motor Skills
The act of picking up small buttons and placing them in specific containers encourages your child to practice their hand-eye coordination and dexterity. These skills are crucial as they prepare for more complex tasks like writing.
Promotes Color Recognition
Sorting colors reinforces your child’s ability to recognize and differentiate colors. By associating colors with objects they see daily, they’ll become more adept at identifying them in their environment.
Sparks Creativity
Feel free to expand this activity by adding more elements! Encourage your child to use larger items or different shapes. This creative exploration fosters imaginative thinking.
Encourages Problem-Solving Skills
As children sort buttons, they engage in problem-solving by determining the correct container for each button. This teaches them to think critically and make independent decisions.
Helpful Tips for Success
Here are some actionable parenting tips to make this activity even more enjoyable and educational:
Create a Colorful Environment
Set the tone by surrounding your child with colorful items. Decorate the play area with artwork featuring colors, or include colorful toys that they’re familiar with.
Add a Story Element
Make this activity more exciting by creating a story around it. Perhaps the buttons came from a magical land where colors come to life! This makes the experience both educational and imaginative.
Turn Competition into Teamwork
If you have multiple kids, create an informal team challenge. Who can sort their buttons the fastest? Keeping the spirit light and fun encourages collaboration rather than competition.
Expand the Lesson
Once your child masters sorting, introduce new concepts like primary and secondary colors, or mix colors to create new ones. After all, learning can happen in so many creative ways!
Share Your Experience
Capture the fun moments during the activity with photos and share them on social media. You can inspire other parents by highlighting the joy and learning that happens during these simple activities!
Conclusion
In the whirlwind of parenting, it’s often the simplest activities that create the most meaningful connections. Your little ones don’t need extravagant toys or elaborate setups; they just need your warmth and encouragement to flourish. Through this fun Button Color Sorting game, you’ll not only enhance their skills but also create precious memories that both you and your child will cherish for years to come.
Remember, no one expects you to be a “perfect” parent. It’s about finding these small moments of joy and learning together, and you’re doing wonderfully! So grab those buttons and embark on this colorful adventure with your little one. You’ve got this, and together, you can make precious moments that truly count!
FAQs
How many buttons do I need for the game? You’ll want to have a variety of buttons, but a great rule of thumb is to gather around 20-30 buttons for sorting.
What age is Button Color Sorting suitable for? This activity generally suits toddlers aged 2 years and up, but even older children can enjoy it with added complexity, like counting or creating patterns.
Can I use other items for sorting? Absolutely! Feel free to use pom-poms, stones, or colored paper clips. The key is to use items that are safe and manageable for your child.
What if my child gets frustrated? If they find it challenging, offer gentle guidance and reassurance. Turn it into a fun game rather than strictly adhering to the rules. The goal is to enjoy the moment!
Now it’s your turn to create a fun-filled learning experience with your kids. Happy sorting!