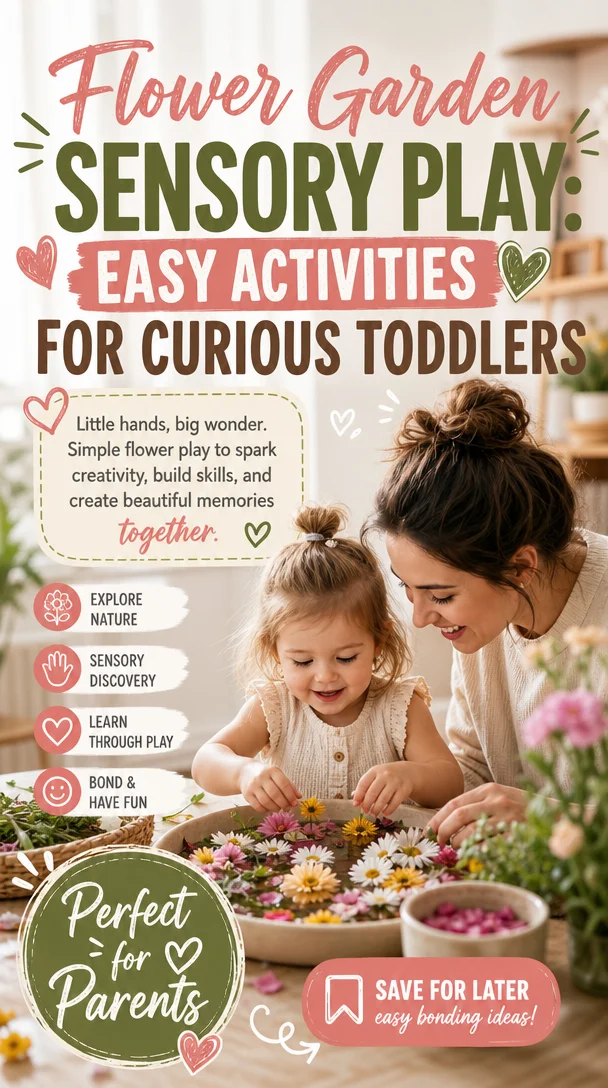
Flower Garden Sensory Play: Easy Activities for Curious Toddlers
Create a Vibrant Flower Garden Sensory Play Experience for Your Kids
Meta Description:
Discover the joy of a Flower Garden Sensory Bin! This engaging sensory play idea promotes creativity and development while providing an easy, fun activity for your toddlers.
Introduction
Do you ever feel like your little ones are brimming with energy, eager to explore every corner of your home? I get it! As a parent, those moments can feel both magical and overwhelming. But fear not! Engaging your child in creative play can turn that energy into a delightful experience. Today, let’s dive into a fun and easy sensory play idea that will keep their curiosity alive while fostering creativity: the Flower Garden Sensory Bin!
Imagine the joy of watching your child’s face light up as they dive into a world of colors, textures, and the joys of gardening—all from the comfort of your living room or backyard. This sensory bin not only captivates their imagination but also enhances their fine motor skills, encourages language development, and provides a fabulous opportunity for you to bond. So grab your supplies, and let’s get started on creating a beautiful garden without the muddy shoes!
What is a Sensory Bin?
Before we plant our gardening seeds, let’s quickly discuss what a sensory bin is, in case you’re new to this concept. A sensory bin is a container filled with materials that stimulate a child’s senses. It allows for open-ended play, where kids can explore, discover, and learn at their own pace. With a mix of tactile elements and creative themes—like our Flower Garden—you can transform any ordinary day into an extraordinary adventure of learning and discovery.
Setting Up Your Flower Garden Sensory Bin
Creating a Flower Garden Sensory Bin is an enjoyable activity you can do together with your children. Not only does it foster their engaging exploration, but it also allows them to connect with nature in a playful way. Here’s what you’ll need to set up your sensory garden:
Supplies Needed
-
Base Materials:
- A large plastic tub or bin (I love using clear bins so the kids can see the contents!)
- Kinetic sand or potting soil for a realistic gardening feel
- Rice, or even dried beans for added texture
-
Flower Supplies:
- Artificial flowers (think colorful blooms in various sizes)
- Small gardening tools (toy spades, rakes, watering cans)
- Pots for planting (you can even use recycled containers or cups)
- Natural elements (pine cones, pebbles, or real leaves)
-
Decorative Touches:
- Gardening gloves for your little ones (they’ll love wearing them!)
- Colorful bowls or scoops for sorting and playing
- Optional: Bug figurines or butterflies for added fun!
How to Assemble the Bin
-
Start with the Base: Pour the kinetic sand or potting soil into the bin. Spread it out evenly to create a gardening playground.
-
Add the Flowers: Place the artificial flowers strategically around the bin. Let your kids decide where each flower goes!
-
Incorporate Tools & Accessories: Scatter the gardening tools and pots throughout the sensory bin. This invites your child to engage in pretend play—“Let’s plant flowers!” “I need a watering can!”
-
Get Creative: Drop in some natural elements, like pebbles and leaves, to enhance the sensory experience and spark imagination.
-
Time to Play: Invite your child to explore. Allow them to dig, plant, water, and create their own floral masterpiece.
Engaging Activities with Your Flower Garden Sensory Bin
Your Flower Garden Sensory Bin serves as more than just a fun activity—it’s a multifaceted learning experience! Here are some ways to bring more depth to your child’s playtime:
1. Counting Flowers:
Encourage your little ones to count their flowers, pots, or gardening tools. Use this as an opportunity to practice counting together, or even introduce simple math concepts like addition and subtraction.
2. Talk About Colors and Shapes:
Engage your child’s imagination by discussing the colors of the flowers. Ask them to sort the flowers by color or shape, enhancing their language skills. For example, “Which flower is the biggest?” or “Can you find the purple flower?”
3. Role Play:
Tap into their imaginative side by role-playing as gardeners. Take turns from planting to watering, and even selling flowers! Dialogue like, “I’m planting a sunflower! What will you plant?” encourages creativity and communication.
4. Sensory Exploration:
Discuss the textures and scents they experience. Touch the sand, feel the smooth plastic flowers, and smell the fresh air. This encourages sensory awareness and vocabulary development.
5. Storytime Connection:
Create stories around their experiences. Ask, “What happens to the flowers if they don’t get water?” This activates their critical thinking and creativity.
Practical Tips for a Successful Sensory Play Experience
As you embark on this engaging sensory journey, here are a few practical tips to keep in mind:
-
Set Up Outside (If Possible): If you can, consider setting up the sensory bin outdoors. This not only allows for easier clean-up but also connects your little one directly to nature.
-
Control the Mess: Keep a dustpan and broom handy for easy cleanup afterwards. Sometimes the mess adds to the fun!
-
Supervise Closely: While sensory experiences are a great opportunity for independent play, always keep a close eye to ensure safe play.
-
Be Prepared for Questions: Your child’s curiosity will likely lead to a myriad of questions. Prepare yourself to engage in meaningful conversations about gardening, nature, and the world around them.
-
Rotate Materials: Change out some supplies every few weeks to keep the activity fresh and exciting.
Celebrating Small Wins in Sensory Play
Remember, the goal of sensory play is not just to entertain but to create meaningful moments. Celebrate the small wins: their first plant, their courage to explore new textures, or simply seeing the joy on their face. Every little step matters in building confidence and curiosity in your child.
Here’s a quick tip: take photos during their play! Capturing these moments not only preserves memories but also allows you to reflect on how they’ve grown, both in skills and confidence.
Encouraging Conclusion
As you and your child dig into this Flower Garden Sensory Bin, know that you are fostering their development in a fun, engaging way. Remember, parenting isn’t about being perfect — it’s about creating loving, learning experiences. Allowing your child the freedom to explore, observe, and play nurtures their imagination and fuels their sense of wonder.
So, what are you waiting for? Grab those supplies and watch as your little one blossoms into a joyful gardener! These small moments can offer big opportunities for connection, so lean into the fun and enjoy every second.
Optional FAQ Section
Q: How long can we keep the sensory bin active?
A: As long as you maintain the materials, the sensory bin can stay active for weeks! Just remember to periodically clean and check for any signs of wear.
Q: Can I tailor this idea for older kids?
A: Absolutely! Introduce more complex concepts like plant care, seed germination, or even discussions on ecosystems for older children.
Q: What if my child doesn’t seem interested?
A: Engage them by demonstrating the first few steps of play, or involve them in the setup process. Sometimes, the excitement comes from being part of the creation!
Invite your little ones into the magic of gardening with this Flower Garden Sensory Bin. Enjoy the laughter, the learning, and the beautiful chaos that comes with it! Happy parenting! 🌼
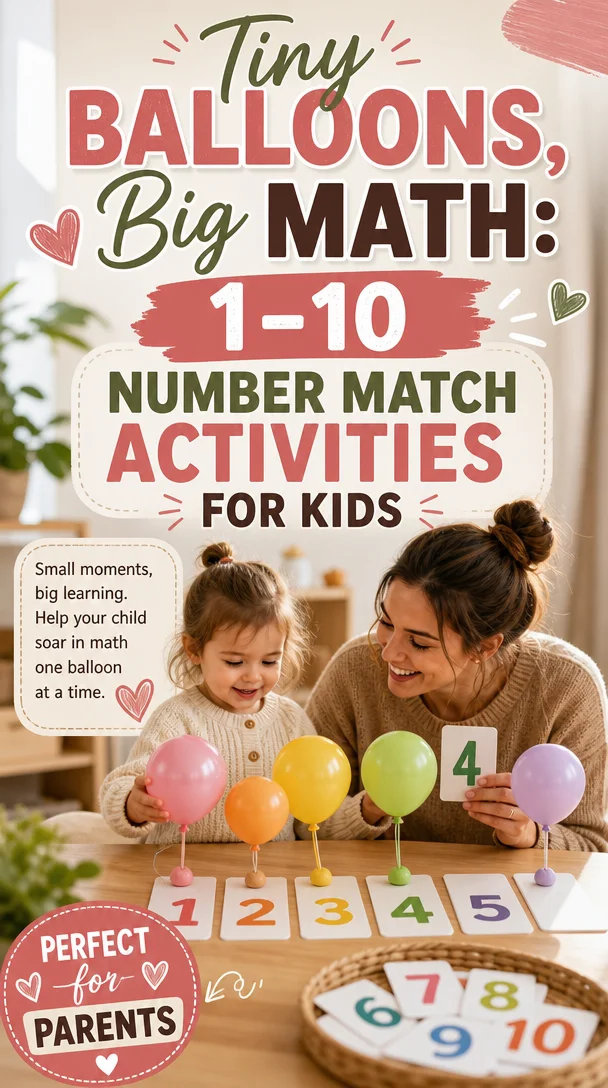
Tiny Balloons, Big Math: 1–10 Number Match Activities for Kids
🎈 Balloon Number Match: Learn 1–10 the Fun Way!
Meta Description
Discover a fun balloon number matching activity for toddlers and preschoolers to enhance number recognition, fine motor skills, and early math interest!
Introduction
Hey there, fellow parent! If you’re anything like me, you know that teaching little ones can feel like a delightful whirlwind of challenges and joy all rolled into one. We want our kids to learn and grow, but let’s be honest: sometimes it’s tough to make learning exciting! That’s why I’m thrilled to share a simple and colorful activity that combines fun with educational value — the Balloon Number Match! 🎈
Imagine your child giggling with excitement as they explore numbers 1 through 10 using vibrant, floating balloons. This is more than just a game; it’s a hands-on experience that fosters learning while keeping the mood light and playful. Whether you’re at home or in the classroom, this engaging activity will not only enhance number recognition but also build fine motor skills and spark an early love for math. Let’s dive into how to make learning numbers not just educational, but absolutely enjoyable!
Why Choose a Balloon Number Match?
As parents, we all strive to provide our children with engaging and effective learning opportunities. The Balloon Number Match activity offers numerous benefits for toddlers and preschoolers aged 2–5, including:
Enhances Number Recognition
By visually connecting each number with a balloon, children strengthen their ability to recognize numbers. This activity helps them avoid frustration while learning, making it feel more natural.
Boosts Visual Discrimination
Matching balloons to their respective numbers challenges kids to differentiate between various shapes and colors, honing their visual discrimination skills in a fun way.
Strengthens Fine Motor Skills
The act of grasping, lifting, and matching balloons requires hand-eye coordination, which is essential for developing fine motor skills necessary for writing and other tasks.
Encourages Independent Learning
This activity allows children to explore at their own pace. By enabling them to take the lead, you foster their independence and confidence in learning.
Promotes Early Math Interest
Fun and enjoyable activities like this one create a positive association with math from an early age. Kids will associate numbers with joy, laying the groundwork for future learning.
How to Set Up Your Balloon Number Match Activity
I promise, setting up this activity is as easy as pie (or should I say balloon?). Here’s what you need:
Materials Needed
- 10 balloons (one for each number from 1 to 10)
- Permanent markers (for writing numbers on balloons)
- A large surface area (like a wall or a table) for matching
- Optional: decorative items like stickers or ribbons to embellish the balloons
Step-by-Step Instructions
-
Inflate the Balloons: Inflate your balloons and tie them securely. If you’re feeling extra creative, you can use colorful balloons for each number range.
-
Write the Numbers: Use permanent markers to write numbers 1 through 10 on each balloon. You might even consider adding fun faces or characters to each balloon to bring your “cast” of numbers to life!
-
Prepare the Matching Surface: Choose a large surface area where your child can easily access the balloons. A wall with tape or a flat space on the floor works wonderfully.
-
Introduce the Activity: Gather your little one and explain the activity with lots of enthusiasm. Tell them they’ll be matching numbers with their balloon friends!
-
Get Matching: Encourage your child to find the correct balloon with the designated number and match it with the corresponding number on the surface. You can show them how to match a few first and then let them take over!
Tips for Maximizing Fun and Learning
Add a Splash of Competition
Make it a friendly race! Time them as they match the balloons and challenge them to beat their previous time. Just be sure to remind them that it’s all about the fun!
Create a Balloon Number Hunt
Hide the balloons around a room and turn the activity into a scavenger hunt. This adds an element of surprise that kids love. As they find each balloon, have them shout out the number!
Use Different Sizes for Variation
Incorporate various balloon sizes to match different numbers. For instance, the number "1" can be represented by a smaller balloon, and "10" can be a large, eye-catching one. This visual difference adds an extra layer of engagement.
Incorporate Songs and Rhymes
As you match numbers, sing songs or rhymes related to numbers. Making connections through music enhances memory retention while creating a joyful atmosphere.
Celebrate Small Wins
Every time your child correctly matches a balloon, cheer them on! Celebrating their victories no matter how small fosters encouragement and confidence.
Encouraging Understanding of Numbers Beyond the Activity
After the Balloon Number Match, it’s essential to weave the concept of numbers into everyday life. Here are some simple ways to build on this foundational activity:
Count Everyday Objects
When you’re at home or on a walk, point out objects and count them together. “Look at those five ducks in the pond!” This real-life application reinforces their number recognition effortlessly.
Use Cooking as a Learning Tool
While cooking, involve your child in measuring ingredients. Ask questions like, “Can you put in three scoops of flour?” This hands-on task not only teaches them numbers but also an essential life skill!
Explore Number Books Together
Incorporate fun learning through books that focus on numbers. Read together and encourage them to count the items on each page.
Create a Math Journal
Invite your little one to keep a journal where they can draw their favorite numbers or count objects they see daily. This offers a creative outlet while reinforcing their learning.
Conclusion
Parenting can often feel like an uphill battle, but remember: it’s all about celebrating those little moments. The Balloon Number Match is just one simple way to infuse joy into the learning process, encouraging your child to explore and grow with numbers in a fun, engaging way.
So grab some balloons, reduce the pressure of perfection, and enjoy the playful path of learning together. You’re doing great, and every little effort counts! With creativity, love, and a sprinkle of fun, you can make numbers a favorite topic at home. You’ve got this, and I’m cheering you on every step of the way! 🎈💛
Frequently Asked Questions
1. What age group is the Balloon Number Match suitable for?
This activity is perfect for toddlers and preschoolers aged 2 to 5, but older children may enjoy it as a fun refresher!
2. How long does the activity typically last?
The time can vary, but expect to spend about 20–30 minutes. Remember, it’s always okay to extend it if your child is having fun!
3. Can I adapt this activity for a classroom setting?
Absolutely! This activity translates well to a classroom. Consider having small groups practice matching to encourage teamwork and collaboration!
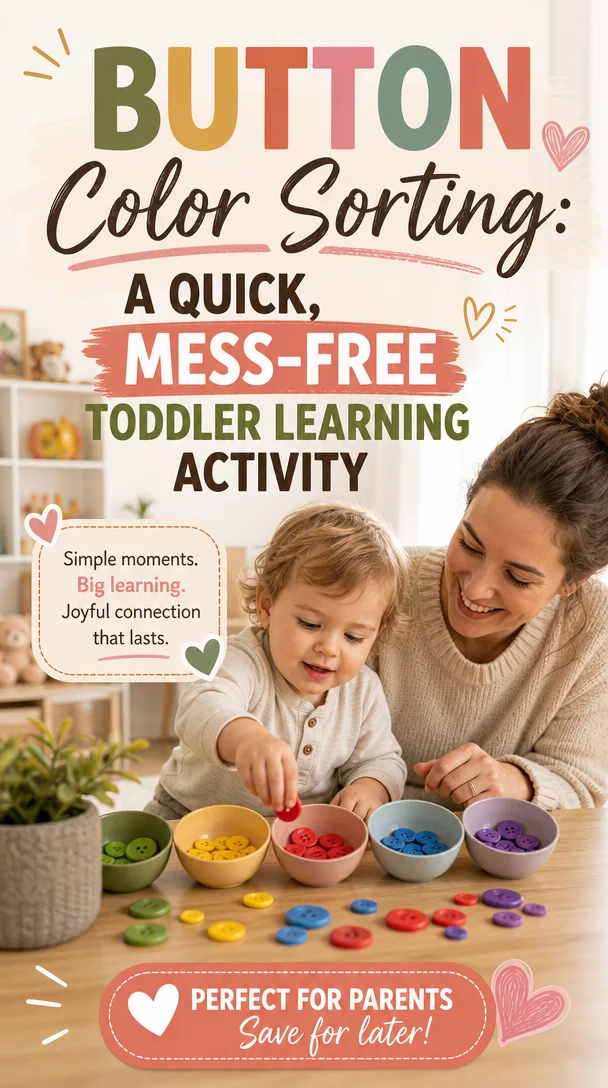
Button Color Sorting: A Quick, Mess-Free Toddler Learning Activity
Fun and Easy Button Color Sorting: Engage Your Kids While Enhancing Their Skills
Meta Description
Discover a fun Button Color Sorting activity to help your kids develop color recognition and fine motor skills using everyday craft supplies.
Introduction
Do you ever find yourself wishing you could turn everyday moments into magical learning experiences with your kids? Well, if you’ve been looking for an engaging way to help your little ones recognize colors, then get ready for an adventure! Today, I’ll introduce you to a delightful Button Color Sorting game that not only captivates your child’s attention but also promotes essential skills like color identification and fine motor development.
Imagine your toddler’s excitement as they dive into a sea of colorful buttons, sorting and categorizing them with joy. With just a handful of inexpensive craft supplies, you can create a fun learning environment right at home. Not only will this activity take mere minutes to prepare, but it also allows you to sneak in a bit of education while creating lasting memories. Let’s jump right in and explore how to make and play this fabulous game together!
What You’ll Need for Button Color Sorting
Creating your Button Color Sorting game is quick and easy. Here are the supplies you’ll need:
- A mix of colorful buttons (you can use old ones from clothes or purchase a cheap set)
- A few small containers or bowls (plastic cups work great!)
- Optional: A colored sheet of paper or fabric to serve as a sorting base
Setting Up the Game
- Gather Your Buttons: Start by collecting buttons of various sizes, shapes, and colors. If you don’t have enough buttons at home, check your local craft store or online shop. It’s an inexpensive way to score lots of colors!
- Prepare Your Sorting Base: You can place a colored sheet of paper on the table to make this more visually appealing and inviting. This will also serve as a backdrop for the activity.
- Set Up Your Containers: Arrange your containers in a row or circle, labeling them with different colors if you want to make it a bit educational. For example, place a red container, a blue container, and so on.
With your materials ready, it’s time to play!
How to Play Button Color Sorting
This activity works beautifully for kids aged 2 and up. Here’s how to introduce the game to your little ones:
Step 1: Introduce the Colors
Start by discussing different colors with your child. Point out each one as you place buttons in front of them. “Look at this sunny yellow button! Where do you think it should go?” Prompt your child to identify the colors and encourage them to name the buttons they see.
Step 2: Sorting Time
Encourage your child to pick up the buttons one by one. Ask them to place each button into the correct container according to its color. Make this process playful by cheering them on or adding fun sounds as they successfully sort the buttons. “Woohoo! Great job with the blue one!”
Step 3: Count and Celebrate
Once your child sorted all the buttons, celebrate their efforts! Count how many buttons are in each container together. This little twist adds an element of numeracy to the activity, enhancing both their math and color recognition skills. You can say, “How many red buttons did you find? Let’s count together!”
Benefits of Button Color Sorting
Not only is Button Color Sorting a fantastic indoor activity for rainy days, but it also offers numerous benefits for your child’s development:
Enhances Fine Motor Skills
The act of picking up small buttons and placing them in specific containers encourages your child to practice their hand-eye coordination and dexterity. These skills are crucial as they prepare for more complex tasks like writing.
Promotes Color Recognition
Sorting colors reinforces your child’s ability to recognize and differentiate colors. By associating colors with objects they see daily, they’ll become more adept at identifying them in their environment.
Sparks Creativity
Feel free to expand this activity by adding more elements! Encourage your child to use larger items or different shapes. This creative exploration fosters imaginative thinking.
Encourages Problem-Solving Skills
As children sort buttons, they engage in problem-solving by determining the correct container for each button. This teaches them to think critically and make independent decisions.
Helpful Tips for Success
Here are some actionable parenting tips to make this activity even more enjoyable and educational:
Create a Colorful Environment
Set the tone by surrounding your child with colorful items. Decorate the play area with artwork featuring colors, or include colorful toys that they’re familiar with.
Add a Story Element
Make this activity more exciting by creating a story around it. Perhaps the buttons came from a magical land where colors come to life! This makes the experience both educational and imaginative.
Turn Competition into Teamwork
If you have multiple kids, create an informal team challenge. Who can sort their buttons the fastest? Keeping the spirit light and fun encourages collaboration rather than competition.
Expand the Lesson
Once your child masters sorting, introduce new concepts like primary and secondary colors, or mix colors to create new ones. After all, learning can happen in so many creative ways!
Share Your Experience
Capture the fun moments during the activity with photos and share them on social media. You can inspire other parents by highlighting the joy and learning that happens during these simple activities!
Conclusion
In the whirlwind of parenting, it’s often the simplest activities that create the most meaningful connections. Your little ones don’t need extravagant toys or elaborate setups; they just need your warmth and encouragement to flourish. Through this fun Button Color Sorting game, you’ll not only enhance their skills but also create precious memories that both you and your child will cherish for years to come.
Remember, no one expects you to be a “perfect” parent. It’s about finding these small moments of joy and learning together, and you’re doing wonderfully! So grab those buttons and embark on this colorful adventure with your little one. You’ve got this, and together, you can make precious moments that truly count!
FAQs
How many buttons do I need for the game? You’ll want to have a variety of buttons, but a great rule of thumb is to gather around 20-30 buttons for sorting.
What age is Button Color Sorting suitable for? This activity generally suits toddlers aged 2 years and up, but even older children can enjoy it with added complexity, like counting or creating patterns.
Can I use other items for sorting? Absolutely! Feel free to use pom-poms, stones, or colored paper clips. The key is to use items that are safe and manageable for your child.
What if my child gets frustrated? If they find it challenging, offer gentle guidance and reassurance. Turn it into a fun game rather than strictly adhering to the rules. The goal is to enjoy the moment!
Now it’s your turn to create a fun-filled learning experience with your kids. Happy sorting!