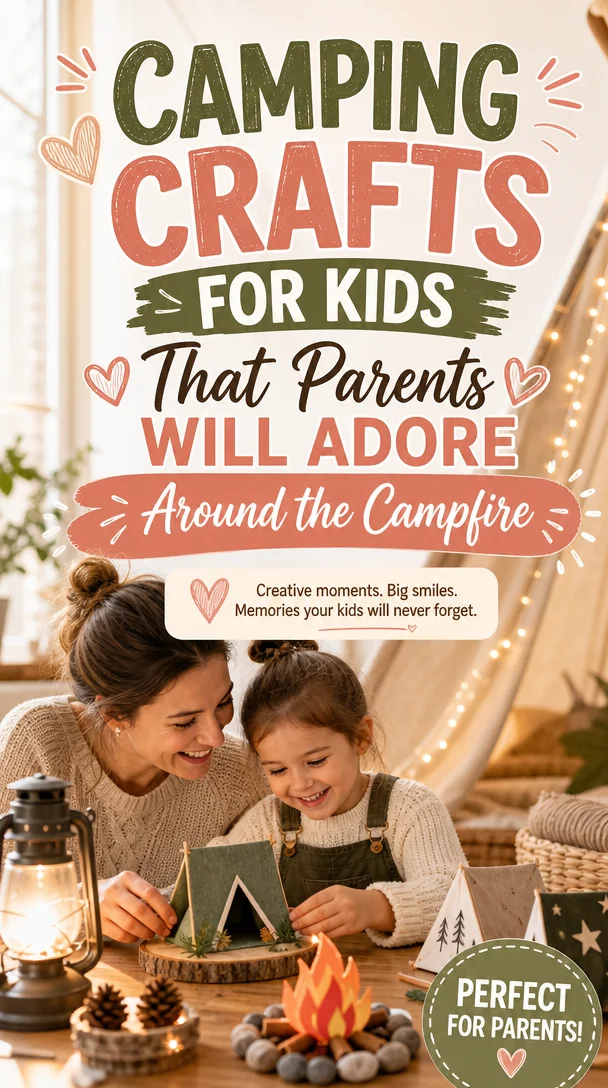
Camping Crafts for Kids That Parents Will Adore Around the Campfire
15 Camping Crafts for Kids That Parents Will Love Too – Camper Outdoor
Meta Description
Discover 15 fun camping crafts for kids that parents will love too! These engaging projects will spark creativity and create lasting memories in the great outdoors.
Introduction
As the sun peeks over the horizon and the fragrance of pine trees fills the air, nothing quite compares to the magic of camping with family. Whether you’re nestled in a cozy tent or parked next to your camper at a beautiful campsite, those moments spent together create memories that last a lifetime. However, let’s face it: keeping kids entertained while surrounded by nature can sometimes feel daunting.
That’s where crafting comes in! Imagine transforming everyday camping items into artsy projects that entertain your little ones while fostering creativity. In this article, I’ll share 15 camping crafts for kids that parents will love too—yes, you read that right. These projects not only keep the kiddos engaged, but they also forge deeper connections and can be enjoyed by everyone, including you! So grab a thermos of hot cocoa, find a comfy spot, and let’s dive into these cheerful camping crafts that are sure to brighten those outdoor days.
Creative Camping Crafts for Kids
1. Nature Scavenger Hunt Collage
What You’ll Need:
- Leaves, flowers, and stones collected during a nature walk
- Cardboard or thick paper
- Glue
- Markers or crayons
Kick off your outdoor adventure with a nature scavenger hunt! Craft a list of items for your kids to find, like different types of leaves, colorful flowers, and interesting stones. When they gather their treasures, help them create a collage on cardboard. Not only does this craft encourage exploration, but it also allows kids to express their artistic side!
2. DIY Nature Paintbrushes
What You’ll Need:
- Sticks
- Leaves, pine needles, feathers
- Paint
- Paper
Craft unique paintbrushes using materials found in nature! Invite your kids to decorate sticks with leaves, flowers, and feathers. After they’ve made their nature paintbrushes, provide them with some paint and paper. Watching their creativity flow will show you that nature can inspire beautiful art!
3. Stone Animals
What You’ll Need:
- Smooth stones
- Paint or permanent markers
- Clear sealant (optional)
Turn your camping site into a mini zoo by painting stones as animals! Gather smooth stones, paint them with colors and patterns, or use markers to draw cute animal faces. This simple craft allows for endless creativity, and the finished products can decorate your campsite or garden at home after the trip.
4. Pinecone Bird Feeders
What You’ll Need:
- Pinecones
- Peanut butter
- Birdseed
- String
Educate your kids about nature and the local wildlife by making pinecone bird feeders! Cover the surface of a pinecone in peanut butter and roll it in birdseed. Finally, tie a string around the top and hang it from a tree branch. Watching birds flit about will captivate your children, promoting a love for the environment.
5. Campfire Story Stones
What You’ll Need:
- Smooth stones
- Paint or permanent markers
- Clear sealant (optional)
Encourage storytelling under the stars with campfire story stones! Paint different images or symbols on rocks that can spark stories. As your family gathers around the campfire, pass the stones around and let each person create a part of the story, building a colorful narrative together.
6. Wooden Stick Sculptures
What You’ll Need:
- Sticks
- Twine or string
- Creativity!
Gather sticks of different shapes and sizes. Challenge your kids to build sculptures by tying the sticks together with twine or string. This hands-on activity allows them to explore their creativity while working with natural materials.
7. S’mores Craft Stick Puppets
What You’ll Need:
- Craft sticks
- Felt or paper
- Glue
- Markers
Create adorable s’mores puppets to reenact the camping experience! Use craft sticks as the base and felt or paper to craft the ingredients of a s’more. These playful puppets are perfect for storytelling and entertainment, bringing a sweet twist to camp crafts.
8. Nature Imprint Art
What You’ll Need:
- Leaves and flowers
- Paint
- Paper
Kids can create beautiful nature imprints with leaves and flowers found around the campsite. Paint one side of the leaf or flower, press it firmly onto paper, and peel it off to reveal a lovely impression. This activity introduces kids to the art of nature while allowing them to make their own unique masterpieces.
9. Campfire Cooking Kits
What You’ll Need:
- Cardboard box
- Paper plates
- Kitchen utensils
- Supply of instructions for campfire cooking
Help your little chefs prepare for the next campfire by creating personalized cooking kits! Use a cardboard box to hold paper plates, utensils, and simple campfire recipes, allowing your children to feel involved in meal preparations. This activity sparks excitement and teaches valuable cooking skills.
10. Tinfoil Art
What You’ll Need:
- Tinfoil
- Markers or specialty paints
Unleash your kids’ creativity with tinfoil art—it’s simple, reflective, and loads of fun! Let them explore shapes and designs by molding tinfoil into sculptures or backgrounds for painted scenes. This hands-on activity allows for tactile learning and creativity.
11. DIY Campfire Lanterns
What You’ll Need:
- Plastic water bottles
- LED tea lights
- Paint or markers
- Twine
Light up your campsite with DIY lanterns! Clean out plastic water bottles and decorate them with paint or markers. Place an LED tea light inside each bottle to illuminate your evening gatherings. These lanterns add a special touch to night-time activities, creating a cozy atmosphere at your campsite.
12. Friendship Bracelets
What You’ll Need:
- Colorful string or yarn
- Scissors
Encourage bonding among siblings or friends by crafting friendship bracelets. Kids can create simple braids or knots using colorful string to symbolize their love and friendship. It’s a beautiful way to let them express themselves and remember their camping adventures.
13. Nature Bingo
What You’ll Need:
- Bingo cards with nature items (leaves, birds, flowers)
- Markers or stones for marking
Make exploring the outdoors a game with nature bingo! Create bingo cards featuring common flora and fauna you might encounter during your camping trip. As you trek through the woods, check off each item you spot. This engaging activity encourages curiosity and observation skills.
14. Memory Stones
What You’ll Need:
- Smooth stones
- Permanent markers or paint
- A quiet moment for memories
Help your children capture precious camping memories by creating memory stones. Ask them to think about their favorite moments at camp and write or draw them on stones. These keepsakes serve as beautiful reminders of your time together and can adorn your garden or home.
15. Nature Tie-Dye
What You’ll Need:
- White T-shirts (or any fabric item)
- Natural dyes (like berries, leaves)
- Water and containers
Put a fun twist on tie-dye with natural dyes! Use berries and leaves to create beautiful colors, dipping the fabric in the juices and letting it dry. Kids will love the vibrant results, and you’ll share a unique activity that brings art to life using nature’s palette.
Helpful Tips for Parents
- Inclusive Crafting: Encourage your kids to share their ideas! Allowing them to take ownership of the crafts boosts their confidence.
- Preparation Is Key: Before you head out camping, gather and pack all necessary supplies to ensure a smooth crafting experience.
- Create a Crafting Space: Set up a designated crafting area at your campsite. This makes it easier to manage projects and keeps things organized.
- Focus on Fun: Remember, these crafts are more about the joyful experience of creation than the final product. Celebrate the process together!
Encouraging Conclusion
Camping is a wonderful opportunity to bond, explore, and create memories as a family. With these 15 camping crafts for kids, you can turn your outdoor adventure into a canvas for creativity, joy, and connection. Remember, it’s all about enjoying those little moments together—whether you’re crafting, cooking, or simply enjoying each other’s company under the stars.
You’re not alone in this journey of parenting; every small action counts! So, pack up those craft supplies and get ready to create wonderful memories alongside your kids this camping season. No matter what happens, you’re doing an amazing job—one little moment at a time!
FAQs
Q: What if we don’t have all the supplies for a craft?
A: Don’t worry! Get creative with what you have. Improvise using natural materials or items you brought along. The fun often lies in thinking outside the box!
Q: Are these crafts suitable for all ages?
A: Most of these crafts can be tailored for various age groups. Just adjust the complexity of the instructions and materials based on your child’s age and abilities.
Q: How can we extend these activities beyond camping?
A: Many of these crafts can be replicated at home! Use the same ideas for family art days or playdates, ensuring the fun and creativity continue beyond your camping trip.
Embrace the beauty of camping and creativity together, and remember, it’s all about enjoying the journey!
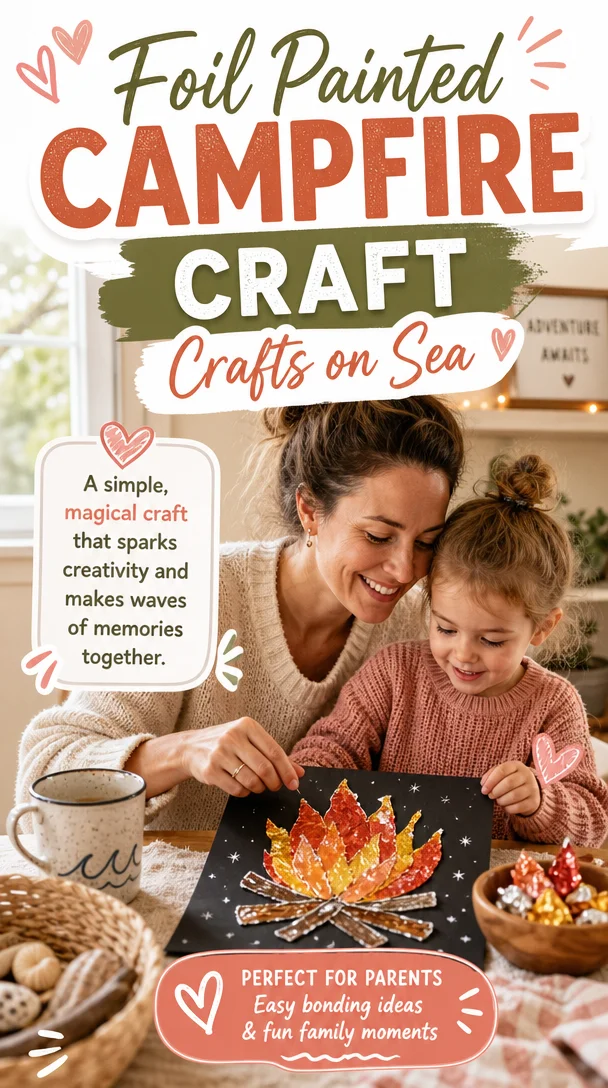
Foil Painted Campfire Craft – Crafts on Sea
Create a Foil Painted Campfire Craft: A Fun Activity for Preschool and Toddlers
Meta Description: Discover a delightful foil painted campfire craft that’s easy and enjoyable for toddlers and preschoolers. Perfect for creative family bonding moments!
Ah, the beautiful mess of childhood! If you’re like many parents, you know that finding engaging activities for your little ones can sometimes feel daunting. Between teaching them how to share and navigating their wild imaginations, it’s easy to get overwhelmed. But fear not, fellow parent! Today, I want to help you spark joy and creativity with a fun Foil Painted Campfire Craft that your preschoolers and toddlers will love. Not only will this craft ignite their artistic spirit, but it also gives you a chance to create memorable moments together, all without the pressure of perfection.
Let’s embrace the chaos and celebrate those little wins as we gather around for some crafting fun. If you’re ready to dive into this delightful project that combines creativity and play, pour yourself a coffee and let’s get started!
Why Crafting Matters for Little Ones
Crafting isn’t just about keeping little hands busy; it’s a wonderful way for children to explore their emotions and develop essential skills. Here’s why crafting matters:
Emotional Expression
Engaging in a craft allows young children to express their feelings. As they splash colors onto paper or mold shapes from clay, they communicate their thoughts, fears, and joys in ways that words sometimes can’t capture.
Fine Motor Skills
Every snip of the scissors, every dab of the paintbrush, and every roll of foil strengthens their fine motor skills. These are crucial for tasks like writing and self-care later on.
Cognitive Development
Crafting promotes critical thinking and problem-solving. As children decide which colors to use for their foil-painted campfire or figure out how to assemble the pieces, they learn to think creatively and logically.
Bonding Time
Most importantly, crafting offers a beautiful opportunity for connection. It’s a chance for you to sit side by side, explore ideas, share laughs, and create lasting memories.
Let’s Dive into the Foil Painted Campfire Craft!
Ready to roll up your sleeves? Here’s everything you need to make this delightful craft with your little ones!
What You’ll Need
- Foil Sheets: An essential for our shining campfire flames!
- Colored Craft Paper: You can choose warm colors like reds, yellows, and oranges for the flames and browns for logs.
- Glue: A trusty companion for assembling your masterpiece.
- Scissors: Don’t forget the safety scissors for little hands.
- Markers or Paint: Use them to add extra flair (bonus fun!).
- A flat surface: Protect your table with some old newspapers or a crafting mat.
Steps to Create Your Foil Painted Campfire
-
Prepare the Foil Flames
Start by tearing sheets of foil into flame-like shapes. Encourage your child to create different sizes for a more dynamic effect. -
Choose Your Craft Paper
Help your little one select colors for the campfire logs—brown for the wood and vibrant hues for the flames. -
Cut Out the Logs
Have your child cut shapes resembling logs from the colored craft paper. You can guide them or let them freehand it for a fun challenge. -
Glitter and Glam
If you have glitter or sequins on hand, sprinkle these onto the foil flames for added sparkle! Watch those eyes light up. -
Assemble the Campfire
Lay the logs on the table, creating a cross pattern. Then, glue the foil flames on top of the logs to create your campfire. -
Make It Personal
This is where your child can shine! Add drawings of tiny marshmallows on sticks or happy faces for a playful touch.
Optional Enhancements and Variations
- Storytelling Time: Share a favorite campfire story while crafting. This fosters a sense of bonding and creativity.
- Color Mixing: Introduce your child to blending colors by letting them mix paints to create unique flame shades.
Helpful Parenting Tips to Enhance Your Craft Time
While you enjoy your foil painted campfire craft, here are some tips to make the most of this experience:
Create a Calm Environment
Choose a quiet spot with minimal distractions where your child feels comfortable. Soft background music can also elevate the mood.
Engage in Conversation
Ask questions like, “What colors do you see in a real campfire?” or “What kind of stories do you think campfires tell?” This encourages your child’s imagination and conversation skills.
Celebrate All Efforts
Don’t focus solely on the final product. Instead, appreciate the creativity and effort your child puts into their work. Celebrate those little victories and moments of fun!
Conclusion
Crafting together creates an unforgettable bond between you and your little ones. The Foil Painted Campfire activity allows for creativity, conversation, and connection—three essentials in the beautiful chaos of parenting. As you both enjoy the process, remember: parenting isn’t about being perfect; it’s about being present and creating joyful memories together, one little moment at a time.
So grab those supplies, get comfy, and enjoy this precious time with your tiny artist. You’re doing an amazing job, and together, you’ll create not just a piece of art but an experience filled with laughter and love. Happy crafting!
FAQ Section
Q: Can I do this craft with older kids?
A: Absolutely! You can adapt the craft by allowing older kids to express their creativity with more intricate designs and techniques.
Q: What if I don’t have foil?
A: If foil isn’t available, try colored paper for the flames! Use shiny markers or glitter glue to add that reflective touch instead.
With your support and encouragement, your child will grow to embrace their creative spirit. Keep forging those beautiful memories; parenting is hard sometimes, but you’re not alone, and small moments can make a huge difference!

Simple Arts and Crafts Activities for Kids That Spark Creativity at Home
Unleashing Creativity: A Treasure Trove of Arts and Crafts Ideas for Kids
Meta Description
Explore a treasure trove of arts and crafts ideas that will keep your kids creatively engaged all year round! Find practical tips and projects for every season.
Introduction
Hey there, fellow parents! If you’ve ever found yourself staring at a blank canvas—or more likely, the wall that your little Picasso just turned into their masterpiece—you know just how important it is to keep our kids busy and creatively engaged. Summer days, rainy afternoons, or the itch of winter weather can leave us scrambling for fresh, fun ideas to channel that boundless energy!
But don’t fret! Today, I’m excited to share one of the most valuable resources you can have as a parent: a treasure trove of arts and crafts ideas that are perfect for kids. Whether your child is a budding artist or just looking for some fun, you’ll find plenty of ideas here to last through the seasons—summer, fall, winter, and spring. Let’s dive in and see how simple materials can spark joy, laughter, and creativity in your home!
The Benefits of Arts and Crafts for Kids
Creating art isn’t just about making something pretty; it’s a fantastic opportunity for learning and growth. Here are just a few wonderful benefits that come along with diving into arts and crafts:
1. Enhances Fine Motor Skills
Did you know that activities like cutting, gluing, and coloring help improve your child’s dexterity? When kids manipulate scissors or hold a paintbrush, they hone their fine motor skills, which are crucial for everyday tasks and academic success!
2. Boosts Creativity and Imagination
Letting children create gives them the freedom to express themselves. Whether it’s painting a sunset or crafting an alien spaceship, creativity knows no bounds. Your kitchen table can become a blank canvas where imagination takes flight!
3. Encourages Problem Solving
Arts and crafts naturally encourage kids to think critically and solve problems. How do you turn a sock into a puppet? What happens if I mix blue and yellow? These questions spark their curiosity and initiate a journey of discovery—creating little innovators in the process.
4. Fosters Emotional Expression
Art provides an incredible avenue for emotional expression. Sometimes kids find it hard to articulate their feelings. Through art, they can communicate their joys, frustrations, or fears, creating a healthy outlet for their emotions.
5. Creates Family Bonds
Let’s not forget how wonderful it is to spend quality time as a family! Crafting together creates moments full of laughter, conversation, and connection. So grab those markers, and let’s create some unforgettable memories together!
Arts and Crafts Ideas for Every Season
Each season brings new emotions, colors, and textures to explore, so let’s jump into some projects that will celebrate the beauty of each time of year!
Spring: Welcoming New Beginnings
Plant Pot Decorating
Grab some terracotta pots and let your kids unleash their inner garden designers! Provide acrylic paints and a variety of brushes and let them paint sunflowers, butterflies, or their favorite colors. Once dry, you can plant flowers or herbs together to watch as nature blooms!
Nature Collage
Go on a nature walk and collect leaves, flowers, or small twigs. Once you’re home, gather your supplies and create a beautiful collage. Use the collected items, glue, and any other embellishments like glitter or stickers. This craft combines creativity with a love for the outdoors!
Summer: Soaking Up the Sun
DIY Tie-Dye T-Shirts
Summer screams tie-dye fun! Buy some plain white t-shirts and fabric dyes (or use food coloring in a pinch). Set up your DIY dye station and let your kids design their own colorful masterpieces. The joy on their faces when they see the reveal will be priceless!
Sun Catchers
With clear contact paper and tissue paper, your kids can create stunning sun catchers! Cut out shapes from the tissue paper—think flowers or geometric designs—and let them arrange them on the contact paper. Hang them in windows to watch the sunlight dance through!
Fall: Embracing Change
Leaf Rubbings
Discover the beauty of fall leaves by doing leaf rubbings! Collect various leaves and place them under a piece of paper. Using crayons or colored pencils, have your children rub over the paper to reveal the impressive leaf shapes. This simple craft highlights the beauty of nature’s artwork.
Pumpkin Painting
Instead of carving, why not paint pumpkins? Let your kids use washable paints to turn pumpkins into silly faces or colorful designs. This way, they can keep their creations longer, and you get to enjoy their artistry all season long!
Winter: Finding Warmth in Creativity
Winter Wonderland Scene
Using cotton balls, googly eyes, and cardstock, help your kids create a winter wonderland scene. They can build snowmen or snowy landscapes that bring the joy of the season indoors. Don’t forget a sprinkle of glitter for extra magic!
Homemade Ornaments
Get crafty and create ornaments for the holidays! Use salt dough or even paper plates. Let the kids cut out shapes and decorate them with paint or markers. Hang them on your tree to cherish family memories each holiday season.
Actionable Tips for a Successful Crafting Experience
As we dive into these exciting projects, remember that crafting should feel joyful, not overwhelming. Here are some tips to ensure your arts and crafts time remains engaging and fun:
-
Set Up a Craft Station
Designate a special spot in your home for crafting. Stock it with supplies such as glue, scissors, crayons, and paper. Having a dedicated area makes it easy to dive into creativity whenever the mood strikes! -
Keep It Simple
You don’t need fancy supplies or complex ideas. Often, the simplest projects bring the most joy. Look around your home for items like cardboard boxes, straws, or old magazines—the possibilities are endless! -
Encourage Conversation
While crafting, spark conversations with your kids. Ask them about their ideas, their colors of choice, or what story their artwork tells. This not only builds emotional connections but boosts their communication skills, too! -
Celebrate All Creations
Whether it’s a masterpiece or a playful scribble, embrace every creation. Display their art proudly around your home. This validation encourages them to keep exploring their talents. -
Incorporate Learning
Use arts and crafts as a gateway to introduce subjects such as math (counting supplies) or science (exploring textures). It’s a fun way to blend learning and creativity seamlessly!
Conversation Starters: Art Talk with Your Child
- “If your artwork could talk, what would it say?”
- “What do you think about using those colors together?”
- “If you could create something amazing, what would it be?”
Conclusion
Crafting with your little ones can transform the ordinary into the extraordinary, bringing joy, laughter, and connection to your everyday life. Remember that every scribble, assess, and splash of paint is a precious moment worth celebrating. As you embark on these artistic adventures together, keep your heart open and enjoy the journey of creativity with your child.
You’ve got this! Keep the art supplies handy, and let your family’s imagination come alive. I hope this treasure trove of arts and crafts ideas lights up your home with creativity, warmth, and cherished memories for many seasons to come.
FAQ Section
Q: What age is appropriate for crafts?
A: Crafts can be tailored for all ages! For toddlers, focus on safe, simple materials like crayons and large paper. As children grow, introduce more complex projects that challenge their creativity.
Q: How do I handle mess during crafts?
A: Embrace the mess! Set up a designated area with newspapers or butcher paper for easy cleanup. Have wet wipes or a damp cloth nearby for quick fixes, and remember, creativity can often be a little messy!
Q: Can crafting help with emotional regulation?
A: Absolutely! Crafting serves as a wonderful tool for emotional expression. Encouraging your child to express their feelings through art can significantly aid in regulating emotions and communication.
Now, grab your crafting supplies and let the artistic fun begin! Your children will thank you for these incredibly memorable moments, and you’ll cherish these beautiful creations for years to come. Happy crafting!
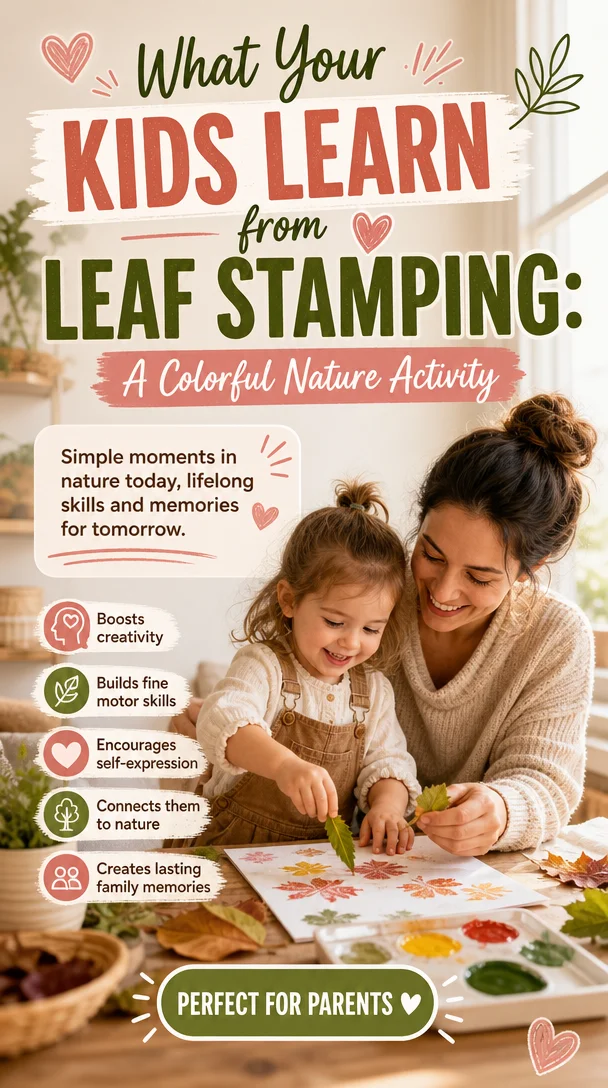
What Your Kids Learn from Leaf Stamping: A Colorful Nature Activity
Leaf Stamping Nature Activity for Kids: A Fun and Simple Science Adventure
Meta Description
Discover the joy of leaf stamping! This easy nature activity for kids combines creativity and science, making family bonding moments unforgettable.
Introduction
Have you ever watched your little ones marvel at the world around them? From the fluttering of butterfly wings to the crunching of leaves underfoot, nature provides endless wonders just waiting to be explored. As parents, we strive to nurture that curiosity, but let’s be real—finding engaging, easy activities can feel overwhelming. That’s where a delightful discovery like leaf stamping comes in!
Imagine your child’s face lighting up as they create colorful art with leaves they gathered from your backyard. Leaf stamping is a simple yet enchanting way to combine creativity with a dash of science—and it’s perfect for those glorious afternoons spent outdoors. This activity not only fosters creativity but also helps your kids appreciate the beauty of nature while learning about the different types of leaves and their textures. Get ready to step outside, embrace a bit of mess, and make warm, lasting memories with your kids!
What is Leaf Stamping?
Leaf stamping is an imaginative craft that involves using leaves as stamps to create stunning prints on paper. This activity allows your children to explore various colors, shapes, and patterns while connecting with nature. Plus, it offers a fun and hands-on way to learn about plant life!
While the process is straightforward, the potential for creativity is limitless. Kids can experiment with different types of leaves, colors, and techniques, making this activity suitable for toddlers and older children alike. Let’s dive into how to get started with this exciting nature activity!
The Benefits of Leaf Stamping
Encourages Creativity
Kids naturally express their emotions through art. Leaf stamping offers them a unique medium to showcase their creativity. With just a few materials, they can create beautiful, one-of-a-kind masterpieces that reflect their personalities.
Connects with Nature
Stepping outside allows your kids to appreciate the beauty of nature firsthand. They engage their senses as they touch different leaves, observe intricate details, and breathe in the fresh air. This connection to nature nourishes their curiosity.
Boosts Learning Opportunities
Leaf stamping provides an excellent backdrop for teaching moments! Talk about various tree species, explore shapes and colors, and even engage in discussions around the science of photosynthesis as you stamp away. Learning doesn’t get much more fun than this!
Enhances Fine Motor Skills
Using paint and stamping requires coordination and fine motor control—perfect for helping kids sharpen their skills. As they dip the leaves in paint and press them onto paper, they develop hand-eye coordination and strength in their hands.
How to Prepare for a Leaf Stamping Adventure
What You’ll Need
Before you head out to start your leaf stamping journey, gather the materials you’ll need. Here’s a quick checklist:
- Leaves of different shapes and sizes (maple, oak, and ferns work well)
- Non-toxic paint (washable tempera paint is great)
- Paper (cardstock or any sturdy paper)
- Paintbrushes (optional)
- Container for the paint
- Newspaper or a plastic tablecloth (for less mess)
- Wet wipes or paper towels (for easy cleanup)
Choosing Leaves
Before you start stamping, take a nature walk with your kids to gather leaves. Encourage them to explore different types of leaves and engage their curiosity. Ask questions like:
- What does this leaf feel like?
- What color is the leaf?
- What tree do you think this leaf came from?
This discovery process makes the activity even more engaging!
Step-by-Step Guide to Leaf Stamping
Now that you’ve gathered everything you need, let’s dive into the fun part! Here’s how to execute the leaf stamping activity:
Step 1: Prepare Your Workspace
Lay down newspaper or a plastic tablecloth to protect your surfaces. Getting a little messy is part of the fun, but it’s nice to have a designated area to work in!
Step 2: Set Up Your Paint
Pour some non-toxic paint into a container. You can use different colors for more vibrant prints. If your kids are feeling adventurous, let them mix colors for unique shades!
Step 3: Paint the Leaves
Using a paintbrush or directly dipping the leaves into the paint, cover one side of a leaf with paint. Make sure the leaf is well-coated, but not dripping!
Step 4: Stamp on Paper
Press the painted side of the leaf onto your piece of paper. Encourage your children to press gently but firmly to ensure an even transfer. For a more intricate design, they can try applying different pressure levels or angle the leaves in various directions.
Step 5: Repeat and Experiment
Let your kids explore! They can use various leaves, mix different colors, and even layer prints for more effect. This is their chance to be artists, so let their imaginations run wild!
Step 6: Clean Up
Once you’ve finished stamping, take a moment to clean up with wet wipes or a damp cloth. Teaching kids about cleanup is another valuable life lesson!
Ideas to Enhance the Leaf Stamping Experience
Explore Nature Further
Take your leaf stamping to the next level by going on a mini-scavenger hunt! Give your kids a list of items to find in nature, such as acorns, interesting rocks, or flowers. This twist adds an element of adventure to your day out.
Create Seasonal Art
Use leaf stamping to create seasonal décor! Consider making autumn leaf prints to decorate your home for fall or colorful spring leaf art as part of your garden theme. Transform their artwork into greeting cards or a wall gallery.
Discuss What You Discover
While you stamp, take the opportunity to discuss nature’s wonders. Ask questions like:
- What colors do you see in nature?
- How do leaves change with the seasons?
- What types of animals might live in the trees?
Encouraging dialogue nurtures your little ones’ curiosity and enhances their learning experience.
Connect with Other Families
Consider organizing a leaf stamping playdate with your friends! Invite other families over for an afternoon of art, laughter, and creativity. Sharing parenting moments with others always lightens the load!
Helpful Tips for a Successful Leaf Stamping Experience
-
Choose the Right Leaves: Opt for leaves with interesting shapes and textures for more exciting prints. Experiment with different tree species for variety!
-
Experiment with Colors: Let your kids mix and match colors to create new shades. This adds an element of surprise to each print!
-
Use Sturdy Paper: Ensure you choose quality paper that can handle the paint. Cardstock works wonderfully!
-
Practice Makes Perfect: If your child struggles initially, encourage them to keep trying. Affirm that creativity takes practice!
-
Celebrate Their Masterpieces: Display their creations proudly! This boosts their confidence and creates a sense of accomplishment.
Conclusion
Leaf stamping is more than just a fun craft, it’s an opportunity to explore, learn, and bond as a family. Allow your children to bask in the beauty of nature while expressing themselves creatively. Remember, it’s not about achieving perfection; it’s about making memories and celebrating each little discovery together.
As you step into this activity, keep in mind that every brushstroke and print is a step towards nurturing their creativity and curiosity. So gather your supplies, head outside, and let the adventure unfold. You’re not just making art—you’re creating moments that matter.
Optional FAQ Section
Q: What age is this activity suitable for?
A: Leaf stamping is suitable for kids aged 3 and up. Younger children will need guidance, while older kids can enjoy experimenting more independently.
Q: Can we use other materials for stamping?
A: Absolutely! In addition to leaves, you can experiment with flowers, vegetables, or even sponges for different effects.
Q: What if my child is hesitant to try?
A: Encourage them gently! Sometimes a little exploration can spark their interest. Join in and show them how fun the process can be!
Q: How can we extend this activity?
A: Use stamp prints to create a personalized storybook where each page represents a different leaf stamping adventure!
Now, go ahead—let the colors, textures, and fun transform your day into an unforgettable family adventure!
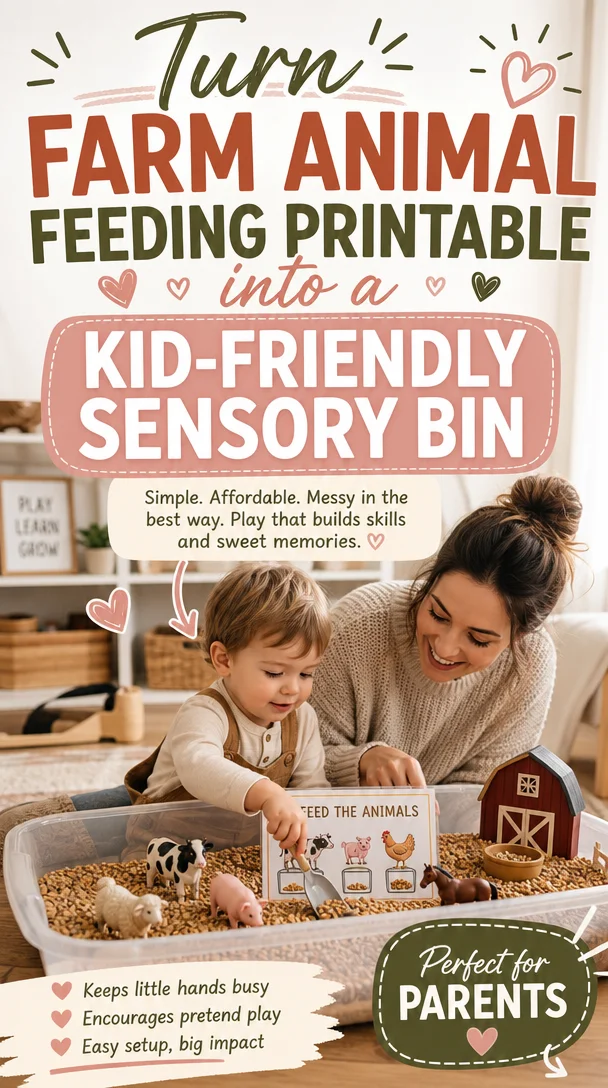
Turn Farm Animal Feeding Printable into a Kid-Friendly Sensory Bin
Engage Your Little Ones: Farm Animal Feeding Printable for Kids (Sensory Bin Activity)
Meta Description
Discover a fun Farm Animal Feeding Sensory Bin Activity! With free printables, help your kids enhance fine motor skills while enjoying sensory play!
Introduction
Ah, parenting! It’s like juggling while riding a unicycle—exhilarating yet challenging. Do you ever catch your little ones lost in their own world, making delightful messes with simple things? I completely understand—transitions into play can often feel overwhelming, yet they hold such magic! Today, I want to share a sensory bin activity that will make your kiddo’s eyes light up while keeping the chaos contained.
The Farm Animal Feeding Sensory Bin Activity is a perfect blend of fun and learning. It’s an engaging way for children to develop their fine motor skills while discovering the wonderful world of farm animals. So, grab your favorite cozy beverage, take a seat, and let’s dive into how to create this delightful activity!
What is a Sensory Bin?
Sensory bins are engaging play areas filled with materials that stimulate the senses. They invite kids to explore textures, sounds, and even smells, enhancing their sensory development. Unlike traditional toys that dictate their play, sensory bins give children the freedom to express their creativity, making every moment an adventure!
Why Farm Animal Feeding?
Farm animals captivate children’s imaginations. Their sounds, textures, and colors intrigue even the youngest explorers. By incorporating a feeding activity, you not only spark their interest but also create a fantastic hands-on experience. Children can practice scooping, pouring, and feeding—all while discovering what each animal eats. It’s a win-win!
Getting Started: What You Need
Before we get all excited about the fun, let’s gather our supplies! Here’s a quick checklist to help you prepare:
- Free Printable Farm Animal Faces: These are essential for bringing your sensory bin to life. You can find adorable printable templates online that you can cut out and stick on jars.
- Containers/Jars: Use small jars, bowls, or recycled containers to hold the "food".
- Sensory Materials: Choose from options like dried corn, rice, oats, or even shredded paper. Each offers a unique texture and sound.
- Scoopers: Provide small scoops, cups, or even spoons for your kids to use while “feeding” the animals.
- Tablecloth or Tray: Set up your sensory bin area with a splash mat or tablecloth to catch any spills.
- Optional – Small Farm Animal Figures: If you have any cute animal figurines, include them for even more play!
Setting Up Your Sensory Bin
- Prepare the Printables: First, print out the adorable farm animal faces. Cut them out and glue or tape them to your containers or jars. Each jar will represent a different animal.
- Pour Your Sensory Material: Next, fill the jars with your chosen sensory materials. I love using corn for pigs, rice for chickens, and oats for horses—each correlates with the animals that eat them!
- Create a Play Area: Set up your sensory bin on a table or tray. Invite your little ones to explore, and watch them engage with each element as they discover what each animal eats.
How to Encourage Learning Through Play
Now that your sensory bin is ready, how can you make the most of this activity? Here are some practical tips to enhance the experience:
Engaging Questions
Ask open-ended questions to promote language development and thinking skills. For example:
- “What do you think the pig likes to eat?”
- “How does this rice feel in your hand?”
Demonstrate and Model
Allow your little ones to watch how you scoop and pour. Demonstrate how to feed the animals, reinforcing the connection between the animal and their food. Make it a fun game! Pretend to hear the sounds of each animal as you feed them, bringing the experience to life.
Encourage Group Play
If you have multiple children, involve them all! Group play enhances social skills and teamwork. Create a challenge by timing how quickly they can feed the animals or see who can fill their jar first.
Incorporate Learning Themes
Use the sensory bin as a springboard for lessons on animal habitats, sounds, and even their life cycles. For instance, after feeding, ask them where they think cows live or what noise a sheep makes.
Additional Activities to Try
You might also consider these activities for more fun and learning:
- Animal Sounds Game: After the sensory play, have your children identify each animal by its sound.
- Story Time Integration: Read a story about farm animals to extend the learning. “Click, Clack, Moo” is a favorite!
- Nature Walk: If possible, visit a nearby farm or petting zoo for real-life experiences. Discuss what animals eat and see if it matches your sensory bin!
Helpful Tips to Enhance the Experience
While sensory play can get a bit messy, it’s also incredibly rewarding! Here are some helpful tips to keep the activity enjoyable and stress-free:
Use a Splash Mat
Consider laying down a waterproof mat or old sheet to collect spills and messes. This makes clean-up easier and allows for stress-free exploration.
Keep It Short and Sweet
For younger kiddos, limit the sensory bin time to about 15-20 minutes to maintain their interest. Follow their lead—if they’re captivated, feel free to extend the activity!
Review and Reflect
After the activity, take a moment to discuss what they enjoyed and what they learned. Did any animals stand out to them? This reflection fosters communication skills and builds their understanding.
Storage Options
When the fun is over, store the materials in a designated bin for future use. Encourage your child to help clean up as part of the routine and ease of access for the next play session!
Encouraging Conclusion
As you embark on this Farm Animal Feeding Sensory Bin Activity, remember that parenting doesn’t have to be perfect to be wonderful. Every little connection you create with your children matters. Whether it’s through messy play or exploring the world of farm animals, these moments leave lasting impressions.
When you observe their eyes fill with curiosity or hear their delighted squeals of joy, know you are doing a fantastic job! Embrace the chaos, celebrate the small wins, and keep making memories together.
So, the next time your little one asks what’s for lunch, why not throw a farm animal feeding party? It could be as easy as pulling out that sensory bin! Enjoy every moment and remember, you are not alone on this parenting journey. Let’s make it lighter, warmer, and more joyful—one little moment at a time!
FAQ
Q: What age is this activity suitable for?
A: This sensory bin activity is perfect for toddlers and preschoolers, typically ages 2-5.
Q: Can I adapt this sensory bin for older kids?
A: Absolutely! You can turn it into a more complex game for older children by introducing math concepts, such as counting or sorting.
Q: How can I change the sensory materials?
A: Feel free to swap out different materials based on seasonal themes or holidays, such as adding colorful fall leaves in autumn or snowflakes made from cotton balls in winter!
Q: What if we don’t have farm animal figures?
A: No problem! Your kids can use the printables alone and let their imagination take over. Paper cutouts can still create immersive play.
Let’s make parenting feel a little easier and embrace the beauty of the everyday chaos together! Happy feeding!
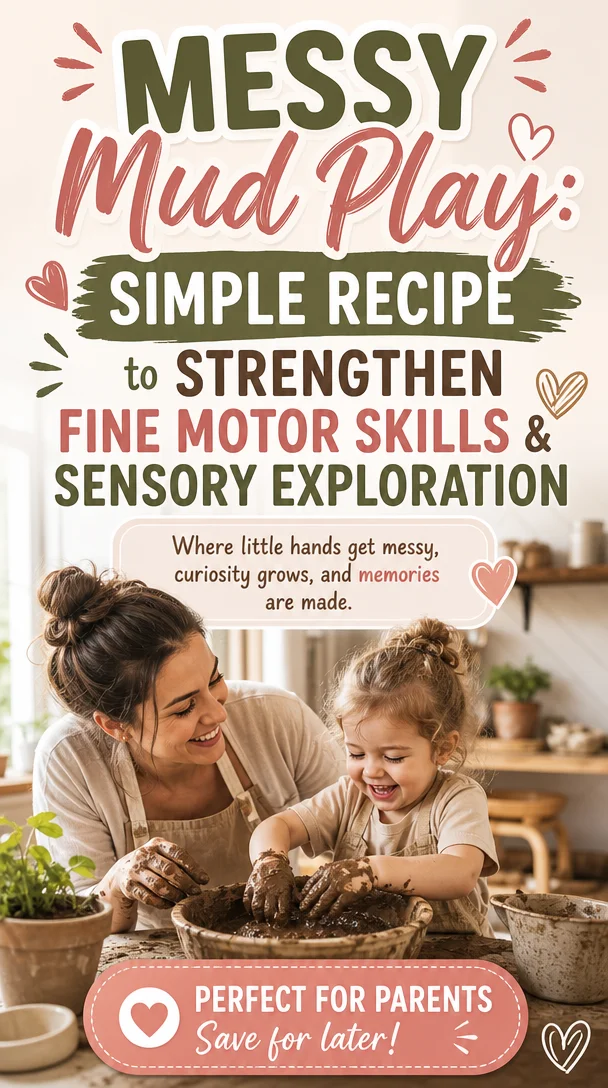
Messy Mud Play: Simple Recipe to Strengthen Fine Motor Skills & Sensory Exploration
Play Mud Recipe: Strengthening Fine Motor Skills Through Sensory Play
Meta Description
Engage your child’s fine motor skills with our easy play mud recipe! Discover how this sensory play is a fun way to learn and grow together.
Introduction
As parents, we all know that children learn best through play. It’s astonishing how something as simple as mud can open up a world of exploration and learning. Have you ever watched your little one joyfully squishing their hands in a muddy puddle or digging in the dirt? Those moments are more than just messy fun; they’re instrumental in developing essential skills like fine motor control and sensory awareness.
Today, I want to share an exciting play mud recipe that’s incredibly easy to make, requires just a few household ingredients, and will keep your little ones engaged for hours. Plus, we’ll discuss how to incorporate insect figurines into the play for an extra layer of exploration. So, grab your apron, and let’s get our hands dirty—figuratively and literally!
Why Play Mud Matters
Fostering Fine Motor Skills
Fine motor skills are essential for everyday tasks. From writing to buttoning shirts, strengthening these skills early on helps set our kids up for success. The act of squishing, rolling, and molding play mud requires coordination and dexterity, which naturally develops these critical abilities.
Enhancing Sensory Experiences
Sensory play is vital for toddlers and preschoolers. Engaging with different textures stimulates their senses and enhances cognitive development. Play mud not only feels cool and squishy but also smells earthy, providing a holistic sensory experience.
The Perfect Play Mud Recipe
Here’s the best part; you can whip up this play mud using items you likely have around your home. Here’s how:
Ingredients
- 2 cups all-purpose flour
- 1 cup water
- 1 tablespoon vegetable oil
- Food coloring (optional)
- 1/2 cup cocoa powder (optional, for color and scent)
Instructions
- Mix Dry Ingredients: In a large bowl, combine the flour and cocoa powder (if using). Stir well until combined.
- Add Wet Ingredients: Slowly add water and vegetable oil to the dry mixture. If you want colored mud, now is the time to add a few drops of food coloring.
- Knead the Mud: With your hands, knead the mixture until you achieve a smooth, pliable consistency. If it feels too wet, add a little more flour. If it’s too dry, add a spoonful of water.
- Store Smarter: Keep your play mud in an airtight container or resealable bag to maintain freshness.
Adding Insect Figurines for Extra Fun
To enhance your sensory experience, consider incorporating small insect figurines into your play mud. These tiny creatures can inspire imaginative play and offer endless opportunities for learning about nature. You could:
- Conduct a “bug rescue” mission where kids dig to find hidden insects.
- Create a mini ecosystem in the mud, explaining how each bug plays a role in the environment.
- Use the figurines to talk about different habitats and behaviors.
Helpful Tips for an Engaging Play Experience
- Set Up a Play Station: Create a designated play area with a tarp or old blanket. This way, cleanup becomes a breeze, allowing everyone to enjoy the activity without worrying about the mess.
- Use Tools: Provide your child with tools like small shovels, spoons, or even cookie cutters. These tools encourage manipulation, enhancing fine motor skills while also making play more engaging.
- Incorporate Themes: Change the play scenario week to week. One week could focus on a bug adventure, while another could revolve around a beach or construction theme—endless opportunities for creativity!
Engaging Conversation Starters
As your child plays, engage them with simple questions to encourage conversation and curiosity:
- “What colors do you see in the mud?”
- “How does it feel in your hands?”
- “What do you think these insects are doing?”
The Importance of Process Over Perfection
As you embark on this messy adventure, remind yourself that this is all part of the process. It’s not about creating the perfect mud sculpture; it’s about the joy of exploration, the giggles, and the learning that occurs through the experience. Celebrate those small wins—whether it’s your child befriending a bug or realizing they can make a mud pie!
Wrapping Up
Engaging in sensory play with your child doesn’t just bolster their fine motor skills; it creates opportunities for bonding, exploration, and joy. Remember, parenting often involves embracing the messy parts of life, and play mud offers a fantastic way to celebrate those moments.
So, get ready to mix some mud, let your imagination run wild with those bug figurines, and enjoy this wonderful opportunity to bond with your little ones. And remember, you’re doing an incredible job navigating this parenting journey. Celebrate the small victories, like warm coffee and messy hands!
FAQs
Can I store play mud for later use?
Yes! Keep it in an airtight container or a plastic bag. It should last for about a week or two if stored properly.
Is this play mud safe for younger children?
Absolutely! All the ingredients are safe; however, always supervise young kids to prevent any accidental ingestion.
What if my child doesn’t enjoy the texture?
That’s okay! Some children are sensitive to touch. Try introducing the texture gradually or allow them to engage in other ways, like scooping with tools.
Join the Little Life Society community for more ideas, encouragement, and tips on navigating this beautiful, messy journey of parenting! 💛
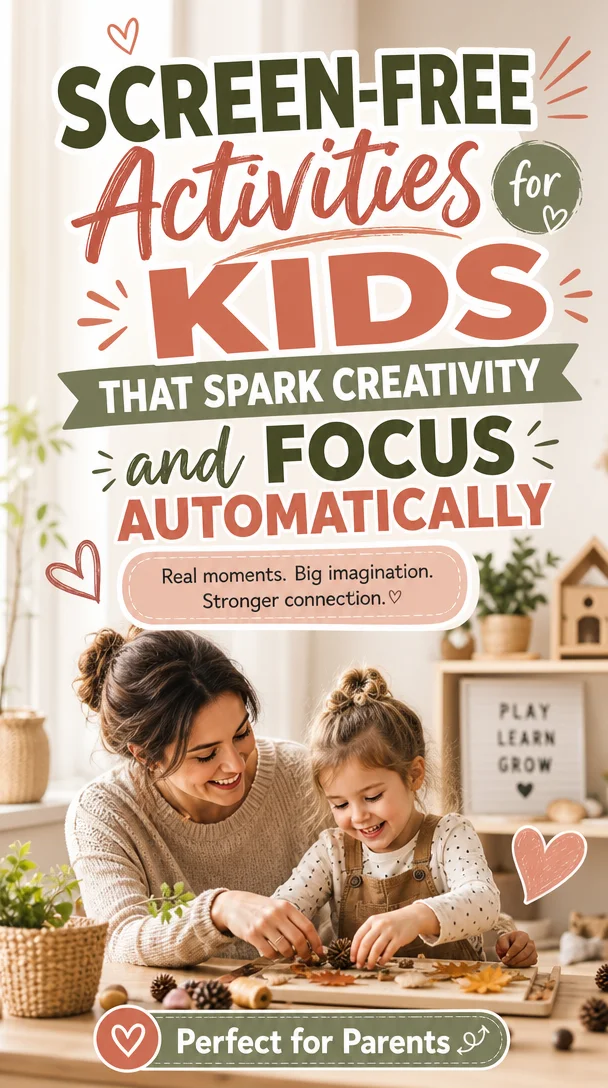
Screen-Free Activities for Kids That Spark Creativity and Focus
50 Amazing Screen-Free Activities for Kids: Fun Ideas to Spark Their Imagination
Meta Description: Discover 50 amazing screen-free activities for kids that inspire creativity, connection, and joy! Say goodbye to boredom and welcome fun family moments.
Hey there, fellow parents! If you’ve ever felt that pang of parental frustration when the kids are glued to screens, you’re definitely not alone. In today’s digital age, finding engaging, screen-free activities for kids can often feel like searching for a needle in a haystack. But here’s a comforting thought: you can create joyful moments and connections without turning on a device.
Imagine the laughter echoing through your home as your little ones engage in activities that spark their creativity and encourage exploration. Whether you want to foster emotional development, build family bonds, or just find a way to make the day a bit more fun, I’ve got your back! Let’s dive into 50 amazing screen-free activities for kids that will inspire adventure and connection in your home.
Creative Play and Imagination
1. DIY Craft Station
Set up a craft corner with paper, markers, stickers, and everyday items like cardboard boxes and egg cartons. Let their imaginations run wild! Encourage them to create whatever pops into their minds.
2. Nature Scavenger Hunt
Head outside for a scavenger hunt! Create a list of items (like a pinecone, a feather, or a specific flower) for your little explorers to find. They’ll learn about nature while having a blast.
3. Puppet Show Time
Use old socks or paper bags to create puppets, then put on a show! This activity is not only super fun, but it also encourages storytelling and creativity.
4. Build a Fort
Transform your living room into a magical fortress using cushions, blankets, and furniture. Your kids will adore their cozy hideaway for reading or play.
5. Cooking Together
Involve your kids in the kitchen. Pick a simple recipe and let them help measure, mix, and decorate. You’ll create delicious memories and teach them valuable cooking skills.
6. Creative Storytelling
Take turns creating a story one sentence at a time. Start with “Once upon a time…” and see where your imaginations take you! This is a great way to bond as a family.
7. Art Gallery
Host an art show at home. Have your kids create various pieces of artwork and display them around the house. Invite family members to admire their masterpieces!
Physical Activities
8. Backyard Obstacle Course
Use household items to set up a fun obstacle course outside. Encourage your kids to jump, crawl, and dash through the course. This helps improve coordination and provides a great energy outlet!
9. Dance Party
Turn up the music and have a family dance-off! Besides being a fantastic way to shake off stress, dancing is a joyful way to express feelings.
10. Gardening Together
Start a small garden—whether it’s in pots on a windowsill or a plot in the backyard. Kids love watching things grow, and they’ll learn about responsibility and nature.
11. Family Yoga
Search for kid-friendly yoga poses and practice them together. Not only does yoga promote flexibility, but it also teaches relaxation techniques.
12. Scavenger Hunt Walk
Create a list of objects to spot on your next walk. Encourage your kids to look around and check things off the list. This is a great way to make walks more exciting!
Brain-Boosting Activities
13. Puzzle Fun
Pick age-appropriate puzzles and work on them together. This activity sharpens problem-solving skills and fosters patience.
14. Science Experiments
Get messy with exciting science experiments! From baking soda volcanoes to homemade slime, there are plenty of simple experiments that ignite curiosity.
15. Reading Hour
Set aside a dedicated reading hour where everyone cozies up with their favorite books. Share stories or read aloud to each other for an extra layer of connection.
16. Family Trivia Night
Create fun trivia questions about family memories or general knowledge. This is a perfect way to learn while sharing laughs!
17. Board Games or Card Games
Dig out the family board games or a deck of cards. Schedule a game night to bring everyone together for some friendly competition.
18. DIY Science Lab
Turn your kitchen table into a science lab! Use safe ingredients to conduct experiments that inspire wonder and learning.
Arts and Crafts
19. DIY Tie-Dye
Have a blast with a tie-dye project using plain white t-shirts. It’s a colorful activity that allows kids to express their creativity through patterns and colors.
20. Scrapbooking
Gather photos, magazine clippings, and other keepsakes to make fun scrapbooks together. This activity encourages storytelling through visuals and memories.
21. Nature Art
Collect leaves, flowers, and twigs to create a nature-inspired mural. Kids will love getting messy and using their surroundings in creative ways.
22. Origami
Introduce your children to the art of origami. Start with simple shapes and watch as their fine motor skills improve while they create beautiful paper animals.
23. Painting Party
Grab some canvases, paints, and brushes for a painting party. Let your kids unleash their creativity while you paint alongside them, encouraging artistic expression.
Collaborative Activities
24. Family Journal
Create a family journal where everyone can contribute thoughts, drawings, or poems. This activity fosters communication and creates a treasure trove of memories.
25. Make a Time Capsule
Gather items that represent your current family life and place them in a box. Seal it and decide on a future date to open it. This provides a fun surprise down the line!
26. Music Creation
Use simple instruments or even homemade ones to create music together. Kicking off a family jam session can lead to lots of laughs and dance breaks.
27. Neighborhood Cleanup
Teach kids the value of community service by organizing a neighborhood cleanup. They’ll feel proud contributing positively while being outside.
Exploring and Learning
28. Visit Local Museums
Check out local museums or cultural centers for engaging experiences for children. Many offer interactive exhibits that kids love!
29. Animal Encounters
Plan a visit to a local farm or petting zoo to learn about animals up close. Kids will enjoy hands-on experiences interacting with nature.
30. Library Outings
Spend an afternoon at your local library. Encourage your kids to explore different sections and pick out books they want to read. Libraries often host fun events, too!
31. Art Museum Visits
Visit an art museum and challenge your kids to find their favorite piece. Discuss what they love about the artwork, encouraging critical thinking and expression.
Social Engagement
32. Playdates
Schedule regular playdates with friends or neighbors. Social interactions promote emotional growth and help kids learn important interpersonal skills.
33. Cooking for Friends
Get together with friends or family to cook meals. Kids can help in the kitchen and also learn about sharing food with others, creating a communal experience.
34. Group Sports
Sign up your children for group sports. Engage with others while staying active, building teamwork skills and new friendships.
Mindfulness and Relaxation
35. Nature Walks
Take time to engage with nature by going for a walk in a park. Encourage your kids to notice sights, sounds, and smells, fostering mindfulness and connection.
36. Meditation for Kids
Incorporate a few minutes of meditation or deep breathing exercises into your daily routine to help kids recenter and relax.
Encouraging Independence
37. Independent Playtime
Set aside a bit of time for independent play. This lets your kids explore their interests freely and develop self-confidence in their abilities.
38. Chore Charts
Create a chore chart to encourage responsibility in a fun way. Kids often feel proud accomplishing tasks around the house!
Connect over Daily Activities
39. Family Meetings
Hold weekly family meetings to discuss plans, goals, or challenges. This builds communication skills and reinforces a sense of belonging.
40. Plan a Family Trip
Get the kids involved in planning your next family outing or trip. Let them choose the destination or activities, making everyone feel valued.
41. DIY Memory Book
Create a family memory book, adding photos, drawings, or notes. It’s a cherished project that will keep family memories alive.
Encouraging Emotional Growth
42. Emotion Charades
Play a game of charades where participants act out different emotions. This develops emotional awareness and helps kids articulate their feelings better.
43. Kindness Projects
Encourage acts of kindness, like making cards for neighbors or donating toys. Performing kind deeds boosts empathy and awareness of others’ feelings.
Enriching Routine Ideas
44. Morning Dance Routine
Kickstart your day with a morning dance party! It’s a great way to wake up and energize the family for the day ahead.
45. Family Dinner Themes
Make dinner fun with themed nights, like Taco Tuesday or Pizza Night. Get everyone involved in preparation for a wonderful family bonding experience.
46. Songwriting Challenge
Try a family songwriting challenge! Each member can contribute a verse or a line, creating a collaborative family anthem.
Practical Encouragement
47. Mindfulness Walk
Take a slow walk and encourage your kids to describe everything they feel, see, and hear. This cultivates mindfulness and deepens their connection to the present moment.
48. DIY Family Challenges
Create weekly family challenges. Whether it’s trying a new vegetable, completing a puzzle, or reading a certain number of books, challenges bring excitement into daily life.
49. Family Volunteering
Volunteer as a family at local shelters or community services. Doing good together creates shared memories and deep emotional connections.
50. Reflection Time
At night, spend a few moments reflecting on the day. Ask your kids about their favorite parts or what they’re grateful for, cultivating positivity and gratitude.
Conclusion
Finding screen-free activities for kids might seem overwhelming at first, but remember, you’re not alone in navigating this parenting journey. By fostering creativity, connection, and exploration, we can help our children grow into confident, well-rounded individuals. With these 50 amazing screen-free activities for kids, you can spark joy, build memories, and embrace the messiness of family life together.
So, grab your kids, pick a few fun activities, and enjoy the laughter and warmth that comes from these moments together. You’ve got this, and each small joyful effort adds up to the beautiful adventure of parenting. Here’s to making family life a little lighter, warmer, and a whole lot more joyful—one activity at a time!
FAQ Section
-
What are some easy screen-free activities for toddlers?
Simple ideas include sensory bins, coloring, storytelling, and outdoor play to keep them engaged. -
How can I encourage my kids to play independently?
Gradually increase their independent playtime, introduce engaging toys, and praise their creativity when they play solo. -
What if my kids resist screen-free activities?
Offer choices and invite them to participate in selecting activities. Make it fun by joining them, and they may warm up to the idea! -
How do I balance screen time and screen-free activities?
Set defined limits for screen time and create a routine that incorporates a variety of engaging, screen-free activities throughout the day.