The Very Hungry Caterpillar Sensory Bin Activities | Playdough sensory bin ideas, Hungry caterpillar toddler craft, Sensory bin themes for toddlers
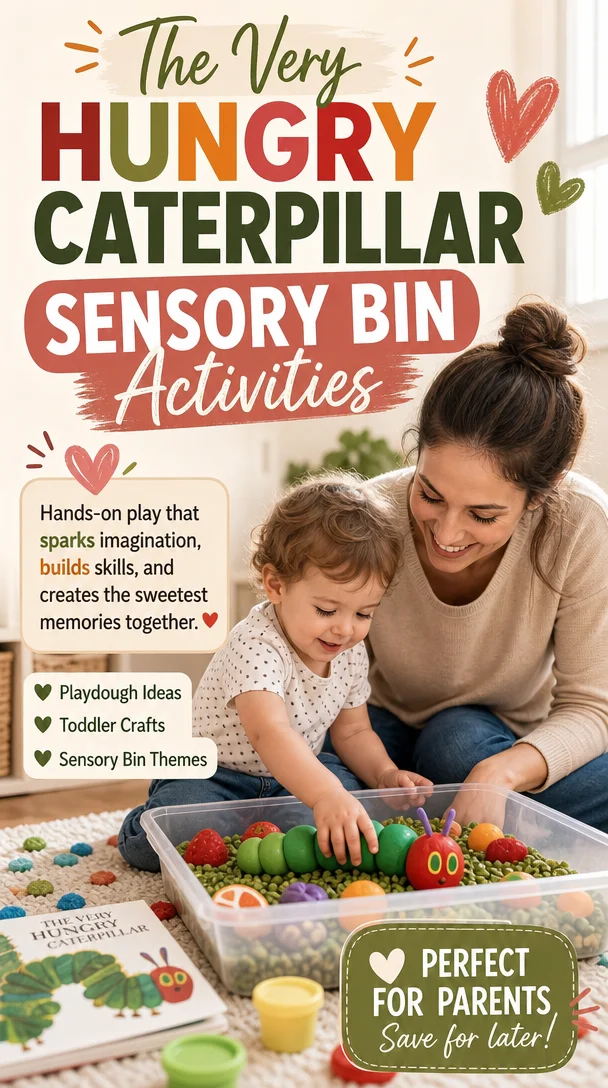
The Very Hungry Caterpillar Sensory Bin Activities: A World of Fun and Learning
Meta Description: Discover delightful and engaging sensory bin activities inspired by The Very Hungry Caterpillar! Perfect for toddlers to explore, learn, and play.
Introduction
As parents, we often seek fun and engaging ways to teach our toddlers while allowing their imaginations to soar. If you’ve spent any time wrangling snacks or calming tantrums, you also know the importance of activities that captivate their attention. Enter The Very Hungry Caterpillar! This beloved story opens the door to endless creativity and learning opportunities for our little ones.
Imagine setting up a sensory bin that sparks curiosity and creativity, all while rooting the activities in the charming world of Eric Carle’s classic book. Today, we’ll dive into fun playdough sensory bin ideas, an irresistible Hungry Caterpillar craft, and creative sensory bin themes, ensuring your toddler enjoys hours of messy, squishy, delightful playtime.
So, grab your favorite cup of coffee, settle in, and let’s explore how to turn the pages of a story into real-world, hands-on adventures!
Why Sensory Bins Matter
Before we jump into the activities, let’s chat about why sensory bins are such a hit with toddlers. Sensory play encourages exploration, and it supports cognitive development, fine motor skills, and emotional growth. Through touch, sight, and even smell, children make connections between their experiences and the world around them. Plus, sensory play is hugely beneficial for those wiggly little bodies that can’t sit still!
Key Benefits of Sensory Play:
- Encourages Exploration: Kids learn about different textures, colors, and materials as they dig, scoop, and mix.
- Enhances Fine Motor Skills: Activities like pouring, scooping, and molding help little hands develop strength and coordination.
- Promotes Language Development: Engaging in play together fosters communication and vocabulary expansion.
- Supports Emotional Regulation: Sensory play can calm anxious feelings and help toddlers process their emotions.
Let’s unleash your toddler’s creativity by tapping into the delightful world of The Very Hungry Caterpillar!
Creating Your Very Hungry Caterpillar Sensory Bin
What You’ll Need
Building a sensory bin doesn’t require a lengthy shopping list. Here’s a simple guide to get started:
-
Base Material: Use dried corn, rice, beans, or colorful shredded paper. These materials provide a lovely backdrop for sensory experiences.
-
Playdough: Homemade or store-bought playdough can act as a great tactile element. You can even dye it in bright colors to reflect the story.
-
Caterpillar Toys or Figures: Look for small caterpillar toys, plastic insects, or even soft plush toys representing the characters from the book.
-
Fruits and Vegetables: Plastic or foam fruits and veggies can be a fun addition to reflect the different items the caterpillar munches through.
-
Tools: Scoops, spoons, small buckets, and containers encourage discovery and imaginative play.
Setting Up Your Bin
-
Choose your base material: Pour your dried corn or rice into a bin (about a third full works well). This will be the “ground” for your sensory experience.
-
Add the playdough: You can create small “fruit” shapes from the playdough, such as apples, pears, and strawberries. You’re not just filling the sensory bin; you’re bringing the story to life!
-
Incorporate figures: Scatter your caterpillar and fruit figures throughout the sensory bin.
-
Encourage exploration: Hand your child a scooper and let them dive in! Encourage them to find the different fruits and help them recount the story as they play.
Engaging Activities with The Very Hungry Caterpillar Sensory Bin
Once your sensory bin is set up, the fun begins! Here are some activities that keep your little one engaged:
1. Fruit Matching Game
Help your toddler practice their recognition skills with a fun fruit-matching game!
- How to Play: Place real or plastic fruit from the story around the sensory bin. As your toddler scoops up each one, encourage them to name it. You can even play a simple game of memory by hiding the fruits under the base material and asking them to find it by name.
2. Caterpillar Counting Fun
Counting can be a delightful experience in your sensory bin!
- How to Play: Use the caterpillar figures to create a counting game. Ask your toddler to count out a specific number of toys or fruits. You can also practice one-to-one correspondence by placing one figure next to each fruit as they count.
3. Color Sorting Activity
Colors pop in the sensory bin, making it a wonderful place to practice sorting!
- How to Play: As your child digs around for different fruits, ask them to sort the items by color. This not only teaches them about colors but enhances their categorization skills.
4. Story Reenactment
Using the sensory bin, your toddler can creatively retell The Very Hungry Caterpillar.
- How to Play: Prompt your toddler to act out the story using the figures and fruit. Encourage them to start with the caterpillar hatching from the egg and move through each day of eating fruit! This is a perfect moment to bond while reinforcing the storyline.
5. Texture Exploration
Sensory bins are perfect for exploring different textures.
- How to Play: Offer your toddler different materials like cloth (to represent leaves) or cotton balls (for clouds). Discuss how each material feels while they dig through the bin.
Hungry Caterpillar Toddler Craft Ideas
Crafts can further enhance your sensory experience and provide an opportunity for creativity. Try these simple craft ideas inspired by The Very Hungry Caterpillar:
1. Paper Plate Caterpillar
This easy craft helps improve fine motor skills!
-
What You Need:
- A paper plate
- Paint or markers
- Googly eyes
- Pipe cleaners
-
Instructions:
- Paint the paper plate green (or any bright color).
- Once dried, glue on googly eyes and add pipe cleaner antennas.
- Your little one can help decide on the colors and decorate!
2. Fruits Collage
Create a beautiful collage using fruits featured in the story.
-
What You Need:
- Construction paper
- Glue
- Scissors
- Magazines or colored paper for cutting out fruit shapes
-
Instructions:
- Help your child cut out or tear fruit images from magazines.
- Encourage them to glue their favorites on a larger sheet of paper to create a vibrant collage.
3. Caterpillar Counting Craft
Combine counting with creativity by making crafts that reinforce numeral recognition.
-
What You Need:
- Cut-out circles in various colors
- Glue
- Markers
-
Instructions:
- Let your toddler glue circles together to create a caterpillar.
- Write numbers on each circle and prompt your toddler to count out the correct number of corresponding items when they see a number.
Tips for a Successful Sensory Playtime
-
Be Present: Engage in the play and join your toddler in exploration. This builds your bond and enhances their experience.
-
Limit Distractions: Make sure the environment is calm and inviting. Set aside phones and other distractions to focus solely on this special time together.
-
Follow Their Lead: Watch your child’s interests and let them guide the play. Follow where their imagination takes them!
-
Provide Variety: Regularly change up your sensory bin materials to keep the experience fresh and exciting. Seasonal themes often delight toddlers.
-
Emphasize Clean-Up: Encourage ownership of the space by involving your child in clean-up time. Make it a part of the fun, and offer praises for their help!
Encouraging Conclusion
As parents, we cherish those simple moments—messy, giggly, curiosity-filled adventures that allow us to bond with our toddlers. With sensory bins inspired by The Very Hungry Caterpillar, your family can enjoy playful learning that evokes lasting memories and sparks imagination.
Remember, you’re doing an amazing job by making time for play. Every minute spent laughing, exploring, and creating together counts. Your little explorer is not just playing; they’re learning about the world and developing crucial skills.
So, gather your supplies and dive into the world of sensory play! Each scoop and squish is a chance to celebrate the beautiful, chaotic journey of family life. You’ve got this!
FAQ
Q: What are some safe materials for toddlers in sensory bins?
A: Safe materials include dried rice, beans, water beads, kinetic sand, and non-toxic playdough. Always supervise your child to prevent any accidental ingestion.
Q: How often can I change themes in the sensory bin?
A: You can change themes as often as every week, especially if you tie them to holidays or seasonal changes. Keeping the activities fresh helps maintain engagement!
Q: What age is appropriate for sensory play?
A: Sensory play is suitable for toddlers and preschoolers, but sensory bins can be adapted for all ages. Younger babies might enjoy more basic textures, while older children can handle more complex themes.
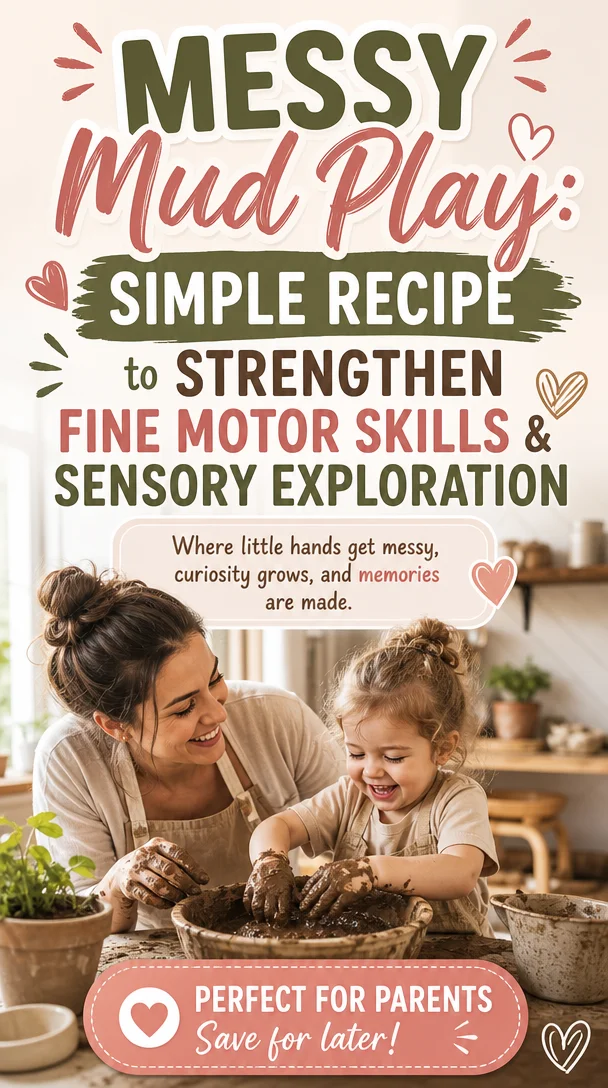
Messy Mud Play: Simple Recipe to Strengthen Fine Motor Skills & Sensory Exploration
Play Mud Recipe: Strengthening Fine Motor Skills Through Sensory Play
Meta Description
Engage your child’s fine motor skills with our easy play mud recipe! Discover how this sensory play is a fun way to learn and grow together.
Introduction
As parents, we all know that children learn best through play. It’s astonishing how something as simple as mud can open up a world of exploration and learning. Have you ever watched your little one joyfully squishing their hands in a muddy puddle or digging in the dirt? Those moments are more than just messy fun; they’re instrumental in developing essential skills like fine motor control and sensory awareness.
Today, I want to share an exciting play mud recipe that’s incredibly easy to make, requires just a few household ingredients, and will keep your little ones engaged for hours. Plus, we’ll discuss how to incorporate insect figurines into the play for an extra layer of exploration. So, grab your apron, and let’s get our hands dirty—figuratively and literally!
Why Play Mud Matters
Fostering Fine Motor Skills
Fine motor skills are essential for everyday tasks. From writing to buttoning shirts, strengthening these skills early on helps set our kids up for success. The act of squishing, rolling, and molding play mud requires coordination and dexterity, which naturally develops these critical abilities.
Enhancing Sensory Experiences
Sensory play is vital for toddlers and preschoolers. Engaging with different textures stimulates their senses and enhances cognitive development. Play mud not only feels cool and squishy but also smells earthy, providing a holistic sensory experience.
The Perfect Play Mud Recipe
Here’s the best part; you can whip up this play mud using items you likely have around your home. Here’s how:
Ingredients
- 2 cups all-purpose flour
- 1 cup water
- 1 tablespoon vegetable oil
- Food coloring (optional)
- 1/2 cup cocoa powder (optional, for color and scent)
Instructions
- Mix Dry Ingredients: In a large bowl, combine the flour and cocoa powder (if using). Stir well until combined.
- Add Wet Ingredients: Slowly add water and vegetable oil to the dry mixture. If you want colored mud, now is the time to add a few drops of food coloring.
- Knead the Mud: With your hands, knead the mixture until you achieve a smooth, pliable consistency. If it feels too wet, add a little more flour. If it’s too dry, add a spoonful of water.
- Store Smarter: Keep your play mud in an airtight container or resealable bag to maintain freshness.
Adding Insect Figurines for Extra Fun
To enhance your sensory experience, consider incorporating small insect figurines into your play mud. These tiny creatures can inspire imaginative play and offer endless opportunities for learning about nature. You could:
- Conduct a “bug rescue” mission where kids dig to find hidden insects.
- Create a mini ecosystem in the mud, explaining how each bug plays a role in the environment.
- Use the figurines to talk about different habitats and behaviors.
Helpful Tips for an Engaging Play Experience
- Set Up a Play Station: Create a designated play area with a tarp or old blanket. This way, cleanup becomes a breeze, allowing everyone to enjoy the activity without worrying about the mess.
- Use Tools: Provide your child with tools like small shovels, spoons, or even cookie cutters. These tools encourage manipulation, enhancing fine motor skills while also making play more engaging.
- Incorporate Themes: Change the play scenario week to week. One week could focus on a bug adventure, while another could revolve around a beach or construction theme—endless opportunities for creativity!
Engaging Conversation Starters
As your child plays, engage them with simple questions to encourage conversation and curiosity:
- “What colors do you see in the mud?”
- “How does it feel in your hands?”
- “What do you think these insects are doing?”
The Importance of Process Over Perfection
As you embark on this messy adventure, remind yourself that this is all part of the process. It’s not about creating the perfect mud sculpture; it’s about the joy of exploration, the giggles, and the learning that occurs through the experience. Celebrate those small wins—whether it’s your child befriending a bug or realizing they can make a mud pie!
Wrapping Up
Engaging in sensory play with your child doesn’t just bolster their fine motor skills; it creates opportunities for bonding, exploration, and joy. Remember, parenting often involves embracing the messy parts of life, and play mud offers a fantastic way to celebrate those moments.
So, get ready to mix some mud, let your imagination run wild with those bug figurines, and enjoy this wonderful opportunity to bond with your little ones. And remember, you’re doing an incredible job navigating this parenting journey. Celebrate the small victories, like warm coffee and messy hands!
FAQs
Can I store play mud for later use?
Yes! Keep it in an airtight container or a plastic bag. It should last for about a week or two if stored properly.
Is this play mud safe for younger children?
Absolutely! All the ingredients are safe; however, always supervise young kids to prevent any accidental ingestion.
What if my child doesn’t enjoy the texture?
That’s okay! Some children are sensitive to touch. Try introducing the texture gradually or allow them to engage in other ways, like scooping with tools.
Join the Little Life Society community for more ideas, encouragement, and tips on navigating this beautiful, messy journey of parenting! 💛
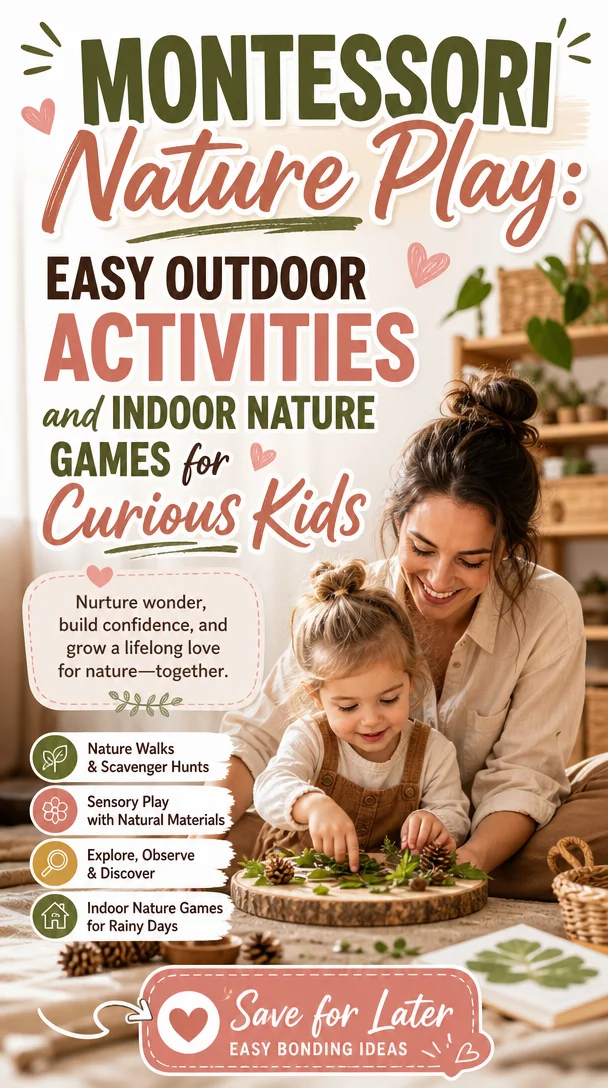
Montessori Nature Play: Easy Outdoor Activities and Indoor Nature Games for Curious Kids
Unlocking the Magic of Montessori: Fun Activities for Outside and Nature-Themed Learning
Meta Description: Discover engaging Montessori activities for outdoor learning and nature-themed games to inspire creativity and connection in your family life!
Introduction
Hey there, fellow parents! If you’ve ever found yourself searching for activities that can spark joy and learning in your little ones, then you’re in the right place. Parenting often feels like juggling a million balls in the air, and the quest for enriching yet simple activities can seem daunting. But it doesn’t have to be!
Montessori education beautifully combines hands-on learning with the exploration of the world around us. Imagine your toddler running barefoot on grass, collecting leaves, or building a mini garden — all while learning in the most natural and joyful way. In this post, we’re diving into Montessori-inspired activities for outside, nature-themed learning, and indoor games that can turn every day into an adventure. Grab a cozy seat, maybe a cup of your favorite brew, and let’s get inspired!
Exploring Montessori Outside: Nature and Movement
The great outdoors offers endless opportunities for children to learn and awaken their senses. Here are some delightful Montessori-inspired activities to embrace nature’s wonders.
Nature Scavenger Hunt
Why not turn a simple walk into a thrilling adventure? Create a scavenger hunt by providing your little one with a checklist of nature items to find. This could include:
- Different types of leaves (maple, oak, etc.)
- Rocks of various shapes and sizes
- Flowers in various colors
- Insects or birds
As your child checks off each item, encourage them to observe the textures, colors, and shapes. It’s an excellent way to sharpen their observation skills while fostering a sense of wonder.
Sensory Exploration Bags
Get creative by making sensory exploration bags filled with items from nature. Here’s how you can do it:
- Collect: Gather leaves, flowers, small stones, and other textures.
- Fill: Place the items in clear ziplock bags. Add a little water and tape them securely.
- Explore: Let your child squeeze, press, and squish the bags to feel the different textures.
This activity not only allows them to explore their tactile senses but also sparks conversations about colors, shapes, and the different parts of plants.
DIY Butterfly Garden
Building a butterfly garden can be a magical activity for your child. Here’s a simple way to involve them in the process:
- Select a Spot: Find a sunny area in your yard or balcony.
- Choose Plants: Plant flowers that attract butterflies, such as milkweed or lantana.
- Create a Routine: Water the plants together and check for butterflies regularly.
Creating a butterfly garden teaches kids about life cycles and the importance of our environment. Plus, they’ll love watching the butterflies flit around their efforts!
Engaging Indoor Nature Games
Sometimes, the weather may not cooperate with our outdoor plans. No worries! Here are a few Montessori-inspired indoor games that keep the outdoor vibe alive.
Nature Art Collage
Bring nature indoors by making a beautiful art collage. Here’s how:
- Collect: Gather leaves, petals, and twigs on your next outdoor adventure.
- Create: Provide a canvas or sturdy paper, and let your child glue their collection onto it.
- Discuss: Talk about the colors and shapes of each item while they create.
This crafts project promotes fine motor skills and encourages creativity. It also provides a perfect opportunity to discuss the different aspects of nature.
Indoor Garden Observation
Set up a mini indoor garden using pots, soil, and seeds. Choose quick-growing plants like beans or grass. Each day, have your little one observe and note any changes. They can sketch the growth stages or simply talk about what they see.
This hands-on activity instills patience and responsibility while allowing your child to connect with nature in a meaningful way.
Nature-Themed Treasure Boxes
Create nature-themed treasure boxes! Get a small container and fill it with items related to nature. For instance, you might include:
- Pinecones
- Acorns
- Small stones
- Dried flowers
Encourage your child to explore the box and describe what they find. This can lead to storytelling, sensory play, and creativity in design.
Encouraging Emotional Connection through Nature
Using nature as a focal point isn’t just about learning; it’s about connecting emotionally, too. Here are a few ways to foster a deeper connection:
Mindfulness Moments
During outdoor activities, incorporate moments of mindfulness. Pause and take a breath together, listen to the sounds around you, or close your eyes and feel the breeze. This practice can help ground your child and foster an appreciation for their surroundings.
Gratitude Walks
Take walks in nature and encourage your child to express their gratitude. You might say, “What’s something beautiful we see today?” This fosters an emotional connection to nature and a positive mindset.
Practical Tips for Implementing Montessori Activities
- Keep It Simple: Choose activities that require minimal preparation and materials. This empowers you to focus on enjoying the moment.
- Follow Their Lead: Pay attention to your child’s interests. If they show excitement about a particular topic (like bugs or plants), dive deeper into those areas.
- Involve Them in Preparation: Let your child help with setting up activities or gathering materials. It builds independence and ownership over their learning.
- Be Patient: Remember, every child learns at their own pace. Celebrate small wins and encourage exploration without pressure.
Conclusion
Remember, dear parents, you don’t have to be perfect to create a world of wonder for your little ones. Embracing Montessori principles with nature-themed activities cultivates curiosity and joy, turning every moment into an opportunity for learning.
Each time you step outside or gather materials together, you create lasting memories and teach your children about the beauty of simplicity and exploration. The best part? You’re not just nurturing their minds; you’re strengthening your emotional bond. So, as you embark on this adventure, know that every small step counts, and you’re doing an incredible job!
Grab those leaves, make those collages, and enjoy every little moment. You’ve got this, and your kids will thrive because of your efforts. Happy exploring!
Optional FAQs
1. What age group is Montessori outdoor learning suitable for?
Montessori activities can suit a wide range of ages, but they are typically designed for toddlers to preschool-aged children. Adjust activities according to your child’s interests and capabilities.
2. How can I encourage my child to engage with nature if they’re hesitant?
Start small! Introduce nature gradually through short outdoor activities, quick walks, or even nature-themed stories. Create a low-pressure environment to spark their curiosity.
3. Are there specific materials I need for Montessori nature activities?
No special materials are required! Most activities utilize common household items or items you can gather from nature. Keep it simple and fun!
4. How do I balance structured activities and free play in nature?
Both structured activities and free play hold value! Offer guided activities then allow open-ended exploration where your child can follow their interests.
5. Can Montessori activities be done indoors?
Absolutely! Many Montessori principles encourage indoor learning, and you can easily adapt many activities to fit indoor spaces.
Now go on, embrace these activities, and enjoy the magic of the great outdoors and your little ones’ discoveries! 🌿✨

Tiny Bottles, Big Calm: 6 DIY Sensory Bottle Recipes for Focus
DIY Sensory Bottles: 6 Recipes for Calm & Focus
Meta Description
Discover 6 easy DIY Sensory Bottle recipes that turn toddler meltdowns into moments of zen. Create a calming play space using organic materials!
Introduction
As a parent, you know those overwhelming moments — the tears, the tantrums, the chaos. Sometimes, it feels like everything is spiraling out of control. During those times, wouldn’t it be a blessing to have a simple tool that helps your little one find calm and focus in the midst of the storm? Enter the magic of sensory bottles!
These delightful DIY creations not only captivate toddlers but also provide a sense of tranquility, helping them navigate big emotions. Whether your child struggles with meltdowns or just needs a moment of pause, sensory bottles can transform chaos into calm. Plus, they’re incredibly easy and fun to make! Let’s dive into six soothing recipes that you can whip up in no time.
Why Sensory Bottles?
Sensory bottles engage children’s senses and promote mindfulness. When kids focus on the movement of the contents inside, they can redirect their overwhelming feelings and find a moment of peace. By incorporating organic materials into these bottles, you create a safe and enriching environment that fosters creativity and exploration.
Let’s explore how you can craft these magical tools and make the most of sensory play!
1. Ocean Waves Sensory Bottle
What You Need:
- Clear plastic bottle with a lid
- Blue water
- Glitter or small fish toys
- Vegetable oil
Instructions:
- Fill the bottle about one-third with blue water.
- Add a sprinkle of glitter and a couple of small fish toys for that oceanic feel.
- Fill the rest of the bottle with vegetable oil to create a lovely contrast.
- Ensure the lid is tightly sealed (consider using some duct tape for extra security).
- Shake and watch your ocean waves come alive!
Actionable Tip:
Encourage your child to shake the bottle and describe what they see. Ask them questions like, “What do the fish feel like?” or “How does the water move?” This helps them express their thoughts and feelings.
2. Rainbow Colors Sensory Bottle
What You Need:
- Clear plastic bottle with a lid
- Warm water
- Food coloring (various colors)
- Small beads or pom poms
- Glitter
Instructions:
- Fill the bottle halfway with warm water.
- Add a few drops of food coloring; each color can represent a different emotion.
- Toss in some small beads or pom poms for texture.
- Top with glitter and fill with more warm water.
- Seal up the bottle and give it a shake!
Actionable Tip:
Use this bottle during emotions talks with your child. When they feel a strong emotion, ask them to pick a color that matches how they feel and talk about it together.
3. Calming Lavender Sensory Bottle
What You Need:
- Clear plastic bottle with a lid
- Water
- Lavender essential oil or dried lavender
- Blue or purple glitter
Instructions:
- Fill your bottle halfway with water.
- Add several drops of lavender essential oil or a teaspoon of dried lavender for scent.
- Sprinkle some blue or purple glitter in there for a touch of magic.
- Fill the rest of the bottle with water, seal it up, and give it a good shake.
Emotional Hook:
The calming scent of lavender can be just what your child needs after a tough day. Use this bottle before bedtime or nap time for a soothing routine.
4. Starry Night Sensory Bottle
What You Need:
- Clear plastic bottle with a lid
- Water
- Black or dark blue food coloring
- Star confetti or glow-in-the-dark stars
- Baby oil
Instructions:
- Fill the bottle one-third with water and add several drops of black or dark blue food coloring to create a night sky.
- Toss in star confetti or small glow-in-the-dark stars.
- Fill the rest with baby oil, which will slow down the movement of the stars.
- Seal the lid tightly and shake!
Helpful Examples:
This bottle is perfect for nighttime routines. When your child is anxious about going to sleep, show them how to shake it and watch the stars twinkle.
5. Sensory Rattle Bottle
What You Need:
- Clear plastic bottle with a lid
- Rice or pasta
- Assorted small objects (buttons, beads, or tiny toys)
Instructions:
- Fill the bottle about one-third with rice or pasta.
- Add a selection of small objects for a delightful rattle sound.
- Completely fill the bottle with more rice or pasta to the neck, then seal the lid.
Practical Parenting Advice:
Encourage your child to move the bottle around, creating sound and visual stimulation. Use this bottle during playdates or group activities to enhance interactions with peers.
6. Nature Time Sensory Bottle
What You Need:
- Clear plastic bottle with a lid
- Water
- Natural materials (small twigs, leaves, or flower petals)
- A few drops of natural food color (optional)
Instructions:
- Wet the twigs, leaves, and petals. Fill the bottle with these nature elements.
- Pour water to fill it up. Optionally add a drop of food coloring for a fun twist!
- Seal the lid securely — nature’s wonders are created to be cherished!
Engaging with Nature:
Take your little one on a nature walk to collect materials. Together, you can personalize this bottle, making it a cherished reminder of your adventure!
Encouraging Conclusions
In the whirlwind of parenting, creating calm and focus doesn’t need to feel daunting. By tapping into DIY sensory bottles, you not only contribute to your child’s emotional development but also strengthen your bond through shared activities. These recipes are simple, fun, and incredibly rewarding.
Remember, you’re doing a fantastic job! Parenting is not about being perfect; it’s about creating opportunities for connection and learning, even in the messiest moments. So gather your supplies, get creating, and watch as your home transforms into a hub of calm and creativity!
Ready to Dive Deeper?
Share your sensory bottle creations and let us know how your little ones responded! Don’t forget to check back for more wonderful parenting tips and tricks. You belong here, and we’re all in this together — one lovely moment at a time.
Optional FAQ Section
Q: How often should we use sensory bottles?
A: Feel free to integrate them into your routine whenever you sense big feelings brewing or simply during quiet playtime.
Q: Can I use other materials for the bottles?
A: Absolutely! Tailor these recipes based on what you have at home. The more personal the bottle, the more special it becomes to your child.
Q: What age is appropriate for sensory bottles?
A: Sensory bottles suit toddlers and older children alike! Just keep in mind any potential choking hazards with small objects for younger kids.
Make parenting feel lighter and more joyful with these simple sensory bottle recipes, and remember, every moment spent together counts! 🌼
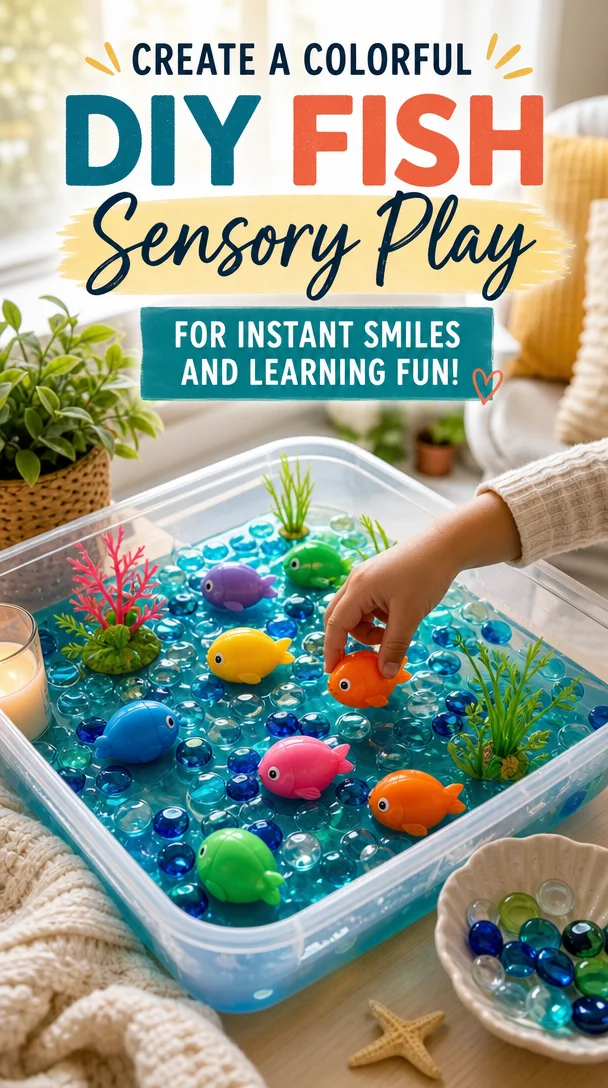
Create a Colorful DIY Fish Sensory Play for Instant Smiles and Learning Fun!
Dive into Fun with This DIY Sensory Fish Game for Toddlers!
Meta Description
Create a fun and engaging DIY sensory fish game for toddlers! Discover step-by-step instructions and tips for sensory play that sparks joy and creativity.
Introduction
Hey there, fellow parents! 🌼 If there’s anything we can all agree on, it’s that parenting can feel like a whirlwind of chaos, excitement, and pure magic all at once. Are you looking for a simple, engaging activity that delights your little ones and keeps them off screens? Today, I want to introduce you to a DIY sensory fish game that not only sparks joy but also nurtures your child’s curiosity and fine motor skills.
Creating this sensory game together can become a treasured bonding moment, filled with laughter and smiles. Plus, it’s an excellent way to encourage exploration and discovery—all while having fun! So, grab your supplies, and let’s dive in!
What is a DIY Sensory Fish Game?
A DIY sensory fish game engages toddlers in a tactile and visual experience. It allows them to squish, press, and explore textures while promoting creativity and imaginative play. Using simple materials, you can craft a colorful fish that holds a delightful surprise inside—water, glitter, and food coloring! It’s not just a game; it’s a chance for your child to explore textures, colors, and even cause-and-effect relationships.
Why Sensory Play Matters
Sensory play is crucial for your child’s development. Research shows that engaging in sensory activities strengthens brain pathways, which are vital for cognitive growth. Plus, it enhances fine motor skills, hand-eye coordination, and problem-solving abilities. In simpler terms, sensory play helps your little ones learn and grow while having a blast!
Getting Started: What You’ll Need
Before we jump into crafting this exciting sensory fish game, let’s gather our supplies! Here’s what you’ll need:
- Clear plastic sheet or laminating pouch
- Permanent markers (waterproof)
- Iron or hair straightener
- Water
- Food coloring (your favorite colors)
- Glitter (the more sparkly, the better!)
- Scissors
- Tape (optional)
Once you have everything on hand, let’s get crafty!
Step-by-Step Instructions to Create Your DIY Sensory Fish Game
1. Draw Your Fish
Start by drawing a fun fish shape on your plastic sheet with permanent markers. Let your creativity flow! Use bright colors and add cheerful details like scales or silly eyes. This part is all about having fun and personalizing your sensory game.
2. Seal the Edges
Using your hair straightener or iron, carefully seal the edges of your plastic sheet. Be sure to leave a large opening to fill it with your sensory mixture later. Pro tip: When cutting around your fish, leave about 2 cm of extra plastic around the edges. This helps prevent leaks and makes sealing much easier.
3. Prepare Your Sensory Mixture
Now for the fun part! Mix water with a few drops of food coloring and sprinkle in some glitter. The colors and sparkles will fascinate your toddler as they explore the sensory experience. Pour this mixture into the fish shape through the opening you left earlier. Watch your little one’s eyes light up with excitement!
4. Seal Everything Up
With the mixture inside, it’s time to seal the final opening. Carefully flatten out the plastic to remove excess air, then seal it off with your hair straightener or iron. Make sure it’s tightly closed to avoid any spills during playtime.
5. Bring on the Play!
Now, it’s time to let the fun begin! Hand your little one this delightful sensory fish and encourage them to squish, poke, and explore the texture. They’ll love the sensation of the water and glitter rushing around inside the fish!
Tips to Enhance the Sensory Experience
As you and your child enjoy this DIY sensory fish game, consider these additional ideas to keep the activity fresh and exciting:
Experiment with Materials
Change up the sensory mixture! Try using different colored water or even add small beads, foam shapes, or sequins to the mix. You can create a variety of sensory experiences, prompting discovery and conversation.
Include Themed Play
Use this activity as a part of a marine or ocean-themed day! Pair the sensory fish with books about ocean life, or set up a play area with stuffed sea creatures. This makes learning feel effortless and engaging.
Discuss Colors and Textures
While your child plays, engage them in conversation about the colors and textures they feel. Ask questions like, “How does it feel when you squish the fish? What colors do you see?” Helping them articulate their experiences fosters language development.
Encouraging Connections Through Sensory Play
This DIY sensory fish game not only offers hours of enjoyment but also creates a valuable opportunity for laughter and connection. As parents, we often feel the pressure to craft perfect memories, but it’s in these simple, unhurried moments that our children thrive.
1. Create Meaningful Moments
Take time to sit and play alongside your child. Share in their giggles, delight in their discoveries, and simply enjoy being present. These shared experiences build a strong bond, while providing your little ones with reassurance and comfort.
2. Celebrate Their Achievements
As your child interacts with the sensory fish, celebrate their curiosity. Whether they notice a new color swirling inside or point out a unique texture, these small wins matter. Offer praise and encouragement for their explorations!
3. Capture the Memories
Snap a few pictures of your child getting lost in the sensory experience! These photos will become cherished reminders of the joyful moments spent together as a family. You can create a scrapbook or a digital album to look back on these memories.
Conclusion: Enjoying Parenthood, One Sensory Project at a Time
In the whirlwind of parenting, it’s easy to feel overwhelmed. Remember, you don’t need to strive for perfection; instead, focus on creating meaningful moments filled with joy and laughter. This DIY sensory fish game is more than just an activity; it’s a chance to connect, explore, and, most importantly, embrace the beautiful chaos of family life.
So, gather those supplies, channel your inner artist, and dive into this colorful adventure with your toddler. You’re doing an amazing job, and these little moments will create a bond that lasts a lifetime. Happy crafting! 💖
FAQs
Q1: How can I store the sensory fish when not in use?
A1: Store your sensory fish flat in a cool place to prevent any leaks. If it becomes too squished, reseal it with an iron!
Q2: Can I use other designs instead of a fish?
A2: Absolutely! Get creative with different marine animals, shapes, or themes. Let your child’s interests guide the designs.
Q3: Is this activity safe for all ages?
A3: While toddlers love sensory play, ensure adult supervision, especially with younger kids, to avoid any choking hazards.
Feel free to spread the magic of this DIY sensory fish game with your fellow parents on social media. Together, we can create a supportive community, sharing tips, tricks, and the joys of family life!