Make Your Own Nature Paint Brushes for Kids – Happy Toddler Playtime
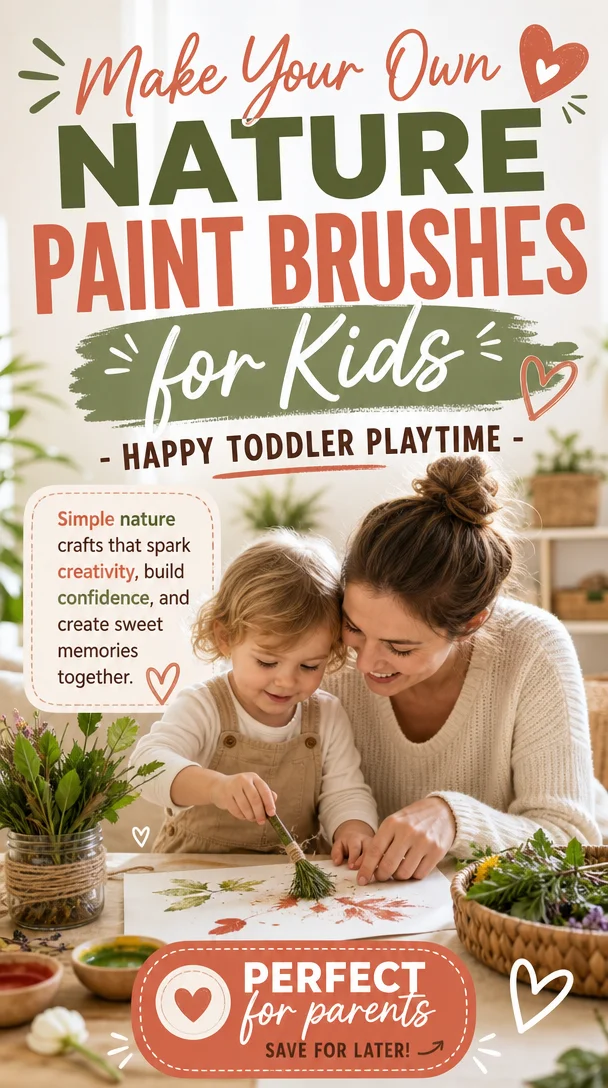
Make Your Own Nature Paint Brushes: Happy Toddler Playtime
Meta Description: Create unique nature paint brushes with your kids! This fun, screen-free activity nurtures creativity while enjoying the great outdoors.
Introduction
As a parent, you know the challenges that come with keeping little ones engaged and happy. You juggle nap times, snack breaks, and seemingly endless energy, all while trying to find ways to encourage creativity. But let me assure you, you’re not alone!
Imagine heading outdoors, breath fresh with the scent of grass, and the excitement sparkling in your child’s eyes as they discover the beauty in simple twigs, leaves, and flowers. Not only does this little adventure provide an excellent opportunity for imaginative play, but it also sparks curiosity and creativity through a delightful art project: making your own nature paint brushes.
In this blog post, I’ll guide you step-by-step as we make nature paint brushes together. You’ll find tips, encouragement, and a sprinkle of fun along the way. Get ready to explore the world with your toddler and create some beautiful art that celebrates nature’s wonders!
The Benefits of Using Nature Paint Brushes
Before we dive into the how-to part, let’s chat about why this activity is not just a fun way to spend an afternoon but also a learning experience packed with developmental benefits.
Nurturing Creativity
Encouraging creativity is vital for young developing minds. Using nature items for painting opens up a whole new world of texture and color. Each brush you create represents a unique experience—each twig or flower petal embodies exploration.
Promoting Fine Motor Skills
Swirling, dipping, and painting with nature brushes improves fine motor skills. When toddlers grasp different brush materials, they practice coordination and control, all while having a splendid time!
Connecting with Nature
In a world filled with screens, getting outside and interacting with nature is crucial. This activity allows kids to discover the beauty around them while stimulating their senses. You’ll watch as they touch, smell, and, yes, even taste some of the different textures they find!
Quality Family Time
As you create these brushes and craft beautiful pieces of art together, you’re strengthening family bonds. Sharing laughs, insights, and the occasional surprise discovery makes lasting memories.
Crafting Your Own Nature Paint Brushes
Now that you’re excited about the rewards, let’s get into the nitty-gritty. This is a simple, screen-free activity that’s easy to set up. Grab your outdoor gear, and let’s head out!
What You’ll Need
-
Materials for Brushes:
- Twigs, sticks, or branches (consider different sizes and textures)
- Leaves (big and small)
- Flowers (safe and non-toxic)
- Pine needles (for a different texture)
- Grass (for a unique bristle effect)
-
Painting Supplies:
- Non-toxic paint (washable is best for little hands)
- Large paper or canvas (for your masterpieces)
- Paint plates or containers (something to hold the paint)
- A bowl of water (for cleaning up)
Step 1: Nature Scavenger Hunt
Start your adventure with a nature scavenger hunt! Give your toddler a small bag or basket and head out to collect materials. Encourage them to choose different shapes and sizes—this is their chance to explore!
You might say, “Look at this big leaf! Can you find a smaller one? What about that green twig over there? Let’s see how many different things we can gather!” This playful dialogue encourages observation and sparks excitement.
Step 2: Making the Brushes
Once you’ve gathered your treasures, it’s time to create your paint brushes. Depending on your child’s age, they might need some help with this part. Here’s how:
-
Twigs/Branches: Wrap the ends with the paintable material (leaves, flowers, etc.) using string or rubber bands. This will create a nice grip and a brush effect.
-
Grass Brushes: Gather a handful of grass, tie it tightly with string, and trim the ends for an even look.
-
Pine Needle Brushes: Use a twig and attach pine needles at the end by wrapping them with string.
Let your little ones help wherever they can, from holding the materials to wrapping the string. They’ll feel a sense of accomplishment in creation!
Step 3: Painting Time!
Now, it’s time for the fun part—painting! Set up your workspace outside or in a well-protected area. Pour the non-toxic paint into your containers and have your toddler dip their new brushes into the colors.
Encourage them to explore different techniques. Ask questions like, “What happens when we use the leaf brush versus the twig? Can we mix two colors and make something new?”
Tips for an Engaging Nature Painting Experience
This activity is full of opportunities to engage your toddler. Here are some tips to enhance the experience:
1. Create a Theme
If it’s autumn, collect colorful leaves and use them as inspiration for fall-themed paintings. In spring, encourage them to paint flowers or sunshine!
2. Story Time
As your kids paint, tell stories related to what they are creating. “Once upon a time, a little bird found a crown made of flowers!” This keeps their imagination flowing.
3. Fun Music
Set the mood with some lively music while you paint. Dancing and singing together doubles the fun.
4. Capture the Moment
Take pictures of your kid’s creations. Not only does this preserve memories, but it also shows your child how proud you are of their work. You can even make a little photo book as a keepsake!
Encouraging Open-Ended Exploration
It’s essential to create an environment that fosters imagination and creativity. Encourage your child to explore beyond just painting with their nature brushes.
-
Texture Exploration: Allow them to feel the different materials. Ask them which one they think will create the best marks.
-
Color Mixing: Provide different paint colors and prompt them to mix them for exciting new hues.
-
Nature Stories: Use the brushes to create a story on paper. They can paint their favorite animals or settings based on what they learned while exploring.
Each moment is a chance for learning, and as you support their creativity, you’ll be amazed at how this strengthens your bond.
Conclusion
Creating your own nature paint brushes is not just a craft; it’s a beautiful opportunity to nurture your child’s creativity, enhance their motor skills, and connect with the world around them. You’ll see the sheer joy on their faces as they explore, create, and tell stories through their art.
Remember, it’s not about perfection or the final piece but the experience shared—the laughter, the exploration, and the magical moments that make parenting so rewarding.
You’re doing an incredible job navigating this beautiful journey of parenthood, and each moment spent fostering creativity adds warmth and joy to your family life. So grab those nature brushes and paint the town—together!
Optional FAQs
Q: What materials work best for nature paint brushes?
A: Twigs, leaves, flowers, pine needles, and grass each bring unique textures and effects to your paintings. Experiment to find what works best for you and your child.
Q: How can I clean up after our painting session?
A: Since we used non-toxic and washable paints, cleanup involves a bowl of water and some paper towels or cloths. Encourage your child to rinse their brushes in the water after painting.
Q: Can we do this activity indoors?
A: Absolutely! Just make sure to cover your workspace with newspaper or a plastic sheet to protect surfaces from spills.
Now, go dive into nature and unleash the creativity that awaits. Happy crafting!
Nature Cutting Bin for Preschoolers: A Mess-Free Way to Build Scissor Skills
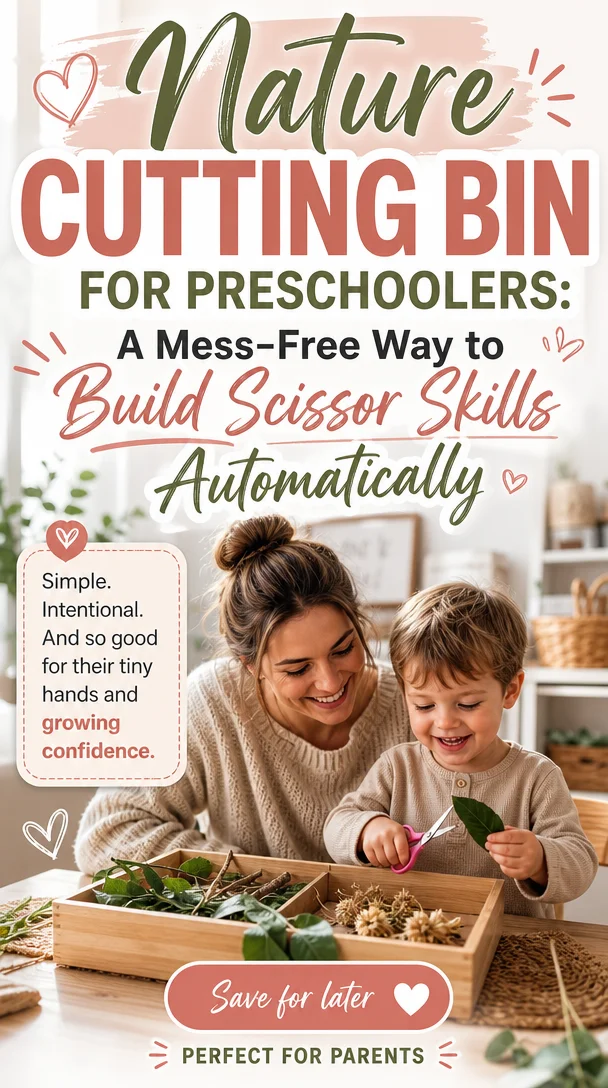
Unleash Creativity with a Nature Cutting Bin: A Delightful Activity for Preschoolers
Meta Description: Discover a fun, free activity for preschoolers with a DIY nature cutting bin. Encourage scissor skills while exploring the outdoors!
Introduction
Ah, the beauty of childhood! There’s something incredibly magical about watching your little ones explore the world around them. Yet, as parents, we often find ourselves pondering how to channel that bubbling energy into creative and educational activities. Enter the nature cutting bin—a game-changer for busy toddlers eager to learn while having fun!
Imagine your preschooler snipping away at colorful clippings from your yard, developing fine motor skills all while having a blast. Sounds fantastic, right? This hands-on experience not only entertains but also fosters their creativity and dexterity. Plus, it costs nothing but a little time and the treasures Mother Nature provides.
So, let’s dive into everything you need to know about creating this engaging nature cutting bin and how it can brighten your family’s day!
What is a Nature Cutting Bin?
A nature cutting bin is a simple sensory activity where your child explores various natural materials—think twigs, leaves, flowers, and more—using scissors to cut and interact with them. This activity marries outdoor play with fine motor skill enhancement, creating a perfect blend for curious minds.
By providing a mix of textures, colors, and shapes, you give your little one the chance to experiment and learn in an inviting way!
Why Choose a Nature Cutting Bin for Your Preschooler?
1. Encourages Scissor Skills
For preschoolers, mastering scissor skills lays the foundation for future writing and crafting. Children learn to open and close the scissors, strengthen grip, and start controlling their cutting line, making this an essential skill-building activity.
2. Fosters Creativity and Imagination
When your child rambles through the yard or a nearby park collecting materials, they engage in imaginative play. The simple act of picking up nature’s treasures sparks creativity, and cutting those items allows them to express their ideas visually.
3. Promotes Outdoor Exploration
With so much screen time these days, outdoor exploration is more important than ever. This activity not only gets your little one outside but also instills a love for nature and its boundless lessons.
4. Offers Sensory Stimulation
The variety of textures and smells in a nature cutting bin provides rich sensory experiences. Children develop tactile sensitivity as they handle everything from soft petals to rough tree bark.
5. Strengthens Parent-Child Bonding
Activities that involve hands-on engagement create wonderful opportunities for conversation, shared laughter, and meaningful memories. As you join your child in this exploration, cherish these moments together!
How to Create Your Own Nature Cutting Bin
Creating a nature cutting bin is incredibly simple and requires minimal materials. Here’s how to get started:
Step 1: Gather Supplies
- Natural Materials: Go for a variety of items—twigs, leaves, grass, flowers, and even some stones if you want to mix it up.
- Scissors: Child-safe scissors work best for preschoolers. They should be lightweight and easy to grip.
- Container: An outdoor bin or a simple tray will suffice to keep things organized.
- Optional: Magnifying glass for closer inspections, paper for collecting cuttings, and a small bag for collecting items.
Step 2: Head Outside
Take a walk with your child, encouraging them to collect anything that catches their eye. This part of the activity allows for lots of discussions about what they find. Ask questions like, “What color is this flower?” or “How does this leaf feel?”
Step 3: Set Up the Cutting Bin
Arrange your collected treasures in the container or tray. If you’re using paper, place it beneath the materials. When your child is ready, have them explore the bin, encouraging them to cut different items.
Step 4: Encourage Exploration
As your child engages with the materials, offer some gentle prompts. You might say, “Can you find the longest piece of grass?” or “What happens if you cut this leaf?” This will encourage both exploration and conversation!
Step 5: Celebrate Their Work
Once your child has finished cutting, celebrate their creations! You could create a nature collage together or make a “nature scrapbook” to store their favorite pieces. This celebratory step helps your child feel proud of their efforts.
Tips for Success: Make the Most of Your Nature Cutting Bin
1. Create a Safe Cutting Environment
Safety comes first! Ensure your child has enough room to cut freely, and always supervise them while they use scissors. Teach proper scissor handling beforehand to prevent accidents.
2. Keep it Simple
Don’t overwhelm your child with too many materials. A few key items will suffice to spark their creativity. In fact, working with fewer materials often leads to more imaginative play!
3. Incorporate Learning
Use this time to weave in educational elements. Discuss colors, shapes, and sizes as they cut. Count pieces together, identify different plants, or even introduce simple science concepts like decomposing leaves.
4. Allow for Free Play
While some structure is helpful, allow your child space for free exploration. They might surprise you with ways they choose to engage with the materials!
5. Mix it Up
Change up the contents of your cutting bin each time or use materials from different seasons to keep it fresh and exciting.
Nature Cutting Bin Variations
Here are some fun variations to consider for your cutting bin:
Seasonal Themes
- Spring: Focus on soft flowers and vibrant greens.
- Summer: Incorporate sturdy leaves and colorful butterflies.
- Autumn: Use colorful leaves, pine cones, and twigs.
- Winter: Add dried out stems or even past holiday decorations like holly.
Adding a Sensory Component
Introduce other sensory materials like water beads, sand, or clay to enhance your cutting experience. Let your child cut items and then mix them with these sensory delights for a multi-faceted playtime.
Encouragement: Let’s Keep Going!
As we wrap up our discussion about creating a nature cutting bin, remember that not every activity will be a perfect hit. Sometimes the weather doesn’t cooperate, or distractions creep in. That’s okay!
What’s important is offering your child consistent opportunities for growth, exploration, and fun. Celebrate both the success and the struggles along the way, and cherish the joyful connections you’re fostering.
Next time you’re feeling a little heat from the chaos of parenting, take a step back and consider a simple, free activity like the nature cutting bin. It’s these small moments that often make the biggest memories.
Conclusion
Creating a nature cutting bin gives your preschooler so much more than just an enjoyable activity; it nurtures their fine motor skills, sparks creativity, and strengthens the bond between you two. So gather those leaves, grab those scissors, and let the cutting begin! Parenting isn’t perfect, but it can certainly be an adventure—full of laughter, lessons, and a sprinkle of nature’s magic.
Optional FAQ Section
Q: What if my child doesn’t want to cut the nature items?
A: Encourage other forms of play! Perhaps they’d enjoy just exploring the textures or making a nature-themed craft. Keep it light and let their interests guide the activity.
Q: How often should I set up a nature cutting bin?
A: Regularly! But listen to your child. If they find it repetitive, mix up the materials or take a break. The goal is to keep it fun and engaging!
Q: What age group is this activity suitable for?
A: The nature cutting bin is fantastic for toddlers and preschoolers, ideally ages 2-5, but older kids can enjoy it too by incorporating more complex cutting and crafting projects!
Happy cutting, and enjoy every beautiful little moment with your little explorer! 💚
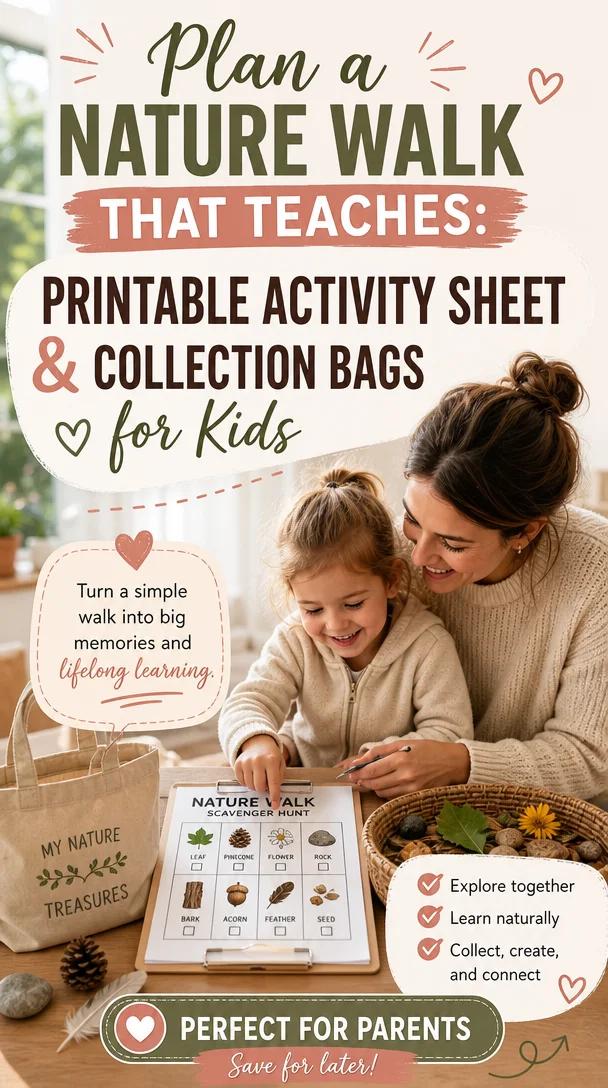
Plan a Nature Walk That Teaches: Printable Activity Sheet & Collection Bags for Kids
Nature Walk Collections + Printable Activity Sheet: A Parent’s Guide to Outdoor Learning
Meta Description
Explore nature walks with your kids! Discover tips, outdoor learning activities, and a free printable activity sheet to enhance your family adventures.
Introduction
Ah, nature walks! Those delightful adventures where the great outdoors meets family bonding. If you’ve ever taken your little ones on a stroll through the trees, you’ve probably felt the magic unfold as they discover the world around them. From crunchy leaves to colorful flowers, each step reveals something new and wondrous.
But let’s be honest—planning a successful nature walk can sometimes feel overwhelming. What should you bring? How do you keep the kiddos engaged? This guide aims to take the pressure off and create an enjoyable outdoor experience for you and your little explorers. Here, you’ll find practical tips for planning a nature walk, fun outdoor learning activities, and even a handy Printable Activity Sheet to take along for the ride.
So, grab your backpacks and put on those walking shoes! Let’s create meaningful moments that will make your heart swell.
Why Nature Walks Matter
The Benefits of Outdoor Learning
Nature walks provide more than just fresh air and exercise. They offer a myriad of benefits for both you and your kids. Here are just a few reasons why getting outside is so vital:
-
Physical Health: Walking promotes fitness, helps burn off energy, and contributes to healthy development. Plus, who doesn’t love a chance to stretch those little legs?
-
Mental Well-being: Nature has an incredible way of calming our minds. The sights, sounds, and scents can ease anxiety and improve mood—not just for kids, but for adults too!
-
Curiosity and Learning: Every leaf, bug, and rock can spark curiosity. Nature is a living classroom, providing endless opportunities for questions, discovery, and important life lessons.
-
Bonding Time: Shared experiences in nature strengthen family connections. Discovering the world together creates memories that last a lifetime.
Planning Your Nature Walk
Step 1: Choose Your Location
The first step in planning a nature walk is selecting the perfect spot. Consider local parks, nature reserves, or even your backyard. Look for areas that offer diverse landscapes—think woods, streams, or fields. Each environment presents unique opportunities for exploration.
Tip: If you’re uncertain of where to go, check out local community boards or websites for family-friendly hiking trails!
Step 2: Gather Your Supplies
To make your journey enjoyable and successful, prep a little beforehand. Here’s a checklist of supplies you might want:
- Backpacks: Bring along a sturdy backpack for each child to carry their treasures.
- Water and Snacks: Keeping hydrated and fueled is key! Pack water bottles and healthy snacks like fruit or trail mix.
- Nature Collection Bags: Simple, reusable bags (or even old pillowcases) for collecting leaves, rocks, or any interesting finds.
- First-Aid Kit: Just in case! It’s always better to be prepared.
- Camera or Smartphone: Document your little one’s discoveries. Capturing these moments will create lasting memories.
Step 3: Set the Tone
Before heading out, gather your kids and get them excited! Discuss what they might see, hear, and feel during the walk. Use engaging language to paint a vivid picture of the adventure ahead.
Ask fun questions like:
- “What color flowers do you think we’ll find today?”
- “How many different insects do you think we’ll see?”
These conversations spark curiosity and set an enthusiastic mood right from the start.
Step 4: Keep It Fun and Active
Children have a natural curiosity and boundless energy, so keep the walk engaging. Here are ways to make your nature walk fun and interactive:
-
Treasure Hunts: Create a simple scavenger hunt list. Include items like pine cones, feathers, or specific types of leaves. You can find a Printable Activity Sheet at the end of this article to get you started!
-
Nature Bingo: Use a bingo card filled with common local plants and animals. Mark off each item as you spot them; it’s like a game within a walk!
-
Storytelling Sessions: Encourage your children to invent stories about the characters they meet in nature. This helps develop their imagination while they connect with the environment.
Fun Outdoor Learning Activities
Nature walks aren’t just a stroll; they provide countless opportunities for learning! Engaging your kids in educational activities keeps them focused and makes the experience enriching. Here are some ideas to spark their interest:
Activity 1: Nature Journaling
Before the walk, provide your kids with their own journals. Encourage them to draw and write about their favorite findings. You can include prompts like:
- "Describe your favorite leaf shape."
- "What animal would live in this habitat?"
This activity hones observation skills and encourages reflection on their experiences.
Activity 2: Create a Nature Collage
When you get home, assemble the collected items—a leaf, a flower petal, a unique rock—and make a nature collage. Help your child glue these treasures onto paper, and encourage them to describe each item’s significance.
Activity 3: Sound Mapping
During the walk, pause occasionally and listen. Have your kids close their eyes and identify sounds—birds chirping, leaves rustling, or water trickling. Afterward, let them map out what they heard. This activity sharpens listening skills and deepens their connection to nature.
Activity 4: Mini Science Experiments
If you’re up for a little experimentation, encourage your kids to test hypotheses on-site! For instance, drop different leaves into water and observe buoyancy. Ask questions like, “Which one sinks? Which one floats?” These little lessons bring science to life in a tangible, engaging way.
Printable Activity Sheet: Your Nature Walk Companion
Before you head out, don’t forget to download our Printable Activity Sheet! This handy companion includes:
- A scavenger hunt checklist
- A nature bingo card
- Sections for nature journaling
- A sound map for a fun listening activity
Having this printed sheet will help maintain focus and make your adventure even more exciting!
Helpful Tips for a Successful Nature Walk
-
Keep It Short: Young children often have short attention spans, so aim for a walk that lasts around 30 to 60 minutes, depending on their enthusiasm.
-
Dress Comfortably: Dress your kids in layers suitable for the weather, and don’t forget sturdy shoes for exploring!
-
Plan for Breaks: Walks can drain energy quickly, so schedule brief stops for snacks and rest to keep spirits high.
-
Go With the Flow: Remember, plans can change. If your child finds something fascinating, take a moment to explore it. Adaptability creates a relaxed, joyful experience.
Encouraging Conclusion
Embarking on nature walks with your children can become some of the most cherished moments of your family life. These adventures not only foster a love for the outdoors but also create beautiful memories that strengthen your bond. This guide arms you with practical tips and engaging activities to make each walk a delightful journey, no pressure included!
So, what are you waiting for? Head outside, breathe in that fresh air, and let the wonders of nature sweep you and your children off your feet. You’ve got this, and remember—parenting is a journey best celebrated one little moment at a time.
FAQs
Q: How often should we go on nature walks?
A: There’s no one-size-fits-all answer! Aim for a few times a month, but feel free to go more often if your family enjoys it.
Q: Can we do nature walks if we live in a city?
A: Absolutely! Parks, botanical gardens, or even nature trails within urban areas can serve as fantastic spots for exploration.
Q: What if my child doesn’t want to walk?
A: Try to make the experience more engaging! Incorporate games, exploration, or even let them bring a favorite toy for companionship.
Q: What age is appropriate for nature walks?
A: Young children from toddler age and up can enjoy nature walks. Make adjustments based on their capabilities, and don’t hesitate to cut the journey short if needed!
Feel free to print and share the activity sheet here—let’s encourage more families to embrace the glorious outdoors!
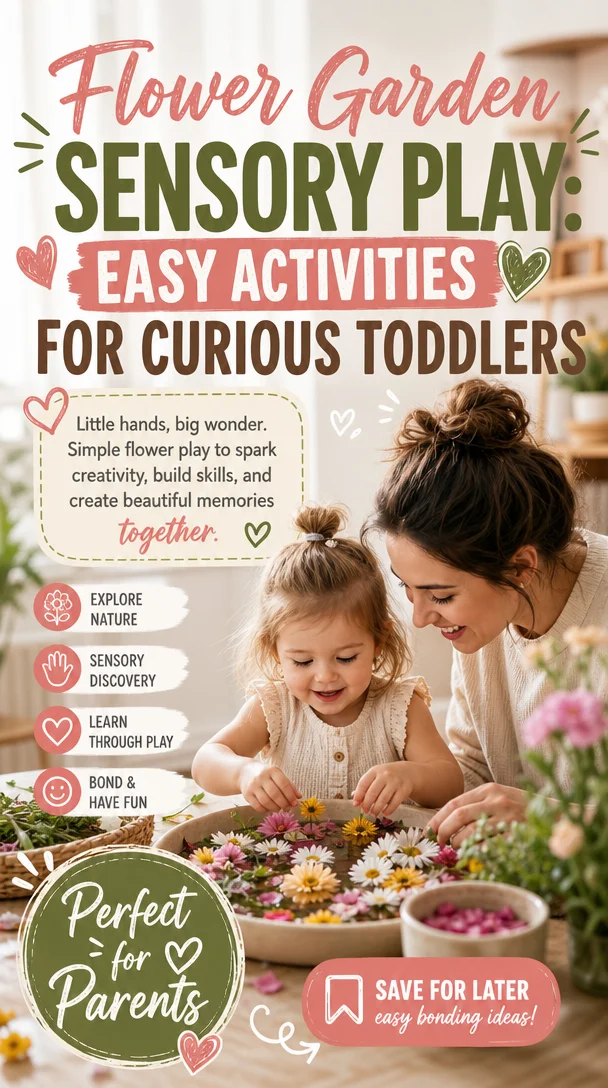
Flower Garden Sensory Play: Easy Activities for Curious Toddlers
Create a Vibrant Flower Garden Sensory Play Experience for Your Kids
Meta Description:
Discover the joy of a Flower Garden Sensory Bin! This engaging sensory play idea promotes creativity and development while providing an easy, fun activity for your toddlers.
Introduction
Do you ever feel like your little ones are brimming with energy, eager to explore every corner of your home? I get it! As a parent, those moments can feel both magical and overwhelming. But fear not! Engaging your child in creative play can turn that energy into a delightful experience. Today, let’s dive into a fun and easy sensory play idea that will keep their curiosity alive while fostering creativity: the Flower Garden Sensory Bin!
Imagine the joy of watching your child’s face light up as they dive into a world of colors, textures, and the joys of gardening—all from the comfort of your living room or backyard. This sensory bin not only captivates their imagination but also enhances their fine motor skills, encourages language development, and provides a fabulous opportunity for you to bond. So grab your supplies, and let’s get started on creating a beautiful garden without the muddy shoes!
What is a Sensory Bin?
Before we plant our gardening seeds, let’s quickly discuss what a sensory bin is, in case you’re new to this concept. A sensory bin is a container filled with materials that stimulate a child’s senses. It allows for open-ended play, where kids can explore, discover, and learn at their own pace. With a mix of tactile elements and creative themes—like our Flower Garden—you can transform any ordinary day into an extraordinary adventure of learning and discovery.
Setting Up Your Flower Garden Sensory Bin
Creating a Flower Garden Sensory Bin is an enjoyable activity you can do together with your children. Not only does it foster their engaging exploration, but it also allows them to connect with nature in a playful way. Here’s what you’ll need to set up your sensory garden:
Supplies Needed
-
Base Materials:
- A large plastic tub or bin (I love using clear bins so the kids can see the contents!)
- Kinetic sand or potting soil for a realistic gardening feel
- Rice, or even dried beans for added texture
-
Flower Supplies:
- Artificial flowers (think colorful blooms in various sizes)
- Small gardening tools (toy spades, rakes, watering cans)
- Pots for planting (you can even use recycled containers or cups)
- Natural elements (pine cones, pebbles, or real leaves)
-
Decorative Touches:
- Gardening gloves for your little ones (they’ll love wearing them!)
- Colorful bowls or scoops for sorting and playing
- Optional: Bug figurines or butterflies for added fun!
How to Assemble the Bin
-
Start with the Base: Pour the kinetic sand or potting soil into the bin. Spread it out evenly to create a gardening playground.
-
Add the Flowers: Place the artificial flowers strategically around the bin. Let your kids decide where each flower goes!
-
Incorporate Tools & Accessories: Scatter the gardening tools and pots throughout the sensory bin. This invites your child to engage in pretend play—“Let’s plant flowers!” “I need a watering can!”
-
Get Creative: Drop in some natural elements, like pebbles and leaves, to enhance the sensory experience and spark imagination.
-
Time to Play: Invite your child to explore. Allow them to dig, plant, water, and create their own floral masterpiece.
Engaging Activities with Your Flower Garden Sensory Bin
Your Flower Garden Sensory Bin serves as more than just a fun activity—it’s a multifaceted learning experience! Here are some ways to bring more depth to your child’s playtime:
1. Counting Flowers:
Encourage your little ones to count their flowers, pots, or gardening tools. Use this as an opportunity to practice counting together, or even introduce simple math concepts like addition and subtraction.
2. Talk About Colors and Shapes:
Engage your child’s imagination by discussing the colors of the flowers. Ask them to sort the flowers by color or shape, enhancing their language skills. For example, “Which flower is the biggest?” or “Can you find the purple flower?”
3. Role Play:
Tap into their imaginative side by role-playing as gardeners. Take turns from planting to watering, and even selling flowers! Dialogue like, “I’m planting a sunflower! What will you plant?” encourages creativity and communication.
4. Sensory Exploration:
Discuss the textures and scents they experience. Touch the sand, feel the smooth plastic flowers, and smell the fresh air. This encourages sensory awareness and vocabulary development.
5. Storytime Connection:
Create stories around their experiences. Ask, “What happens to the flowers if they don’t get water?” This activates their critical thinking and creativity.
Practical Tips for a Successful Sensory Play Experience
As you embark on this engaging sensory journey, here are a few practical tips to keep in mind:
-
Set Up Outside (If Possible): If you can, consider setting up the sensory bin outdoors. This not only allows for easier clean-up but also connects your little one directly to nature.
-
Control the Mess: Keep a dustpan and broom handy for easy cleanup afterwards. Sometimes the mess adds to the fun!
-
Supervise Closely: While sensory experiences are a great opportunity for independent play, always keep a close eye to ensure safe play.
-
Be Prepared for Questions: Your child’s curiosity will likely lead to a myriad of questions. Prepare yourself to engage in meaningful conversations about gardening, nature, and the world around them.
-
Rotate Materials: Change out some supplies every few weeks to keep the activity fresh and exciting.
Celebrating Small Wins in Sensory Play
Remember, the goal of sensory play is not just to entertain but to create meaningful moments. Celebrate the small wins: their first plant, their courage to explore new textures, or simply seeing the joy on their face. Every little step matters in building confidence and curiosity in your child.
Here’s a quick tip: take photos during their play! Capturing these moments not only preserves memories but also allows you to reflect on how they’ve grown, both in skills and confidence.
Encouraging Conclusion
As you and your child dig into this Flower Garden Sensory Bin, know that you are fostering their development in a fun, engaging way. Remember, parenting isn’t about being perfect — it’s about creating loving, learning experiences. Allowing your child the freedom to explore, observe, and play nurtures their imagination and fuels their sense of wonder.
So, what are you waiting for? Grab those supplies and watch as your little one blossoms into a joyful gardener! These small moments can offer big opportunities for connection, so lean into the fun and enjoy every second.
Optional FAQ Section
Q: How long can we keep the sensory bin active?
A: As long as you maintain the materials, the sensory bin can stay active for weeks! Just remember to periodically clean and check for any signs of wear.
Q: Can I tailor this idea for older kids?
A: Absolutely! Introduce more complex concepts like plant care, seed germination, or even discussions on ecosystems for older children.
Q: What if my child doesn’t seem interested?
A: Engage them by demonstrating the first few steps of play, or involve them in the setup process. Sometimes, the excitement comes from being part of the creation!
Invite your little ones into the magic of gardening with this Flower Garden Sensory Bin. Enjoy the laughter, the learning, and the beautiful chaos that comes with it! Happy parenting! 🌼
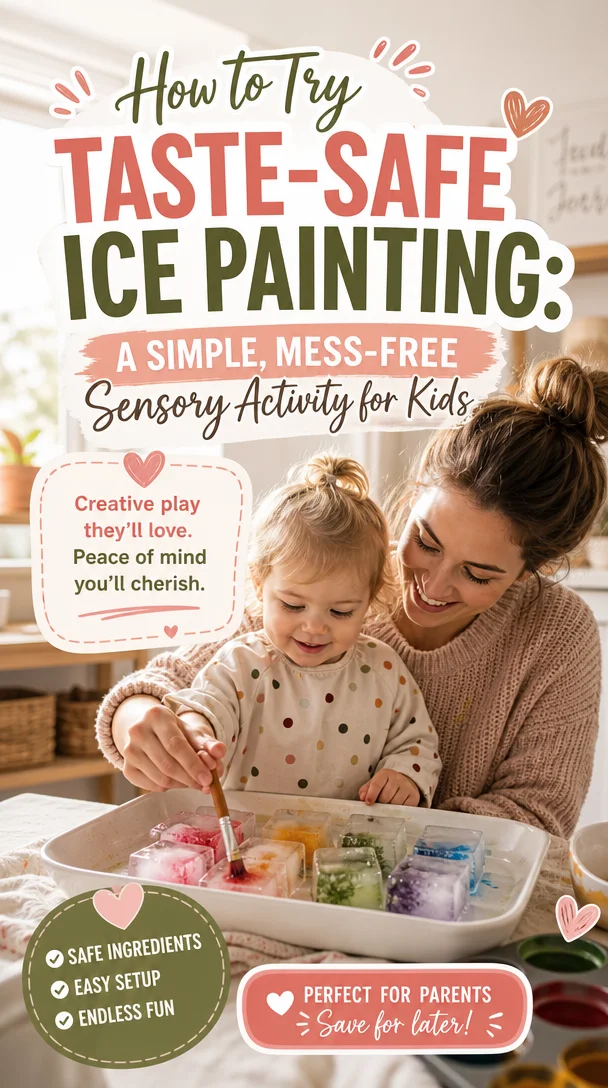
How to Try Taste-Safe Ice Painting: A Simple, Mess-Free Sensory Activity for Kids
Taste Safe Ice Painting: A Fun Sensory Play Activity for Kids
Meta Description: Discover taste-safe ice painting for sensory play! Create colorful art while fostering creativity and exploration in your little ones.
Hey there, fellow parent! You know those days when the kids seem to have an endless amount of energy, and the weather limits outdoor play? We’ve all been there! Sometimes, it feels like you need a little magic to transform those chaotic moments into something special. That’s why I’m excited to share an amazing activity with you: Taste Safe Ice Painting.
This engaging sensory play idea not only allows your little ones to uncover their creative talents but also provides a wonderful opportunity for exploration and learning. The best part? It’s completely taste-safe! So, don’t worry if they take a curious lick or two. This activity isn’t just about art; it’s about building connections with your child while encouraging their natural curiosity. Let’s dive into the colorful world of ice painting and create some joyful memories together!
The Benefits of Sensory Play
Before we jump into the nitty-gritty of ice painting, let’s chat about why sensory play is so essential for our little ones. Engaging their senses helps children develop crucial skills such as:
- Fine Motor Skills: Squeezing, stirring, and manipulating tools enhance dexterity and strengthen hand muscles.
- Cognitive Development: Sensory experiences foster problem-solving skills as kids explore colors, shapes, and textures.
- Emotional Regulation: Hands-on activities can help children express their feelings and reduce anxiety.
- Creativity and Imagination: Unleashing their creativity allows kids to express themselves in unique ways.
With the benefits in mind, let’s explore a delightful sensory activity that your toddler will adore!
What is Ice Painting?
Ice painting combines the joy of painting with the sensory experience of melting ice. You freeze colorful, edible liquids in ice cube trays and then use the ice to paint on paper or canvas. As the ice melts, children witness a beautiful blending of colors. This magical transformation can captivate young hearts and minds!
What You Will Need
Gather these simple supplies for an enjoyable ice painting adventure:
Materials
-
Taste-Safe Paint:
- 1 cup of water
- 1 cup of sugar-free juice or unsweetened yogurt (you can also use diluted food coloring)
-
Ice Cube Trays: These will serve as molds for your paint.
-
Paper or Canvas: Use watercolor paper, cardstock, or a canvas where the colorful artwork will appear.
-
Plastic Wrap (optional): If your little artist wants to transport their artwork outside, this will help keep it from blowing away.
-
Paintbrushes or sponges (optional): For those who want to dab, swirl, or create patterns as they play.
Preparing Your Materials
- Make the Paint: Combine water and your choice of juice or yogurt in a bowl. If using food coloring, mix it in to create vibrant colors.
- Fill the Ice Cube Trays: Pour your colorful mixture into the ice cube trays and freeze them overnight.
- Prepare Your Workspace: Set up a designated painting area outdoors or at a table covered with newspaper. Minimize the mess while maximizing fun!
Ice Painting Step-by-Step Instructions
Once your ice cubes are frozen and your space is ready, it’s time for the fun! Follow these steps:
- Set the Stage: Find a nice spot either outdoors where your child can create freely or somewhere inside protected from spills.
- Gather Encouragement: Invite your child to browse through the ice “paints.” Encourage them to pick their favorite colors or flavors to start.
- Start Painting: Show your child how to hold an ice piece and paint! Let them explore the melting ice, feeling its coolness against their hands.
- Experiment with Techniques: Encourage them to press, swipe, and spin the ice on the paper. Ask questions like, “What happens when we layer colors?” or “Can you create a rainbow?”
- Observe and Discuss: As the painting progresses, take a moment to observe the changing colors and discuss what your child sees. Use descriptive words and encourage them to share their thoughts.
Connecting Through Conversation
This activity isn’t just about creating beautiful artwork; it’s an opportunity for meaningful connection. Here are some conversation starters to enhance the experience:
- “What color do you think we should mix next?”
- “How does the ice feel against your skin?”
- “Can you describe what this color reminds you of?”
By fostering these interactions, you nurture language development and emotional bonds between you and your child, making the experience even richer.
Helpful Tips for Success
To ensure your ice painting session goes smoothly, keep these tips in mind:
Make it a Mess-Free Zone
- Use a plastic tablecloth or old newspapers to protect your surfaces.
- Dress your child in old clothes or a smock to avoid worries about stains.
Adapt for Age and Skill Level
- For younger kids, allow them to freely explore without specific instructions.
- For older children, introduce techniques like layering, mixing colors, or even creating shapes and patterns.
Add Layers of Learning
- Teach about color mixing: What happens when they combine red and blue?
- Discuss the science of melting: Why does the ice melt, and what can we learn about temperature?
The Joy of Displaying Art
Once your little artist finishes their masterpiece, let’s celebrate their creativity!
- Spotlight Art: Find a special place at home to hang their artwork. Use clips, strings, or a gallery wall for an attractive display.
- Keep an Art Journal: Take pictures of their creations and compile them into a fun scrapbook. You can create a mini-gallery of their artistic journey to look back on together.
Encouraging Independence
As your child starts to gain confidence in their creativity, encourage them to lead the way. Let them choose their colors and methods. Empowering them builds self-esteem and a sense of ownership over their creations. Remember, there’s no wrong way to play!
Cleaning Up Made Easy
No need to dread the cleanup after such a fun activity! Once your ice painting session wraps up:
- Quick Rinse: If using juice or yogurt, quickly rinse any brushes or surfaces with warm water to prevent stickiness.
- Store Remaining Ice Cubes: If there are any leftover ice paints, you can refreeze them for future play sessions. Just pop them back in the freezer!
Conclusion
Taste-safe ice painting combines creativity and sensory exploration, bringing joy and learning right into your home. As parents, we want to create moments that matter, and this simple activity allows us to do just that. Along the way, you bond with your child, encourage artistic expression, and help them express their emotions.
Remember, parenting doesn’t require perfection. Little moments of joy, like ice painting, are what make this journey beautiful. So, the next time your little one needs an engaging activity, whip out those ice paints, grab your favorite juice, and let the creativity flow. You got this, and you’re doing amazing!
Now, let’s grab those supplies and begin painting the world with imagination and love. Happy creating!
Frequently Asked Questions
Q: Is the ice paint safe for my toddler to taste?
A: Yes! Using juice or yogurt means it’s taste-safe. Just supervise to ensure they don’t consume too much at once.
Q: What if it’s too cold outside?
A: You can do ice painting indoors! Just prepare your space accordingly, but keep the temperature in mind to avoid slippery floors.
Q: Can we use these techniques with other materials?
A: Absolutely! Try using different tools, such as sponges or brushes, or even create splatter art by flicking paint from toothbrushes!
By following this guide, you can create a delightful sensory-rich environment that supports your child’s development and strengthens your parent-child bond. Let’s keep those creative juices flowing, one activity at a time!
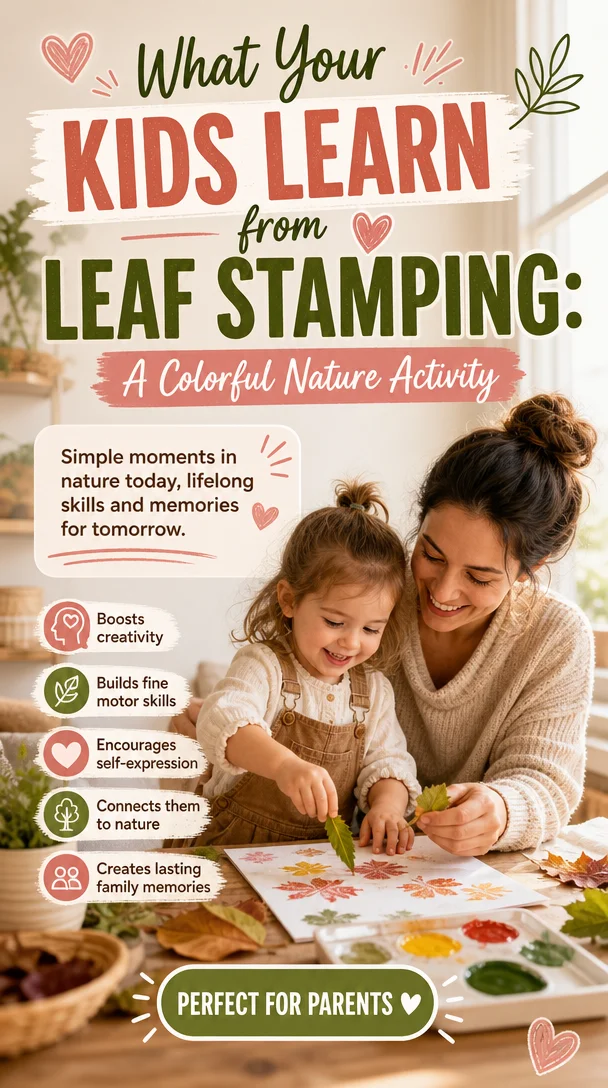
What Your Kids Learn from Leaf Stamping: A Colorful Nature Activity
Leaf Stamping Nature Activity for Kids: A Fun and Simple Science Adventure
Meta Description
Discover the joy of leaf stamping! This easy nature activity for kids combines creativity and science, making family bonding moments unforgettable.
Introduction
Have you ever watched your little ones marvel at the world around them? From the fluttering of butterfly wings to the crunching of leaves underfoot, nature provides endless wonders just waiting to be explored. As parents, we strive to nurture that curiosity, but let’s be real—finding engaging, easy activities can feel overwhelming. That’s where a delightful discovery like leaf stamping comes in!
Imagine your child’s face lighting up as they create colorful art with leaves they gathered from your backyard. Leaf stamping is a simple yet enchanting way to combine creativity with a dash of science—and it’s perfect for those glorious afternoons spent outdoors. This activity not only fosters creativity but also helps your kids appreciate the beauty of nature while learning about the different types of leaves and their textures. Get ready to step outside, embrace a bit of mess, and make warm, lasting memories with your kids!
What is Leaf Stamping?
Leaf stamping is an imaginative craft that involves using leaves as stamps to create stunning prints on paper. This activity allows your children to explore various colors, shapes, and patterns while connecting with nature. Plus, it offers a fun and hands-on way to learn about plant life!
While the process is straightforward, the potential for creativity is limitless. Kids can experiment with different types of leaves, colors, and techniques, making this activity suitable for toddlers and older children alike. Let’s dive into how to get started with this exciting nature activity!
The Benefits of Leaf Stamping
Encourages Creativity
Kids naturally express their emotions through art. Leaf stamping offers them a unique medium to showcase their creativity. With just a few materials, they can create beautiful, one-of-a-kind masterpieces that reflect their personalities.
Connects with Nature
Stepping outside allows your kids to appreciate the beauty of nature firsthand. They engage their senses as they touch different leaves, observe intricate details, and breathe in the fresh air. This connection to nature nourishes their curiosity.
Boosts Learning Opportunities
Leaf stamping provides an excellent backdrop for teaching moments! Talk about various tree species, explore shapes and colors, and even engage in discussions around the science of photosynthesis as you stamp away. Learning doesn’t get much more fun than this!
Enhances Fine Motor Skills
Using paint and stamping requires coordination and fine motor control—perfect for helping kids sharpen their skills. As they dip the leaves in paint and press them onto paper, they develop hand-eye coordination and strength in their hands.
How to Prepare for a Leaf Stamping Adventure
What You’ll Need
Before you head out to start your leaf stamping journey, gather the materials you’ll need. Here’s a quick checklist:
- Leaves of different shapes and sizes (maple, oak, and ferns work well)
- Non-toxic paint (washable tempera paint is great)
- Paper (cardstock or any sturdy paper)
- Paintbrushes (optional)
- Container for the paint
- Newspaper or a plastic tablecloth (for less mess)
- Wet wipes or paper towels (for easy cleanup)
Choosing Leaves
Before you start stamping, take a nature walk with your kids to gather leaves. Encourage them to explore different types of leaves and engage their curiosity. Ask questions like:
- What does this leaf feel like?
- What color is the leaf?
- What tree do you think this leaf came from?
This discovery process makes the activity even more engaging!
Step-by-Step Guide to Leaf Stamping
Now that you’ve gathered everything you need, let’s dive into the fun part! Here’s how to execute the leaf stamping activity:
Step 1: Prepare Your Workspace
Lay down newspaper or a plastic tablecloth to protect your surfaces. Getting a little messy is part of the fun, but it’s nice to have a designated area to work in!
Step 2: Set Up Your Paint
Pour some non-toxic paint into a container. You can use different colors for more vibrant prints. If your kids are feeling adventurous, let them mix colors for unique shades!
Step 3: Paint the Leaves
Using a paintbrush or directly dipping the leaves into the paint, cover one side of a leaf with paint. Make sure the leaf is well-coated, but not dripping!
Step 4: Stamp on Paper
Press the painted side of the leaf onto your piece of paper. Encourage your children to press gently but firmly to ensure an even transfer. For a more intricate design, they can try applying different pressure levels or angle the leaves in various directions.
Step 5: Repeat and Experiment
Let your kids explore! They can use various leaves, mix different colors, and even layer prints for more effect. This is their chance to be artists, so let their imaginations run wild!
Step 6: Clean Up
Once you’ve finished stamping, take a moment to clean up with wet wipes or a damp cloth. Teaching kids about cleanup is another valuable life lesson!
Ideas to Enhance the Leaf Stamping Experience
Explore Nature Further
Take your leaf stamping to the next level by going on a mini-scavenger hunt! Give your kids a list of items to find in nature, such as acorns, interesting rocks, or flowers. This twist adds an element of adventure to your day out.
Create Seasonal Art
Use leaf stamping to create seasonal décor! Consider making autumn leaf prints to decorate your home for fall or colorful spring leaf art as part of your garden theme. Transform their artwork into greeting cards or a wall gallery.
Discuss What You Discover
While you stamp, take the opportunity to discuss nature’s wonders. Ask questions like:
- What colors do you see in nature?
- How do leaves change with the seasons?
- What types of animals might live in the trees?
Encouraging dialogue nurtures your little ones’ curiosity and enhances their learning experience.
Connect with Other Families
Consider organizing a leaf stamping playdate with your friends! Invite other families over for an afternoon of art, laughter, and creativity. Sharing parenting moments with others always lightens the load!
Helpful Tips for a Successful Leaf Stamping Experience
-
Choose the Right Leaves: Opt for leaves with interesting shapes and textures for more exciting prints. Experiment with different tree species for variety!
-
Experiment with Colors: Let your kids mix and match colors to create new shades. This adds an element of surprise to each print!
-
Use Sturdy Paper: Ensure you choose quality paper that can handle the paint. Cardstock works wonderfully!
-
Practice Makes Perfect: If your child struggles initially, encourage them to keep trying. Affirm that creativity takes practice!
-
Celebrate Their Masterpieces: Display their creations proudly! This boosts their confidence and creates a sense of accomplishment.
Conclusion
Leaf stamping is more than just a fun craft, it’s an opportunity to explore, learn, and bond as a family. Allow your children to bask in the beauty of nature while expressing themselves creatively. Remember, it’s not about achieving perfection; it’s about making memories and celebrating each little discovery together.
As you step into this activity, keep in mind that every brushstroke and print is a step towards nurturing their creativity and curiosity. So gather your supplies, head outside, and let the adventure unfold. You’re not just making art—you’re creating moments that matter.
Optional FAQ Section
Q: What age is this activity suitable for?
A: Leaf stamping is suitable for kids aged 3 and up. Younger children will need guidance, while older kids can enjoy experimenting more independently.
Q: Can we use other materials for stamping?
A: Absolutely! In addition to leaves, you can experiment with flowers, vegetables, or even sponges for different effects.
Q: What if my child is hesitant to try?
A: Encourage them gently! Sometimes a little exploration can spark their interest. Join in and show them how fun the process can be!
Q: How can we extend this activity?
A: Use stamp prints to create a personalized storybook where each page represents a different leaf stamping adventure!
Now, go ahead—let the colors, textures, and fun transform your day into an unforgettable family adventure!
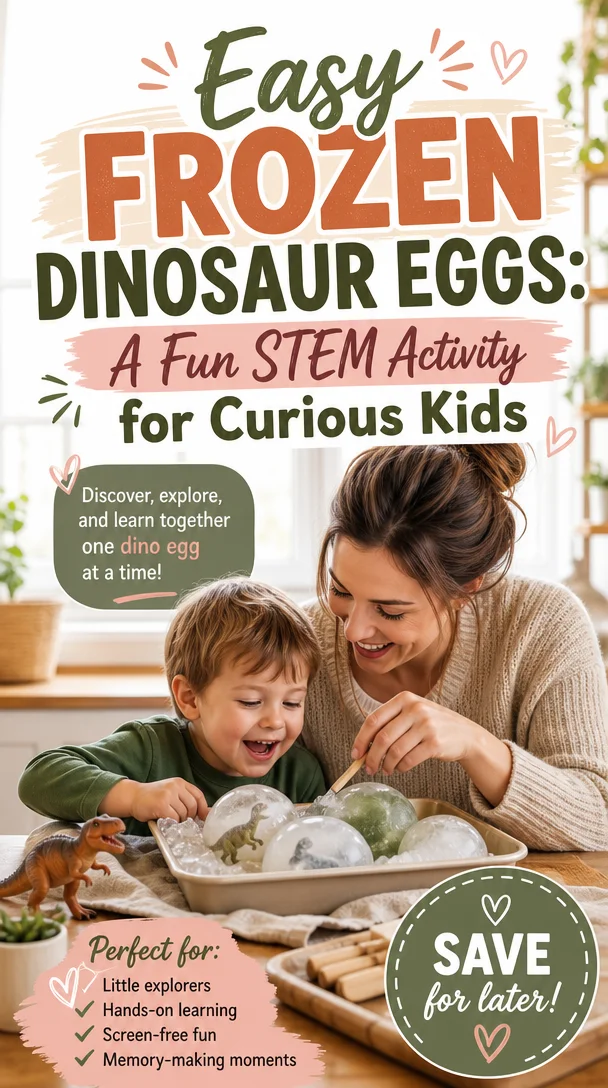
Easy Frozen Dinosaur Eggs: A Fun STEM Activity for Curious Kids
Frozen Dinosaur Eggs: A Fun and Sensory Summer Activity for Kids
Meta Description
Beat the summer heat with Frozen Dinosaur Eggs! Discover this fun sensory activity that keeps kids engaged and encourages outdoor play.
Introduction
Summer vacations often bring the promise of sunny days, but let’s be real—keeping kids entertained every hour of every day can feel overwhelming. If you’re a parent who’s ever wished for a creative way to keep your little ones engaged (and away from screens), I have a fun idea for you!
Imagine the joyful squeals as your kids dig for dinosaurs trapped in icy, colorful "eggs." This delightful sensory activity, known as Frozen Dinosaur Eggs, combines ice, adventure, and a bit of science—perfect for cooling off during those scorching summer afternoons. Not only is this a fantastic way to encourage outdoor play, but it also sparks curiosity and exploration in kids of all ages. From your toddler to your pre-teen, everyone can join in the fun!
Grab your swimming suits and sunblock, because we’re about to dive into how to create these captivating frozen dinosaur eggs. Trust me, they’ll become an unforgettable part of your family’s summer memories!
What You’ll Need to Get Started
Before we jump into the details, here are a few supplies you’ll need:
Materials:
- Small dinosaur toys (or any small toys your kids love!)
- Balloons (the latex kind you can find at most grocery stores)
- Water
- Food coloring (optional, for some extra fun)
- Containers (like bowls or cups to hold the balloons while they freeze)
- A sunny patch in your backyard or a large bowl of water for melting
Creating Your Frozen Dinosaur Eggs
Now that you have your materials, let’s get started! Here’s a step-by-step guide.
Step 1: Prepare the Toys
Begin by choosing your small toys. For this project, plastic dinosaurs work wonderfully, but you can easily swap them out for mini cars, sea creatures, or even themed characters from your child’s favorite show.
Step 2: Fill the Balloons
Take your balloons and stretch them out a bit. You’ll want to fill them with water, but first, drop in a dinosaur toy so it’s swimming inside the balloon. If you’re feeling adventurous, add a drop of food coloring for a splash of color. You can make colorful "dino eggs" this way!
Step 3: Freeze the Eggs
Carefully tie the balloons once they’re filled. Place them in your containers and pop them in the freezer. Leave them overnight if you can—a good freeze makes for a solid egg!
Step 4: Unmold and Play!
When you’re ready for the big reveal, bring the frozen eggs outside. You can either let your kids observe how the sunlight melts the ice or get hands-on and see who can free their dinosaur the fastest! For an added twist, place the eggs in a kiddie pool where kids can splash about while they excavate.
Why Frozen Dinosaur Eggs Are So Engaging
You might wonder why this particular activity resonates with kids. Here are just a few reasons:
1. Sensory Exploration
For toddlers and preschoolers, sensory play is essential in early childhood development. The cold, slippery texture of ice combined with the anticipation of discovering a hidden toy promotes fine motor skills and encourages exploration.
2. Learning Through Play
As children dig into the eggs, they practice problem-solving! How long will the ice take to melt? Do they need to use warm water or sunlight? These small but mighty questions lead to natural learning opportunities.
3. Outdoor Play
Getting kids outside is a game-changer, especially during the hot months. Frozen Dinosaur Eggs encourages them to run, jump, and engage in creative play rather than being glued to a screen all day.
4. Family Bonding
This activity provides a perfect opportunity for family bonding. Join your kids in the hunt, make it a friendly competition, or simply bask in the laughter as you all engage in imaginative play.
Helpful Tips for Making the Most of Your Frozen Dinosaur Eggs
Now that you’ve mastered the basics, here are some tips to elevate your experience!
Add a Rainbow Twist
Divide water into several bowls and use different food coloring for each batch. You’ll end up with vibrant eggs that add a pop of color to your summer play!
Change the Theme
Instead of dinosaurs, why not create Frozen Ocean Eggs with sea creatures? Or Frozen Safari Eggs with toy animals like lions and elephants? Changing the theme keeps the excitement fresh for each round of play.
Make It Educational
As your kids play, encourage them to discuss the different dinosaurs or animals they discover. Learn about their background, habitat, and even names! This will take playtime to another level—mixing education with fun!
Schedule Regular Ice Play
Consider making this activity a weekly tradition. Create new “eggs” with different themes each week, allowing your children to look forward to another fun-filled adventure every weekend.
Encouraging Your Kiddo’s Development
Frozen Dinosaur Eggs isn’t just entertaining; it supports your child’s growth in various ways:
Emotional Development
As they dig through the ice, children exercise patience and practice delayed gratification. This can be an important lesson in understanding how to wait for something special.
Social Skills
If you involve siblings or friends, the collaboration encourages sharing, teamwork, and communication. They’ll learn how to work together to “rescue” the toys from their icy prisons.
Creativity
Encourage your children’s imaginations! Ask them to come up with backstories for the dinosaurs they unearth or describe the adventures they embark on. This boosts their creativity and storytelling skills.
Conclusion
Parenting often feels like a juggling act, doesn’t it? You want to provide joy, education, and unforgettable memories for your children—while also maintaining your sanity! The beauty of Frozen Dinosaur Eggs lies in their simplicity; this engaging activity transforms an ordinary summer day into a delightful exploration of sensory play, learning, and laughter.
So this summer, embrace the outdoor chaos and let the children discover the wonder of nature and play. You don’t need to be a perfect parent—just let the joy of small moments create beautiful memories that last a lifetime.
Go ahead, grab those balloons and toys, and make this summer a little brighter with Frozen Dinosaur Eggs! You’ve got this, and remember: every small win counts in the journey of parenthood. Happy playing!
FAQs
How long does it take for Frozen Dinosaur Eggs to freeze?
Typically, they need about 6-8 hours to freeze completely, so starting the night before works best.
What other toys can I use?
Besides dinosaurs, consider using small sea creatures, safari animals, or superheroes.
Is this activity safe for toddlers?
Absolutely! Just supervise your toddler to ensure they don’t accidentally swallow any small parts.
Can we do this on a hot day?
Yes! In fact, it’s perfect for hot days, as the melting ice keeps kids cool while they play!
Feel free to share your experiences with Frozen Dinosaur Eggs. Let’s make this a summer to remember!
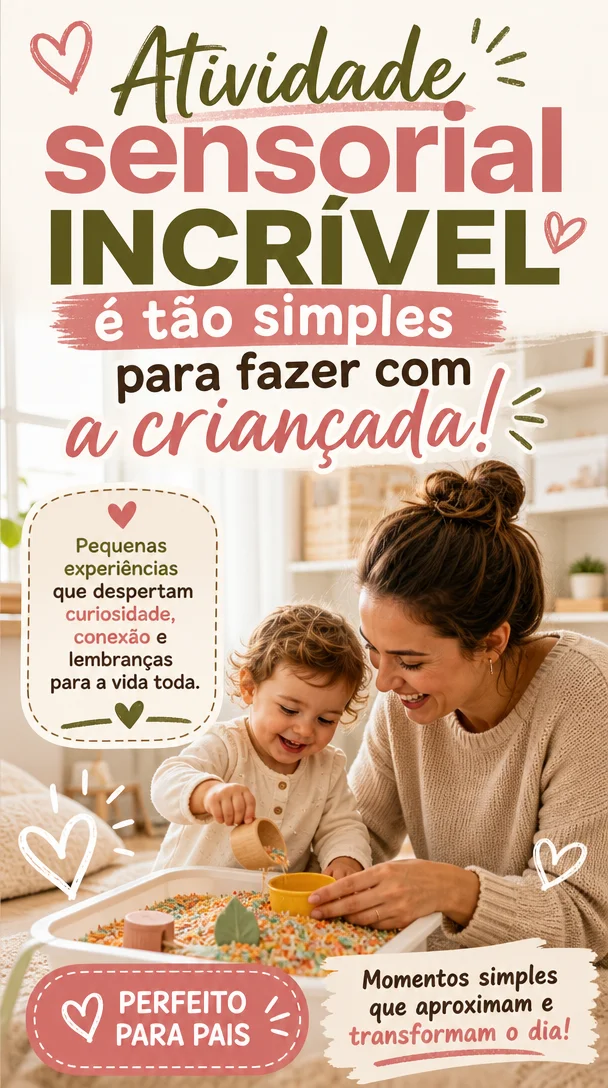
Atividade sensorial INCRÍVEL é tão simples para fazer com a criançada!
Incredible Sensory Activities So Simple to Do with Your Kids!
Meta Description: Discover simple and engaging sensory activities that your little ones will adore! Explore practical tips and ideas to enrich your parenting journey.
Hey there, wonderful parents! 🌼 Today, I want to share something that’s perfect for your family’s bonding time and super easy to do. If you’re searching for incredible sensory activities that will keep your kids engaged while offering a world of learning and fun, you’re in the right place!
I know how hectic parenting can get. The chaos of juggling chores, meals, and everything else can sometimes leave us feeling a little overwhelmed. But here’s a cheerful thought: sensory activities can not only provide a much-needed pause but also create beautiful moments of connection with your little ones.
Imagine watching your child’s eyes light up as they explore different textures, colors, and scents. You’re not just keeping them entertained; you’re nurturing their curiosity and creativity, too! And trust me, they will love it just as much as we do! 😍
So grab a seat, cozy up, and let’s dive into some fantastic sensory activity ideas that you can whip up in no time.
Why Sensory Activities Matter
Before we jump into the fun, let’s chat about why sensory play is so beneficial for our kiddos. Sensory activities are not just about fun; they play a crucial role in your child’s development. These activities:
- Enhance Cognitive Skills: Through exploration, children learn to make connections between different sensory inputs and develop critical thinking skills.
- Promote Emotional Regulation: Engaging with sensory play can help children express their emotions and manage stress.
- Boost Motor Skills: Many sensory activities encourage kids to use their hands and fingers in creative ways, fine-tuning their motor skills as they play.
- Encourage Creativity: Working with different materials and ideas sparks imagination and originality in your little ones.
Isn’t it reassuring to know that play can be such a powerful tool in our parenting toolbox?
Exciting Sensory Activities to Try
Now, let’s explore some incredible sensory activities that you can easily implement at home. Get ready, because these ideas are not only simple but also guaranteed to be a hit with the kids!
1. Rainbow Rice Bin
What You Need:
- 2 cups of white rice
- Food coloring
- Ziplock bags
- A large bin or tray
- Scoops, spoons, and small toys (optional)
How To Do It:
-
Color the Rice: Divide the rice into ziplock bags and add a few drops of food coloring to each bag. Seal the bags and shake to mix the color. Let it dry for a bit.
-
Set Up the Bin: Pour the colored rice into a large bin or tray. This creates a beautiful rainbow effect that kids will love!
-
Engage: Provide scoops, spoons, and little toys for digging and playing. Let your kids explore the textures and colors as they create, discover, and enjoy.
Why They’ll Love It:
The tactile experience of playing with rice not only entertains but also helps children learn about colors and sorting. Plus, it’s incredibly satisfying to pour and scoop!
2. DIY Sensory Bags
What You Need:
- Clear ziplock bags
- Hair gel or liquid soap
- Small items (buttons, beads, glitter, or googly eyes)
How To Do It:
-
Fill the Bags: Pour hair gel or liquid soap into a ziplock bag. Add in the small items for your child to find and explore.
-
Seal and Tape: Seal the bag tightly and tape it to an easily reachable surface.
-
Explore: Let your little one squish and move the items around within the bag.
Why They’ll Love It:
Sensory bags are squishy, messy free, and oh-so-fun! They stimulate curiosity while promoting sensory exploration.
3. Nature Sensory Box
What You Need:
- A shallow box or container
- Various nature items (leaves, flowers, pebbles, twigs)
How To Do It:
-
Gathering Supplies: Go for a nature walk with your kids. Collect leaves, flowers, smooth pebbles, and interesting twigs.
-
Create the Box: Place all the collected items in the shallow box or container.
-
Sensory Play: Encourage your kids to touch, smell, and arrange the items. You can even discuss their colors and shapes.
Why They’ll Love It:
Engaging with nature is a wonderful way for kids to connect with the world around them. Plus, it’s free and promotes outdoor exploration!
4. Cloud Dough Fun
What You Need:
- 8 cups of flour
- 1 cup of baby oil
- Food coloring (optional)
How To Do It:
-
Mix Ingredients: In a large bowl, combine the flour and baby oil. Mix until you create a dough-like consistency.
-
Add Color: If you’d like, add a few drops of food coloring and mix well to incorporate.
-
Playtime: Let your kids create shapes, sculptures, and more with the soft, moldable dough.
Why They’ll Love It:
Cloud dough is soft and moldable, providing endless opportunities for creativity. The unique texture is both calming and stimulating, making it a joy for little hands.
5. Sensory Water Play
What You Need:
- A large tub or basin
- Warm water
- Cups, scoops, and floating toys
How To Do It:
-
Set Up: Fill a tub with warm water.
-
Add Fun Items: Toss in cups, scoops, and any floating toys or bath letters your kids love.
-
Explore and Play: Let your kids pour, splash, and dive into imaginative play.
Why They’ll Love It:
Water play is invigorating and therapeutic! It encourages those little ones to practice fine motor skills while having tons of fun.
Helpful Tips for Sensory Play Success
-
Safety First: Always supervise your children during sensory activities, especially when using small objects or water.
-
Follow Their Lead: Allow your child to explore in their own way. Engage in the play without directing every move they make.
-
Encourage Language: Talk to your child about what they’re experiencing. Ask questions to develop vocabulary and understanding.
-
Keep It Simple: Don’t feel pressured to prepare elaborate activities. Often, the simplest ideas create the most memorable experiences.
-
Prepare for Mess: Enjoyment often comes with a little mess. Embrace it! Have cleaning supplies ready but remember the joy of play is worth it.
Conclusion
As parents, we often feel the weight of expectations, wondering if we’re doing enough. Here’s the heart of the matter: you are enough. Just by being present and enjoying simple moments through sensory activities, you are forging connections that matter.
Let your kids dive into the joy of exploration, and don’t forget to enjoy the smiles, laughter, and occasional chaos that accompanies it. Remember, parenting is a journey, not a race. Celebrate every little win and cherish the moments you create together.
You’ve got this, and every little moment spent nurturing curiosity and creativity is a step in the right direction. So grab those supplies, clear your minds, and dive into the wonderful world of sensory exploration. Your children will thank you for it!
Feel free to share your favorite sensory activity in the comments below, or let us know how your kiddos responded to these fun ideas! Your experiences enrich our community and inspire us all. Happy exploring! 💛
Optional FAQ Section
Q: What age is suitable for sensory activities?
A: Sensory play caters to various ages. Toddlers and preschoolers often enjoy it the most, but even older children can benefit from engaging sensory experiences.
Q: How do I clean up after sensory play?
A: Clean up can feel overwhelming! Set up a designated play area for sensory activities, and use trays or bins to contain mess. Once playtime ends, involve your child in the cleanup—it can be part of the fun!
Q: Can I combine sensory play with learning?
A: Absolutely! Incorporating educational elements, like counting or color recognition, can enhance the fun and promote deeper learning during play.
With these tips and activities, your family adventures in sensory play are not just about having fun—they’re about building memories that last a lifetime. Enjoy every moment!
Hot Cocoa Sensory Bin Cards for Toddlers: Cozy Winter Christmas Activity
Cozy Up with Hot Cocoa Sensory Bin Cards: A Winter Wonderland Activity for Toddlers
Meta Description
Explore our Hot Cocoa Sensory Bin Cards! This winter activity combines fun and learning for toddlers. Engage their imaginations while practicing early math concepts!
Introduction
As winter blankets our world in white, there’s something undeniably magical about this time of year. The chill in the air invites cozy moments, warm drinks, and opportunities for creative play. If you’ve ever found yourself chasing your toddler around the house, looking for ways to keep their little hands busy, I have a treat for you! Enter the Hot Cocoa Sensory Bin Cards—a delightful winter activity designed not just for fun, but for learning too!
Engaging toddlers in sensory play can feel like a daunting task, especially when life gets busy. But here’s the good news: with a sprinkle of imagination and a dash of creativity, you can turn a simple idea into a memorable experience. Whether it’s the playful rustle of materials in a sensory bin or the comforting warmth of hot cocoa, these cards will keep your child entertained while promoting early math skills and allowing their imagination to soar. Ready for a cozy adventure? Let’s dive in!
Why Choose Sensory Bins for Winter Activities?
H2: The Magic of Sensory Play
Sensory play involves activities that stimulate a child’s senses—sight, sound, touch, taste, and smell. This kind of play nurtures cognitive growth, encourages fine motor skills, and fosters creativity. And what’s better than a sensory activity that embodies the warmth of hot cocoa during the winter months?
H3: Benefits of Hot Cocoa Sensory Bin Cards
-
Early Math Skills: The Hot Cocoa Sensory Bin Cards come with 12 diverse cards that engage your child in play while reinforcing fundamental math concepts such as counting and sorting. Toddlers can practice recognizing numbers and even begin learning about simple addition and subtraction without any pressure.
-
Pretend Play Welcome: These charming cards also spark imaginative role-play. Imagine your toddler serving up hot cocoa to their stuffed animals or friends, fostering social skills and creativity as they create their winter café scenes.
-
Encouraging Curiosity: Every card can set your child off on a new adventure—whether they’re imagining themselves as a barista or exploring the different types of ingredients that go into a perfect cup of cocoa.
H2: Setting Up Your Hot Cocoa Sensory Bin
Now that you’re sold on the idea, let’s talk about setting up the sensory bin to create an inviting and engaging experience for your toddler.
H3: What You’ll Need
- Hot Cocoa Sensory Bin Cards: Purchase the digital download from Etsy and print them out on sturdy cardstock.
- Base Material: Choose a base for your sensory bin, such as dry cocoa powder, shredded paper, or even brown rice to mimic the cocoa!
- Toys and Tools: Incorporate small cups, spoons, scoops, and even plush toys to enhance the play experience.
- Additional Items: Consider adding small marshmallows (fake ones, of course!), chocolate coins, or winter-themed decorations for extra flair!
H3: Easy Steps to Set Up
- Gather Your Supplies: Print your Hot Cocoa Sensory Bin Cards and choose your base material.
- Create Your Sensory Bin: In a shallow container, pour in your base material and arrange the cards throughout.
- Add Fun Elements: Sprinkle in your additional items like fake marshmallows or toys. Encourage your toddler to explore.
- Invite Play: Engage with your child! Use the cards to prompt counting and sorting activities, or simply enjoy the playtime together.
Making the Most of Your Sensory Bin Experience
H2: Fun Engagement Ideas
H3: Interactive Conversations
As your toddler dives into their sensory bin adventure, make the most of this opportunity to engage them in conversation. Ask leading questions that prompt thought and creativity:
- “How many marshmallows can you count?”
- “What colors do you see in your hot cocoa?”
- “Can you make a pretend order for our winter café?”
H3: Incorporating Learning
While their hands are busy, weave in some learning moments too! For example, you might:
- Count Together: Count the number of items as they scoop them into their cups.
- Pattern Making: Use the cards to create patterns with the items they’re playing with.
H3: Celebrate Small Wins
Every little achievement is a big deal! Celebrate your toddler’s accomplishments, whether they recognize a number on a card or create a delicious concoction in their winter café. A simple, “Wow, you counted that all by yourself!” goes a long way in boosting their confidence.
Helpful Tips for a Successful Sensory Bin
-
Embrace Mess: Sensory play can get a bit messy, and that’s okay! Having a designated play area makes cleanup easier.
-
Stay Present: Your involvement makes a world of difference. Join in the fun, demonstrate activities, and let your child take the lead.
-
Frequency: Rotating toys and materials can keep the experience fresh and exciting. After a few uses, switch out some items or introduce new challenges.
-
Set a Timer: If your child loses interest, consider setting a timer for a set “play time.” This gentle structure can keep playtime lively and engaging.
The Beauty of Winter Moments
As you sip on a cup of cozy hot cocoa with your little one, remember that these moments, messy and magical alike, contribute to their growth and development. The holidays come with their own wonders, but they can also be overwhelming. Embracing activities like this sensory bin reminds us that joy often lies in the simple moments spent together.
Encouraging Conclusion
Creating a Hot Cocoa Sensory Bin is more than just a winter activity; it’s an avenue for learning, bonding, and unleashing creativity in your toddler. You don’t need to put pressure on yourself to create the “perfect” experience. Just being present and enjoying these sweet moments with your child can make all the difference.
So, grab your hot cocoa, gather those cards, and watch how this winter cosmos unfolds right at your kitchen table. Remember, parenting isn’t about perfection; it’s about connection—and you’re doing great!
Optional FAQ Section
Q: How do I access the Hot Cocoa Sensory Bin Cards?
A: Simply make a purchase on Etsy, and you’ll receive an email allowing you to download your cards directly.
Q: Can I use this sensory bin with multiple kids?
A: Absolutely! This activity encourages cooperative play and social interaction, making it perfect for playgroups or siblings.
Q: What are some alternative sensory bin themes?
A: Consider themes like snow, gingerbread, or winter animals to keep the excitement alive through the seasons!
By fostering creativity and exploration, you help your children grow in a supportive, nurturing environment—one fun-filled sensory bin at a time!
Easy Moon Sand: Calm, Mess-Free DIY for Busy Parents
How to Make Moon Sand: A Fun and Easy Kids Craft
Meta Description
Discover how to make moon sand with just 2 ingredients! This sensory play idea is perfect for toddlers, preschoolers, and tweens. Enjoy summer fun and creativity!
Introduction
Hey there, super parent! If you’re anything like me, you probably know that parenting can be a delightful rollercoaster ride. One moment you’re marveling at your child’s curiosity, and the next, you’re navigating a maze of spilled snacks and toy explosions! But fear not — I’m here to share a simple, joyful activity that will delight your little ones and give you a much-needed break: homemade moon sand!
Imagine a sensory experience that not only captivates your kids but also brings that big, lopsided smile to their faces. This moon sand is soft, moldable, and incredibly fun to play with — and the absolute best part? You only need two simple ingredients to whip it up! Whether it’s a sun-soaked summer afternoon or a cozy winter day, this activity is guaranteed to keep your kids engaged, imaginative, and happy. So grab a snack (or a cup of coffee!), and let’s dive in!
What is Moon Sand?
Moon sand is a fluffy, moldable substance that’s perfect for sensory play. It feels like a blend between sand and dough, allowing kids to shape, build, and create unique textures. This sensory experience not only entertains but also enhances creativity and fine motor skills. Plus, it encourages imaginative play — think castles, moon bases, or even adorable sea creatures! The beauty of moon sand lies in its simplicity and versatility.
Why You Should Try Making Moon Sand
Creating moon sand is an engaging way to bond with your kids while allowing them the freedom to explore their creativity. Here are some fantastic benefits of moon sand play:
- Sensory Exploration: The texture of moon sand is engaging for little hands, encouraging kids to explore tactile sensations.
- Fine Motor Development: Molding, squeezing, and shaping the sand develop hand-eye coordination.
- Creative Expression: Kids can create whatever their minds envision, fostering imagination and independent play.
- Stress Relief: Creating with moon sand can be a calming activity for both children and parents!
Are you excited yet? Let’s get to the fun part — making moon sand!
How to Make Moon Sand: 2-Ingredient Recipe
Ingredients You’ll Need:
- Flour – 4 cups
- Vegetable Oil – 1/2 cup
Step-by-Step Instructions
- Gather Supplies: Grab a mixing bowl, measuring cups, and a mixing spoon. Lay down some newspaper or an old tablecloth to make clean-up easier.
- Mix Flour and Oil: In the mixing bowl, combine the flour and vegetable oil. Start with the flour first to prevent a mess.
- Combine: Use your hands or a spoon to mix thoroughly. Once mixed, you should get a texture similar to wet sand — soft but moldable.
- Adjust As Needed: If your moon sand is too dry, add a bit more oil. If it’s too oily, sprinkle in more flour.
- Playtime: Once your moon sand is ready, transfer it to a container or a sensory bin, and let the fun begin!
Sensory Play Ideas
While your kids dive into their moon sand masterpiece, you can enhance their playtime with a few extra touches:
Creative Tools
- Molds and Cutters: Use cookie cutters, cups, or any mold you have on hand!
- Spoons and Scoops: These can be great for pouring and transferring the sand.
- Toys: Little figurines, cars, or animals can spark imaginative play narratives.
Thematic Play
- Outer Space: Add star-shaped sprinkles or glitter for a space theme. Encourage kids to create planets or aliens!
- Underwater Fun: Incorporate seashells and small ocean animal toys.
- Construction Zone: Use toy trucks and shovels — the possibilities are endless.
Helpful Tips for a Successful Moon Sand Experience
Setup Your Space
- Contain the Chaos: To minimize mess, consider doing this activity outside or in the kitchen. A large plastic tub can keep the sand contained and make clean-up a breeze!
Storage Tips
- Keep It Fresh: Store your moon sand in an airtight container when not in use. It can last for weeks if stored properly!
Engaging Your Kids
- Ask Open-Ended Questions: While they play, engage your kiddos with questions about their creations. For example, “What kind of creatures live on your moon?” or “How tall is your sand castle?”
- Take Photos: Snap some pictures of their creations. Not only does it create lasting memories, but it also encourages them to share their work and be proud of their achievements.
The Role of Moon Sand in Emotional Development
As we navigate the ups and downs of parenting, it’s crucial to consider emotional development as well. Engaging in activities like playing with moon sand can have a profound impact on your child’s emotional well-being.
Expressing Emotions
Kids often struggle to express their feelings verbally. When they play, they might act out scenarios or share stories related to their day. This encourages them to articulate their emotions and provides an outlet for any stress or anxiety.
Building Confidence
Creating something tangible boosts children’s self-esteem. A completed project, no matter how small, shows them they can achieve their goals and express themselves. Celebrate their achievements, even little ones, to foster confidence!
Encouragement for Parents
I know the days can be long, and sometimes, you might feel overwhelmed. But remember: it’s perfectly okay to take a breather and allow your kids to explore on their own. Making moon sand — or engaging in any playtime activity — doesn’t have to be a pressure-filled experience. Embrace the moments, let your children shine, and always remind yourself that you’re doing an amazing job.
Conclusion
Making moon sand is such a delightful way to foster creativity, fine motor skills, and emotional expression in our little ones. Plus, it gives you a break from the typical whirlwind of family life. So go ahead, mix those two ingredients, and let the imaginative play unfold!
Remember, you don’t need to be a perfect parent to create magical moments. With little activities like this, you’ll find joy in the chaos and laughter in the everyday mess. Embrace the imperfections and cherish each moment — after all, these are the little joys that make family life truly special.
Thanks for joining me today at Little Life Society! I hope you feel inspired to try this activity and create some wonderful memories with your kids. Now, let’s get creating! 🌟
FAQs About Moon Sand
-
How do I store moon sand?
- Keep it in an airtight container to keep it fresh and moldable.
-
Can I add color to moon sand?
- Absolutely! You can mix in colored sand or food coloring for a fun twist.
-
What if my child has allergies?
- You can substitute vegetable oil with coconut oil or a safe alternative to accommodate allergies.
-
How can I clean up after playtime?
- Sweeping the area and using a damp cloth should help gather up any stray grains.
-
Is moon sand safe for toddlers?
- Yes! Just supervise them to ensure they don’t put it in their mouths. Always prioritize safety!