50 Life Skills Every Child Should Know
50 Life Skills Every Child Should Know
Meta Description
Explore 50 essential life skills for kids that promote independence and confidence. Equip your children with practical skills before they leave home!
Introduction
As parents, we often find ourselves drowning in the chaos of daily family life—balancing work, school, meals, and that endless laundry pile. In the midst of it all, have you paused to wonder what real-life skills you want to pass down to your kids? It’s a big question, and one that can feel a bit overwhelming at times.
Fostering independence and confidence in our children is a gift that lasts a lifetime. That’s why I’ve put together this comprehensive list of 50 life skills every child should know before they fly the nest. Whether your little ones are just starting to walk or you have teens ready to tackle the world, these skills will help pave the way for their future success. Grab a snack, settle in, and let’s dive into these small but mighty lessons!
Household Management Skills
Teaching Chores Early
-
Making Their Bed
Start small—show your child how to pull up the sheets and arrange their pillows. You’ll be amazed at how much pride they can take in their morning routine! -
Doing Laundry
Teach them how to sort clothes, use the washing machine, and fold their clean clothes. Consider making it a fun game to see who can match the most socks quickly! -
Sweeping and Dusting
Provide them with kid-sized cleaning tools. Let them know that everyone contributes to a tidy home and that even kids can make a difference. -
Basic Meal Prep
Introduce simple recipes that they can help with. Think scrambled eggs or sandwiches! Soon, they’ll feel comfortable enough to whip up something on their own. -
Understanding Grocery Lists
Make a grocery list together when you shop. As they grow, encourage them to pick up items from the store, promoting independence and decision-making skills.
Budgeting and Money Skills
-
Simple Budgeting
Teach them how to manage pocket money. Discuss saving vs. spending. They can use jars to separate their money: one for spending, one for saving, and one for sharing. -
Understanding "Needs" vs. "Wants"
Engage them in discussions about their purchases. This “money talk” helps them make decisions that reflect their values. -
Using Cash and Cards
Allow them to make small purchases. Explain how debit/credit works and the importance of tracking spending. -
Saving for a Goal
If they want a new toy or game, help them save up. It’s a great way to introduce delayed gratification. -
Basic Investment Knowledge
As they grow, introduce them to basic concepts of investing. Apps like Stockpile can be engaging for older kids.
Personal Care Skills
Building Independence in Daily Care
-
Brushing Teeth
Start with demonstration, then let them take over. Sing a fun song to make it enjoyable! -
Bathing and Personal Hygiene
Encourage them to take ownership of their shower routine and grooming game. Leaving reminders can be a good step! -
Dressing Themselves
Guide them to select their clothes based on weather and occasion. It empowers them to express their style. -
Nail Care
Teach them how to trim their nails. If they’re ready, consider encouraging them to explore nail design. -
Selecting Clothing
Help them understand when certain types of clothing are appropriate to wear, like gym clothes or formal wear.
Cooking and Meal Skills
-
Preparing Healthy Snacks
Have fun with no-bake recipes! Think smoothies or fruit bowls—great ways for them to be involved and teach about healthy eating. -
Using Kitchen Appliances
Start with basics! Show them how to use a microwave or a blender safely. These skills encourage independent snacking. -
Cleaning Up After Cooking
Make it a family event where everyone cleans up together. You can even create a fun cleanup song! -
Reading Recipes
Engage their reading skills with simple recipes. Let them pick a meal to make once a week! -
Setting the Table
Show them how to properly set a table for family dinners. It’s a lovely way to embrace family time!
Communication Skills
Encouraging Connection
-
Practicing Active Listening
Role-play scenarios where listening is key. It builds empathy and effective communication. -
Expressing Feelings
Give them tools or visuals to label feelings. Talking about emotions can help build emotional intelligence. -
Making Eye Contact
Encourage this during conversations. You might even practice with fun games like “staring contests.” -
Starting Conversations
Teach them friendly ways to introduce themselves or ask questions. Role-play helps ease any anxious feelings. -
Writing Thank You Notes
Make “thank you” notes a routine. They’ll learn gratitude while also practicing writing skills.
Life Skills for Social Situations
Navigating Friendships
-
Making Friends
Encourage them to reach out and introduce themselves. Role-play different social situations to build their confidence. -
Handling Disagreements
Teach them to express their feelings respectfully when conflicts arise. Talk about the importance of compromise. -
Saying "No"
Empower them to stand by their values. Explain that it’s okay not to do something they don’t want to, even if others are involved. -
Working in Teams
Prompt teamwork through group projects, whether at school or in casual settings. Allow them to learn the give and take of group dynamics. -
Respecting Differences
Encourage open discussion about diversity and acceptance. Share stories from different cultures and backgrounds.
Practical Skills for Everyday Life
Navigating Tools and Technology
-
Basic First Aid
Teach them how to clean a cut or use a band-aid. Empower them with the confidence to help others safely. -
Using a Phone
Start with basic skills—calling for help or messaging someone. Discuss when and how to use these tools responsibly. -
Finding Information Online
Guide them in exploring the internet safely. Show them how to differentiate between reliable sources and misinformation. -
Understanding Navigation
Take walks or bike rides together and teach them how to read a map or use a compass. Exploring can be both fun and educational! -
Basic DIY Repairs
Show them how to use basic tools like a screwdriver. Simple home projects can become fantastic bonding experiences.
Safety and Emergency Preparedness
Empowering Safety Awareness
-
Fire Safety
Discuss fire safety protocols, such as stop, drop, and roll, and creating a family emergency plan including escape routes. -
Recognizing Danger
Help your kids identify potentially dangerous situations, whether with strangers or unsafe environments. -
Basic Emergency Contacts
Ensure they can recite important phone numbers and know where to find adults in an emergency. -
Returning Home Alone
Discuss safety strategies for coming home without an adult, like safe routes and how to handle surprises. -
Using Public Transport
Teach them how to navigate public transportation. Start with familiar routes before branching out!
Emotional and Social Intelligence
Building Resilience
-
Problem-Solving Skills
Introduce problem-solving games or scenarios—encourage them to think through solutions independently. -
Building Empathy
Discuss feelings and ask them how they would feel in different scenarios. It fosters compassion toward others. -
Handling Stress
Teach them relaxation techniques like deep breathing or mindfulness practices. Make it a fun family routine! -
Setting Personal Goals
Help them identify and write down a small goal. Create a chart to visualize their progress—everyone loves a little motivation! -
Understanding Consequences
Discuss decision-making openly. Analyze past choices together to understand outcomes without judgment.
Life Skills for Community and Citizenship
Engaging with the Community
-
Volunteering
Encourage family involvement in community service. Not only does it help others, it also nurtures gratitude. -
Respecting the Environment
Teach them about recycling and taking care of nature. Turn it into a fun outdoor activity! -
Voting Basics
As they grow, introduce them to the importance of civic engagement and how the voting process works. -
Cultural Awareness
Explore different cultures together through food, music, and stories. Discuss the beauty of diversity. -
Engaging in Smart Consumerism
Introduce shopping choices—local vs. big box stores. Engage them in understanding the importance of supporting local businesses.
Encouraging Conclusion
You’ve made it through this list, and that’s a huge win! Teaching life skills doesn’t have to be overwhelming. Remember, it’s all about small, consistent actions that build up over time. Celebrate the process together, and don’t forget to share those precious moments with your kids. Each skill learned is a step toward independence, confidence, and becoming wonderfully resilient individuals.
You’re doing an amazing job, and your efforts today will create a brighter tomorrow filled with capable, well-rounded adults. So, embrace the mess, celebrate the small wins, and enjoy this beautiful parenting journey—you’re not alone in it!
FAQ Section
What are the most important life skills for kids?
While all 50 skills listed are invaluable, focus on the basics first: personal care, communication, and household management.
How can I incorporate these skills into daily life?
Use everyday moments—cooking, shopping, cleaning—to teach practical skills. Make it fun and interactive!
What if my child resists learning these skills?
Be patient! Find creative ways to make the learning process enjoyable, and always encourage their independence.
Remember, every little step they take today prepares them for a confident tomorrow. Happy parenting! 💛
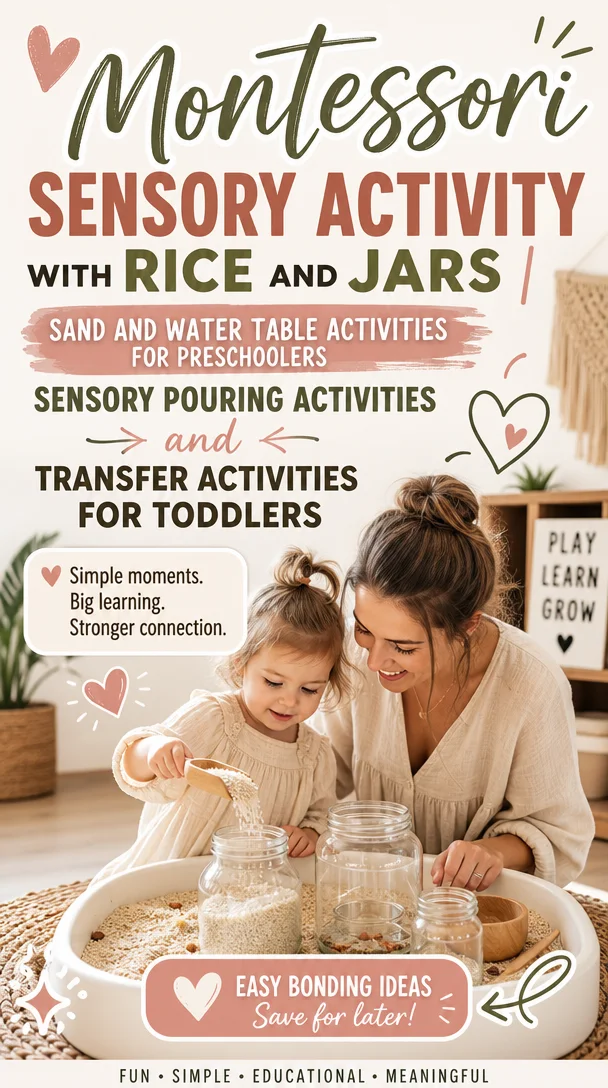
Montessori Sensory Activity with Rice and Jars | Sand and water table activities for preschoolers, Sensory pouring activities, Transfer activities for toddlers
Engaging Montessori Sensory Activities with Rice and Jars: Fun Ideas for Preschoolers
Meta Description: Discover fun Montessori sensory activities using rice and jars! Explore engaging pour and transfer activities for toddlers to enhance learning through play.
Introduction
Hey there, fellow parents! If you’re anything like me, you know that finding engaging activities for our little ones can sometimes feel like a monumental task. You want them to learn, explore, and have a blast, but where do you even start? Well, let’s make your life a bit easier today! 🌟
Imagine the gleeful giggles and endless curiosity as your child experiments with rice, jars, and their little hands. Today, I’m so excited to share Montessori-inspired sensory activities that utilize rice and jars, plus tips on how to create a magical sand and water table setup. These activities won’t just keep your toddler entertained; they will also support their emotional and cognitive development. Let’s dive in!
Why Sensory Play is Important
Before we jump into the fun, let’s take a moment to understand why sensory play, like pouring activities, is essential for our kiddos. Sensory play fosters creativity and curiosity while allowing children to explore various textures, sounds, and even smells. Here are some reasons why you should incorporate sensory activities into your child’s playtime:
- Boosts Fine Motor Skills: Manipulating objects like rice and jars encourages hand-eye coordination, which is crucial for writing later on.
- Encourages Problem Solving: Your child will face challenges—think spilling rice or pouring too much water—but these moments present valuable learning opportunities.
- Enhances Language Development: As you describe what they are doing, your little one picks up new vocabulary. Encourage them to express their feelings and thoughts about the activity.
- Provides Emotional Regulation: Sensory play is an excellent way for children to manage their emotions. The act of pouring, sorting, and feeling can be calming and grounding.
Feeling inspired? Let’s get started with our Montessori sensory activity using rice and jars!
Montessori Sensory Activities with Rice and Jars
The Basics of the Rice and Jars Activity
What You Need:
- Uncooked rice (white, brown, or colored for extra fun!)
- Clear jars (preferably with lids)
- A tray or large container to catch spills
- Measuring cups or scoops
- Small funnels (optional)
- A variety of scoops or cups (like spoons, small bowls, etc.)
How to Set Up:
-
Prepare Your Space: Lay down a blanket or use a tray to catch the inevitable spills. You can even set this up outside for easy cleanup!
-
Introduce the Materials: Present your child with the jars filled with rice and ensure various tools are available. Show them how to scoop and pour, modeling the activity before letting them explore.
-
Encourage Exploration: Invite your child to start pouring rice from one jar to another. Guide them to use different tools, helping them see what works best for each task.
Variations to Spice it Up
Once they’ve mastered the basics, here are some variations to keep the excitement going:
-
Color Sorting: If you use colored rice, encourage your child to sort the rice by color into different jars. This activity enhances their visual discrimination.
-
Size Exploration: Use jars of various sizes. Ask your child to figure out which jar can hold the most rice or how many small jars it takes to fill a larger one.
-
Sensory Exploration: Add a few drops of essential oils (like lavender) to the rice for aromatic sensory experiences. Ensure you’re using child-safe oils.
-
Sensory Challenges: Blindfold your child (with your supervision) and encourage them to identify different textures or sounds by feeling the jars or listening to the rice.
Sand and Water Table Activities
If you want to expand beyond rice-themed activities, let’s talk about setting up a sand and water table for even more sensory fun!
Creating Your Sand and Water Table
What You Need:
- Container: A shallow plastic container or a kiddie pool works well.
- Sand and Water: You can use kinetic sand, natural sand, or even substitute with dried rice instead of sand.
- Tools for Exploration: Include scoops, measuring cups, molds, and various cups. Don’t forget bath toys for some extra excitement!
How to Set Up:
-
Find a Suitable Location: Choose a space where water can splash around without causing too much worry—outdoors is ideal, but spread out towels indoors if needed!
-
Layer Your Materials: Fill half of your container with sand and the other half with water. Engage your child in the setup, showing them how they can move between the two environments.
-
Provide Varied Tools: Encourage your little one to fill, dump, sift, and pour using the tools you’ve provided. Challenge them with interesting tasks, like building sandcastles or collecting water in cups.
Activity Ideas for the Sand and Water Table
-
Transfer Tasks: Use cups to transfer just a small amount of sand into a jar. This activity helps develop fine motor control while practicing pouring.
-
Measurement Fun: Show your child how to measure larger vs. smaller cups of water, discussing concepts of volume and measurement.
-
Nature Exploration: Add natural items like rocks or leaves to the table, encouraging your child to create a mini-world and describe their creations.
-
Weather Experiments: Discuss what happens when water mixes with sand when making mud! Encourage your little one to describe the texture and what they observe changes.
Making the Activities Meaningful
When engaging in these activities, the goal is to keep them fun and meaningful. Here are some ideas to enhance the experience:
-
Ask Open-Ended Questions: Instead of giving directions, ask questions like, “What will happen if you pour that cup of water here?” This promotes critical thinking.
-
Encourage Language: Narrate your child’s actions—“Wow! Look how high you poured the rice!”—to enrich their vocabulary.
-
Celebrate Success: Acknowledge their small victories. If they manage to keep the rice from spilling, celebrate with high-fives or cheers!
Helpful Tips for a Smooth Experience
-
Set Rules: Decide in advance what the cleanup will look like. Will you allow spills, or will you provide specific areas for pouring? Ensure your child understands the guidelines.
-
Be Patient: Keep in mind that every child’s exploration looks different. Embrace the mess and be prepared to join in the fun too!
-
Limit Screen Time: These activities are a wonderful way to offer a screen-free alternative that engages your child deeply.
-
Encouraging Exploration: Provide diverse materials to play with and let your child take ownership of their learning journey.
Encouragement for the Journey Ahead
Remember, as parents, we’re all in this together, navigating the beautiful, messy chaos that is parenting. It’s easy to get overwhelmed, but when we find enjoyable activities like these, we foster not only their learning but also our own joy.
So, grab some rice, some jars, and maybe a few cups, and let the fun begin! You’ll not only have loads of smiles and giggles but also meaningful moments you’ll cherish.
Conclusion
Montessori sensory activities using rice and jars, along with engaging sand and water tables, offer countless opportunities for exploration and learning. You don’t need to be perfect; your love and involvement are what matter most to your child. So, embrace the mess, celebrate the little victories, and watch your little ones thrive in their imaginative play!
Want to share your experiences or your favorite tips? I’d love to hear from you! Let’s keep the conversation going, and support one another on this wild ride called parenting.
By incorporating these sensory activities into your daily routine, you provide a world of learning through play for your little ones—one joyful moment at a time. 💛
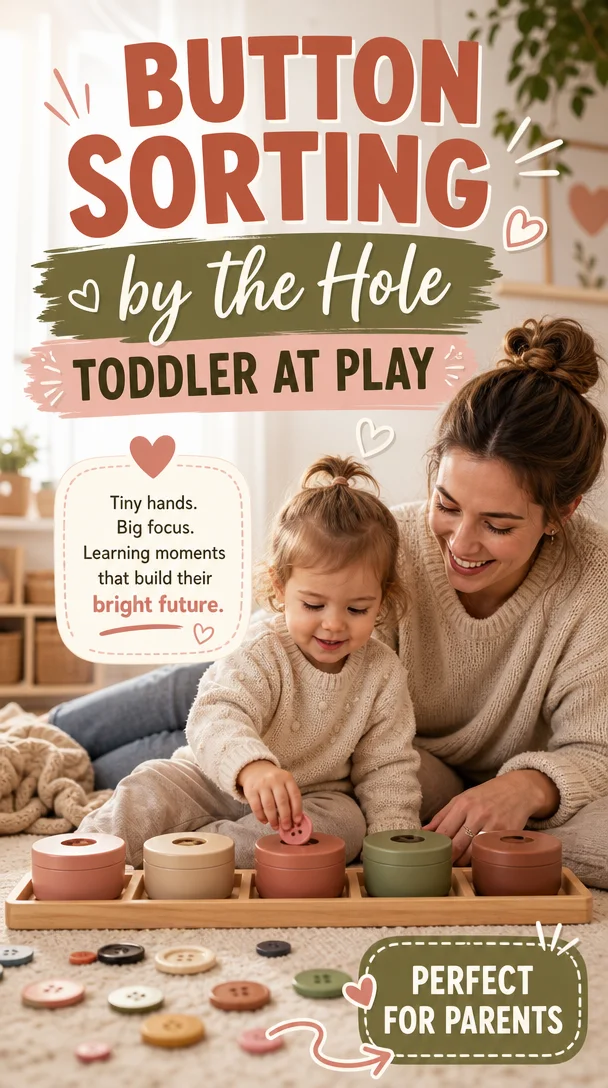
Button Sorting by the Hole – Toddler at Play
Fun and Engaging Button Sorting by the Hole: A DIY Activity for Toddlers
Meta Description: Discover an easy and fun button sorting activity for toddlers that promotes focus and learning! Keep little hands busy with this simple, screen-free idea.
Introduction
Hey fellow parents! If you ever find yourself in the thick of toddler chaos — toys scattered everywhere, fingers itching for a screen, and a schedule that feels a little too hectic — you might just be on the lookout for a fun, engaging, and interactive activity. Let’s be real; parenting is a beautiful, messy journey, and we all need a little helping hand sometimes.
Today, I’m excited to share a simple and delightful activity that brings you smiles and keeps those tiny hands busy: Button Sorting by the Hole! This activity captivates toddlers, supports their learning, and fosters a sense of achievement — and the best part? It requires minimal prep and everyday materials you probably already have at home. So, grab a snack, get comfy, and let’s explore just how magical a little sorting can be!
Why Button Sorting is Such a Hit with Toddlers
Boosting Fine Motor Skills
Sorting buttons might seem like just a fun way to pass the time, but it does wonders for those little hand muscles! As your child picks up buttons, manipulates them, and fits them into holes, they strengthen those crucial fine motor skills that serve as the foundation for writing, drawing, and countless other future activities.
Promoting Focus and Concentration
Does your little one have a tendency to bounce from one activity to the next? Button sorting is fantastic for helping them hone their attention span. It gives them a chance to settle into a focused activity while boosting their concentration in a calming, non-overwhelming environment.
Fostering Cognitive Development
By sorting buttons by size, color, or even shape, you engage your toddler’s emerging cognitive skills. They begin to understand concepts like categorization and differences, which builds important critical thinking skills in an enjoyable setting. Plus, who knew sorting could be so educational?
Setting Up Button Sorting by the Hole: Step-by-Step Guide
Gather Your Supplies
Before diving in, let’s gather the materials you’ll need. No need to head out to the store; this activity keeps it simple:
- Buttons: Collect a variety of buttons in different sizes and colors. You can raid your sewing kit or thrift shop for some treasures!
- A container: Use an old muffin tin, a cardboard box, or any small containers you have on hand.
- A surface to work on: Spread out a blanket on the floor or set up at the kitchen table.
Creating the Activity
-
Sort the Buttons: Start by sorting buttons into different areas. Keep some grouped by size, color, or shape, which creates fun challenges for your toddler.
-
Demonstrate: Show your child how to sort the buttons by fitting them into different holes or sections. If using a muffin tin, you can demonstrate how to place a button in each cup based on its size.
-
Let Them Explore: Now, it’s their turn! Encourage them to sort the buttons by themselves, but feel free to guide them as they begin. Celebrate their successes, even the small ones!
Variations to Keep Button Sorting Fun
Switch things up a bit! Here are some engaging twists on this activity you can try:
Color Matching
Challenge your toddler to match buttons to the correct colored section in their sorting area. They’ll hone their color recognition skills while having fun!
Shape Sorting
If you have a mix of buttons with different shapes, encourage your little one to sort them based on shape. This adds an extra layer of difficulty and reinforces their understanding of different physical properties.
Size Sorting
Have them practice sorting buttons from smallest to largest. Introducing concepts like "big," "medium," and "small" in a physical way helps solidify their understanding of sizes!
Creative Arts and Crafts
Once you have sorted the buttons, why not turn them into an art project? Use glue to make fun pictures or patterns! Transforming sorting into an art activity adds a whole new layer of creativity to the experience.
Tips for Success
-
Be Prepared for Mess: Embrace the chaos! Allowing your child to freely explore might lead to a scattered button mess, but remember that exploration is part of the fun (and learning).
-
Make It a Game: Add a timer and see how many buttons they can sort before it goes off! This increases engagement and excitement.
-
Keep It Short: Toddlers have short attention spans! If you sense their interest waning, it’s perfectly okay to wrap things up and revisit button sorting another day.
-
Encourage Communication: As they sort, ask open-ended questions about what they are doing. “Which button do you like the most?” or “What color do you see?” This brings in opportunities for language development and connection.
-
Add a Reward: Celebrate their accomplishments with a sticker, a stamp, or just verbal praise! Positive reinforcement encourages them to keep trying new things.
Finding Joy in Everyday Moments
As we glide through the beautiful chaos of parenting, it’s essential to seize those little moments of joy. Button Sorting by the Hole might seem simple, but it holds the powerful potential to enrich your child’s development while bringing you closer together. Remember, you don’t have to be a perfect parent; just being present and available makes a world of difference.
So, lean into the mess and embrace every giggle, every concentration face, and every triumphant button placed just right. Your child is learning and growing at their own pace, and you’re right there alongside them, cheering them on!
Conclusion
Creating fun, screen-free activities is a wonderful way to connect with your toddler and support their growth. Button sorting brings together learning, fun, and the chance for quality time — and you can do it with materials you already have on hand!
Next time chaos brews, reach for a handful of buttons instead of electronic distractions. You might just find that the simplest of activities can spark joy and connection in ways you never expected!
Here’s to warmer, lighter, and more joyful parenting, one little moment at a time. You’ve got this!
Optional FAQ Section
Q: Can I do this activity with a group of toddlers?
Absolutely! Button sorting can be a fantastic activity for playdates. Just make sure to have plenty of buttons available, and encourage sharing and teamwork!
Q: How do I clean up after the activity?
Have your child help you gather the buttons back into the container. It teaches responsibility and keeps the cleanup process fun!
Q: What if my toddler gets frustrated?
If frustration arises, take a break or shift to a different activity. Some days are just not for sorting, and that’s perfectly okay!
Feel free to adapt this guide to suit your child’s needs and interests, and most importantly, enjoy the process!
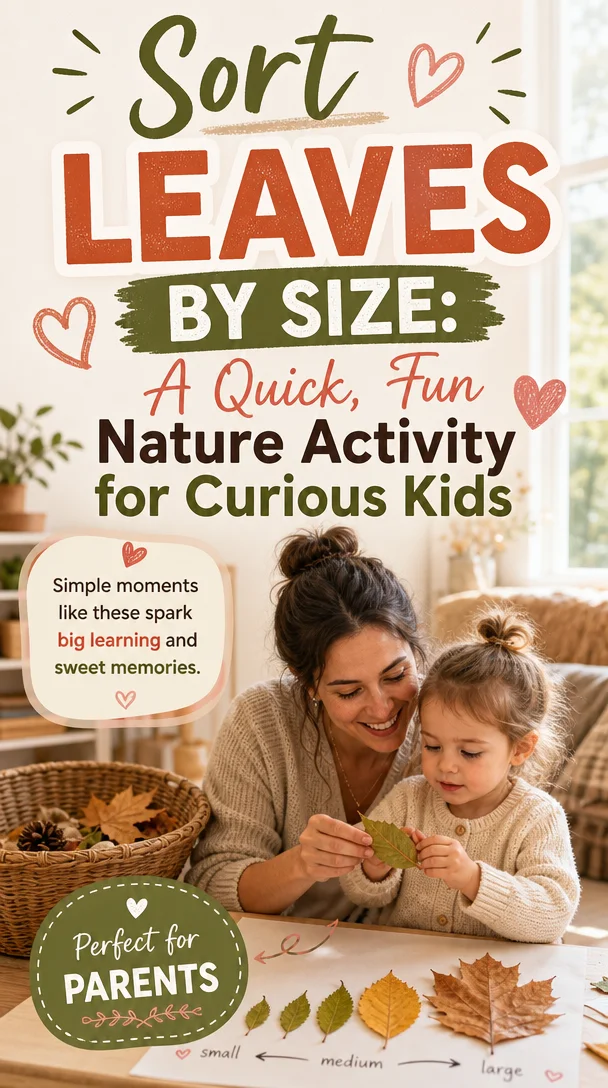
Sort Leaves by Size: A Quick, Fun Nature Activity for Curious Kids
Leaves Size-Sorting Kids Activity: A Fun Way to Engage Your Little Ones
Meta Description: Dive into a creative leaves size-sorting activity that supports your child’s learning and development. Get ready for fun, exploration, and family bonding!
Introduction
Picture this: it’s a crisp autumn morning, and your children are bursting with energy and curiosity as they step outside. Leaves of all shapes and sizes scatter the ground, creating a beautiful, colorful canvas for exploration. As parents, we want to create meaningful, engaging experiences that spark our little ones’ imaginations and foster a love for learning. That’s why today, I’m excited to share a delightful leaves size-sorting activity that not only captivates your child’s attention but also teaches valuable skills along the way!
We often find ourselves juggling various roles—and if you’re like me, you sometimes wonder how to combine fun with education without adding pressure to your already busy schedule. This leaves size-sorting activity is here to help! It’s simple, engaging, and offers a beautiful opportunity for connection with your kids. So, grab a warm cup of coffee, and let’s dive into this creative adventure that you can easily integrate into your family life!
Why Size-Sorting Activities Matter
Engaging your children in size-sorting activities brings numerous developmental benefits. Sorting helps enhance fine motor skills, boosts cognitive development, and teaches classification—skills that lay the foundation for early math understanding. Moreover, size-sorting activities encourage children to observe their surroundings, think critically, and express their discoveries.
The Benefits of the Leaves Size-Sorting Activity
- Fine Motor Skills Development: Picking up different sizes of leaves fosters dexterity and hand-eye coordination.
- Cognitive Growth: Children learn to compare, classify, and draw connections as they sort leaves based on size.
- Nurturing Creativity: This hands-on activity encourages imagination as children invent stories and scenarios about their findings.
- Emotional Bonding: Working together fosters a sense of teamwork and connection as you share in the excitement of discovery.
How to Set Up Your Leaves Size-Sorting Activity
Now that we understand the benefits, let’s explore how to create this enchanting leaves size-sorting activity! You don’t need elaborate materials or a large space; just some creative energy and a few simple steps!
Step 1: Gather Your Materials
- Leaves: Go on a nature walk to collect a variety of leaves in different sizes. Encourage your children to select leaves they find interesting, whether they are large oak leaves or tiny maple ones.
- Containers/Baskets: Use small baskets or containers to create sorting stations. You can even recycle old boxes to make it eco-friendly!
- Markers and Paper: Provide different colored markers and blank paper for your child to document their findings if they wish.
Step 2: Explore and Sort
Once you have collected your leaves, lay them out on a flat surface, and let the sorting begin! Here’s how you can guide your children through the activity:
- Discuss Sizes: Start by discussing the different sizes of leaves. Ask questions like, “Can you find a leaf that is bigger than your hand?” or “Which leaf is the smallest?”
- Sorting Time: Encourage your little ones to sort the leaves into different containers based on size—small, medium, and large. You’ll be amazed at how they interact with the leaves and each other during this process!
Tips for a Successful Sorting Experience
To ensure this activity is both enjoyable and educational, here are some practical tips:
- Be Patient: Allow your child to take the lead. If they want to sort leaves by color or shape instead, that’s perfectly fine! Follow their lead and let their creativity shine.
- Encourage Dialogue: Engage in conversations as they sort. Ask open-ended questions about their preferences and thoughts, like “Why do you think this leaf is larger than that one?”
- Integrate Learning: Use this opportunity to introduce concepts like weight or texture. Feel the leaves and discuss which ones are light and which are thick and sturdy.
Incorporating Other Learning Elements
If you want to expand this simple activity, consider adding other educational elements:
Additional Sorting Themes
- Colors: Sort the leaves by color, creating a vibrant spectrum.
- Textures: Talk about the differences in texture—smooth versus rough.
- Shapes: Incorporate shape sorting by categories, like pointy versus round leaves.
Nature Journals
Encourage your child to create a nature journal! After sorting, they can draw or write about their favorite leaves, what they learned, and the adventure of collecting them. This practice helps develop literacy skills while reminding them of the day’s discoveries!
Fun Conversations to Spark Imagination
Use this activity as a launching point for imaginative storytelling. Encourage your little ones to create tales about the leaves they collected. Ask questions like:
- “If this leaf could talk, what story would it tell?”
- “What adventures do you think this leaf has been on?”
These types of conversations not only stimulate their creativity but also enhance their communication skills. You’ll find yourself sharing laughter and creating beautiful memories with each story that unfolds.
Encouraging Teamwork and Family Bonding
Invite siblings, or the whole family, to join the leaves size-sorting fun! Working as a team allows everyone to learn from one another and encourages cooperative play. Plus, it’s an excellent way to bond as a family. Here are a few ideas to enhance teamwork during this activity:
- Create Groups: Split into teams and see who can find the highest number of leaves within a certain time. Celebrate the efforts of all with high-fives or snacks afterward!
- Build a Leaf Castle: Challenge your family to use the sorted leaves to construct a ‘leaf castle’ or ‘leaf monster.’ Collaborate on designs and enjoy the process together—this is where the magic happens!
Conclusion: Embrace the Joy in Simple Moments
Parenting isn’t just about teaching; it’s also about creating joyful, shared experiences with our children. The leaves size-sorting activity offers an effortless way to blend learning while embracing all the little magical moments springing from everyday life. Each leaf represents not only a unique feature of nature but also an opportunity for emotional connection and foundational education.
So, gather your family, head outdoors, and let the wonders of nature inspire your everyday learning. Remember, you don’t need to be a perfect parent; the goal is to raise happy, loved kids while still having a ton of fun along the way! You’re all doing a fantastic job, and every little effort counts. Happy sorting, and here’s to brighter days filled with laughter and discovery!
Optional FAQ Section
Q: What age group is this activity suitable for?
A: This activity can be adapted for children aged 2 and up. Toddlers can simply enjoy collecting and feeling the leaves, while older kids can engage with sorting and categorizing.
Q: Can this activity be done indoors?
A: Absolutely! If the weather isn’t ideal, you can collect leaves ahead of time and sort them indoors on a flat surface.
Q: How long should this activity take?
A: The duration can vary, but you can plan for about 20-30 minutes. However, your little ones may want to carry on longer, and that’s perfectly okay!
By making connections through simple activities like the leaves size-sorting, we build a foundational layer of love, learning, and laughter that lasts a lifetime. Happy parenting!

15 Life Skills Kids Need Before Leaving Home | Parenting tips, Smart parenting, Parenting skills
15 Life Skills Kids Need Before Leaving Home
Meta Description: Equip your kids with 15 essential life skills to thrive as they grow up. Practical tips, relatable moments, and encouragement for every parent!
Introduction
As parents, we want to raise kids who are not only happy but also capable of tackling the world on their own. But here’s the truth: parenting often feels like a balancing act between teaching life skills and managing the everyday chaos of family life. Trust me; I know it can be overwhelming at times!
Yet, instilling essential life skills in our children doesn’t have to be a daunting task. It starts with recognizing that you’re not alone in this journey. We all want our kids to grow into self-sufficient individuals who can confidently navigate life, and I’m here to help you achieve that!
Let’s dive into fifteen key life skills your kids need before leaving home. From managing finances to basic cooking, these skills can prepare them to face the world with confidence and independence.
1. Basic Cooking Skills
Why It Matters
Cooking is more than just preparing food; it’s a cornerstone of independence. Teaching your child basic cooking skills not only helps them eat healthier but also boosts their confidence.
Practical Tips
- Start with simple recipes. Think scrambled eggs or smoothies. These are quick and require minimal ingredients.
- Make it fun! Turn cooking into a family activity. Organize a “family cook-off” where everyone prepares a dish.
Example: Pick a day each week when your child can choose a recipe. They’ll feel empowered by the decision-making process!
2. Money Management
Why It Matters
Understanding money is crucial in today’s world. Teaching financial literacy early sets your kids up for success later in life.
Practical Tips
- Introduce them to the concept of budgeting. Have them keep track of their allowance or any money they receive.
- Use real-life scenarios, like grocery shopping. Discuss wants vs. needs when planning your shopping list.
Example: If your child wants a toy, discuss how many chores they’d need to do to save for it. This promotes delayed gratification!
3. Time Management
Why It Matters
Time management enables kids to prioritize tasks and manage their schedules effectively. These skills will serve them throughout their lives.
Practical Tips
- Use a weekly planner together. Help them visualize their tasks and commitments.
- Teach them how to break larger projects into smaller, manageable tasks.
Example: If they have a school project, help them create a timeline that includes research days, drafting days, and a final review.
4. Basic Household Chores
Why It Matters
Contributing to household chores fosters a sense of responsibility and teamwork. Plus, life skills don’t get much more practical than this!
Practical Tips
- Create a chore chart based on their age and abilities. Even toddlers can help put toys away!
- Make it a fun routine. Play music while cleaning or turn chores into a friendly competition.
Example: Set a timer for 15 minutes, and see how much they can tidy up. You might be surprised by their enthusiasm!
5. Communication Skills
Why It Matters
Effective communication is key to building relationships and resolving conflicts in any stage of life.
Practical Tips
- Encourage role-playing scenarios that involve different types of conversations. How about a mock family meeting?
- Teach active listening skills by practicing eye contact and summarizing what the other person said.
Example: Ask your child to share their day, and practice asking follow-up questions to keep the conversation flowing.
6. Problem-Solving
Why It Matters
Life is full of challenges. Teaching kids how to approach problems independently builds resilience and adaptability.
Practical Tips
- Present them with hypothetical situations and ask how they would solve them.
- Validate their feelings when they encounter a real problem and help them brainstorm solutions.
Example: If they’re struggling with a friendship issue, discuss different approaches they could take and weigh the pros and cons together.
7. Basic First Aid
Why It Matters
Accidents happen, and knowing how to respond can make a huge difference. Teaching first aid can empower kids in emergencies.
Practical Tips
- Take a family first-aid class together, making it a fun learning experience.
- Use real-life scenarios to practice. For example, if someone gets a small cut, walk them through what to do.
Example: Make a checklist of actions to follow during an emergency. Keep it where they can easily access it!
8. Self-Care
Why It Matters
Teaching kids to take care of themselves physically, emotionally, and mentally is vital for their overall well-being.
Practical Tips
- Discuss different self-care practices and what feels good for them — from taking a warm bath to reading a favorite book.
- Encourage them to have a regular routine that includes physical activity, quality sleep, and downtime.
Example: Create a "self-care toolbox" where they can pick activities to do when they feel overwhelmed.
9. Teamwork
Why It Matters
Teamwork lays the foundation for successful collaboration throughout life. Kids need to learn how to work with others toward common goals.
Practical Tips
- Involve your children in group activities, whether it’s sports, school projects, or community service.
- Set family goals that require everyone’s input, like planning a vacation or a family garden.
Example: They can lead a group project, delegating tasks to ensure everyone is involved and engaged.
10. Critical Thinking
Why It Matters
Developing critical thinking skills allows children to process information, analyze situations, and make sound decisions.
Practical Tips
- Encourage them to ask questions and seek out information. The more curious they are, the better thinkers they’ll be.
- Use games or puzzles to stimulate their analytical skills and make learning enjoyable.
Example: Play strategy-based board games that require planning and foresight, discussing decisions along the way.
11. Digital Literacy
Why It Matters
In today’s tech-driven world, digital literacy is crucial. Kids need to understand how to navigate technology safely and responsibly.
Practical Tips
- Set up family rules for technology use, including screen time limits and safe internet practices.
- Engage them in discussions about online safety, netiquette, and recognizing misinformation.
Example: When using apps or websites together, point out how to evaluate the credibility of information. This skill will serve them well!
12. Social Skills and Empathy
Why It Matters
Building relationships requires social skills and empathy. Kids must understand how to interact positively with others!
Practical Tips
- Use storytime to discuss characters’ feelings. Ask your child how they would feel in a given situation.
- Encourage them to volunteer in the community to develop compassion for others.
Example: Sign up for a community cleanup, allowing them to experience teamwork while discussing the importance of helping others.
13. Emotional Regulation
Why It Matters
Emotional regulation teaches children to manage their feelings constructively, which is vital for personal and social success.
Practical Tips
- Teach them to identify their emotions by using a feelings chart. You can even make this a nightly ritual to reflect on the day.
- Practice deep breathing or mindfulness techniques to help them calm down when feeling overwhelmed.
Example: Create a “calm-down corner” at home where they can go to regroup when they’re feeling upset or stressed.
14. Basic Grooming and Hygiene
Why It Matters
Good grooming and hygiene habits affect self-esteem and health. Kids need to learn how to care for their bodies.
Practical Tips
- Turn grooming routines into a fun game. For example, create a song for brushing teeth or set a timer for washing hands.
- Lead by example! Make sure they see you prioritize your hygiene routines as well.
Example: Have them plan a weekly “hygiene detective” day where they check off their grooming tasks while also learning.
15. Navigation Skills
Why It Matters
Understanding how to navigate their environment gives kids a sense of independence and confidence.
Practical Tips
- Use maps and mobile apps together when planning trips. Teach them how to find their way around new places.
- Encourage exploration by allowing them to walk home from a friend’s house as they become comfortable with their surroundings.
Example: Plan a family hike where they can navigate using a map, developing their skills in a fun and engaging way.
Encouraging Conclusion
Together, we embark on this vibrant journey of raising kids who are well-prepared for life’s many challenges. Each of these fifteen life skills serves as stepping stones toward raising confident, capable individuals. Remember, you don’t have to teach everything at once. Small, consistent efforts can make a significant difference over time.
So, whether you’re cooking together or setting up a chore chart, know that every moment matters. Celebrate those small wins — they pave the way for great success! Take a deep breath, enjoy the ride, and remember: you’re not alone. You’ve got this, and your kids will thank you for it!
FAQ Section (Optional)
Q: How can I effectively teach these skills to my child?
A: Start small and incorporate these skills into everyday routines. Make learning fun and engaging!
Q: What if my child resists learning these skills?
A: Try to make it more appealing by turning tasks into games or personal challenges. Allow them to choose the skills they want to learn first.
Q: Are these life skills age-appropriate?
A: Absolutely! Tailor the complexity of each skill to fit your child’s age and abilities, gradually increasing the difficulty as they grow.
Q: How can I monitor my child’s progress?
A: Create a chart to celebrate each skill they learn, encouraging them along the way!
By incorporating these skills into your family life, you prepare your children to flourish as they step into adulthood. Embrace the chaos, cherish the moments, and let’s nurture our little ones into their best selves, one step at a time!
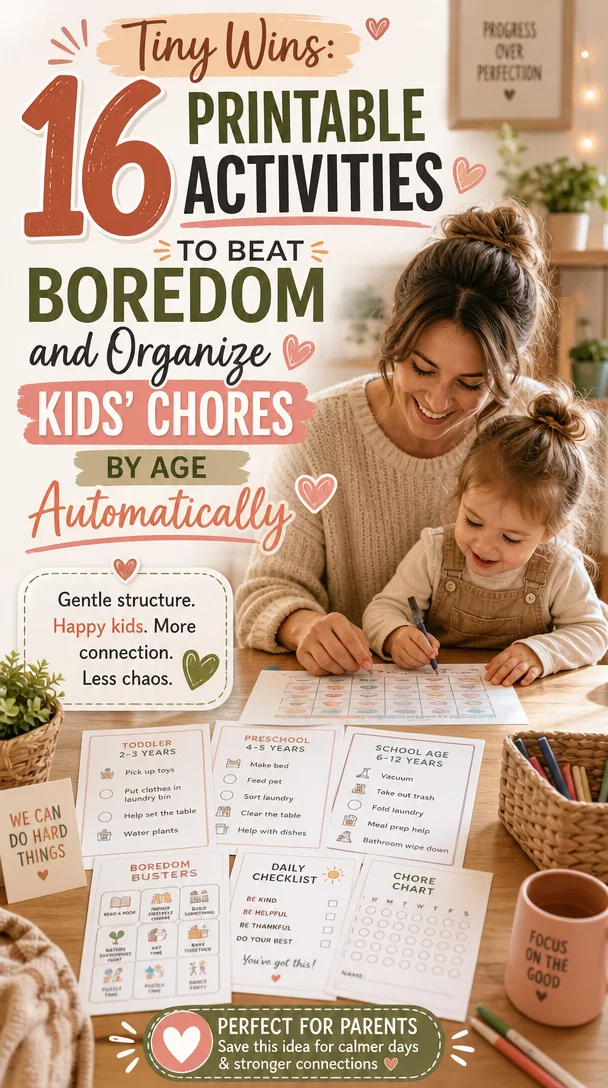
Tiny Wins: 16 Printable Activities to Beat Boredom and Organize Kids’ Chores by Age
16 Printable Activities for Kids: Boredom Busters + Chore Chart
Meta Description: Discover 16 printable activities for kids, plus age-appropriate chore chart ideas! Keep boredom at bay and teach kids responsibility with our fun, printable resources.
Introduction
Hey there, fellow parents! If you’ve ever found yourself staring at the clock, wondering how it’s only noon and your little ones are already bouncing off the walls, you’re not alone. As we juggle the demands of parenting, finding engaging activities for kids can feel like an endless challenge. You want to keep their minds active while also teaching them responsibility along the way.
That’s why I’ve created this fun list of 16 printable activities for kids that double as boredom busters and incorporate chores into their daily routine. These activities not only keep your kids entertained but also instill a sense of responsibility through age-appropriate chores. Trust me, you’ll find something here that fits perfectly into your family dynamic. Ready? Let’s dive into the world of creative activities and chore charts!
Boredom Busters: Fun Activities for Kids
1. Create Your Own Storybook
Encourage your kids to unleash their inner author by crafting their own storybook. Provide them with blank pages and colorful markers. Prompt them to illustrate their stories, blending creativity with literacy. This activity keeps them engaged and enhances their storytelling skills!
2. DIY Science Experiments
Let’s get those tiny brains buzzing with a few simple science experiments. A classic baking soda and vinegar volcano is a great start. Gather the ingredients and let your kids experience the thrill of watching their creation erupt. Science can be super fun and teaches them about reactions in the world around them!
3. Scavenger Hunt Adventure
Set up a scavenger hunt in your home or backyard. Create a list of items for the kids to find or challenges to complete. You can even theme it around colors, shapes, or nature. Watching them work together and use their problem-solving skills will warm your heart.
4. Art from Nature
Take those nature walks to a whole new level! Collect leaves, rocks, and flowers, then encourage your kids to create art from their findings. They could make leaf rubbings or paint rocks with fun patterns. This bridging of nature and creativity fosters a love for the environment!
5. Build a Fort
Every kid loves a good fort! Hand over some blankets, pillows, and chairs, and let their imagination run wild. This activity is not only fun but helps them develop spatial awareness and teamwork skills.
6. Make Homemade Playdough
With just a few ingredients, you can whip up a batch of homemade playdough. Allow your kids to mix and knead the dough, adding colors as they go. Playdough is a wonderful sensory experience and helps develop fine motor skills. Plus, it’s easy to clean up!
Engaging Kids with Chores: Finding the Right Balance
Teaching our little ones about responsibility through chores doesn’t need to be daunting. With the right approach, it can be an enjoyable part of their day. Below, you’ll find age-appropriate chore lists designed to help you create a chore chart that fits your family.
Chores for Toddlers (Ages 2-4)
At this young age, chores should feel more like fun games than obligations. Here are some simple tasks to include:
- Put away toys: After playtime, guide them to place their toys in designated spots. Make it a game!
- Help with sorting dirty laundry: Ask them to help by selecting colors or matching socks—perfect for those tiny hands.
- Wipe spills: Hand them a damp cloth and let them “help” clean up their messes.
Chores for Preschoolers (Ages 4-5)
As kids grow, they can take on slightly more challenging tasks. Here’s what you can assign:
- Dusting low furniture: Provide them with a microfiber cloth and let them dust reachables—sneaky cleaning!
- Feeding pets: Supervised pet tasks can teach empathy and responsibility.
- Setting the table: Give them small responsibilities like placing utensils or napkins.
Chores for Early Elementary (Ages 6-8)
Kids this age can handle more responsibility. These chores can be enjoyable and slightly more involved:
- Make their bed: Teach them how to make their space feel cozy and organized.
- Help with grocery shopping: Take them along and assign them simple tasks like finding items from the list.
- Water plants: Allow them to care for indoor plants or outdoor gardens—what a fantastic way to connect with nature!
Creating an Easy-to-Follow Chore Chart
Now that you have some chore ideas, it’s time to put them into action with a chore chart! Here’s how to create a flexible, age-appropriate system:
-
Pick a Format: Decide whether you want a digital chart or something colorful on paper. Kids love a visual representation of their work!
-
Involve Your Kids: Let them help design the chart. Ask them about fun stickers or colors to use. Giving them a say will encourage them to take ownership of their chores.
-
Start Small: Introduce one or two new chores at a time. Celebrate these small wins to motivate them to embrace their responsibilities!
-
Use Positive Reinforcement: Offer praise when they complete their chores. Consider using a reward system where points lead to special treats or activities.
-
Review Regularly: Sit down weekly and review their progress together. Adjust the chores as needed, incorporating new responsibilities as they grow.
Printable Activities for Kids: The Fun Continues!
Want to keep the momentum rolling? Here are a few fun printables to grab that will help both keep boredom at bay and encourage responsibility:
7. Coloring Pages
Coloring pages bring out creativity and keep little hands busy. Create your own or download free printable ones featuring their favorite characters.
8. Chore Chart Printable
Design a customizable chore chart that fits your family’s needs. There are plenty of free templates available to start your journey into responsibility.
9. Activity Cards
Create a set of activity cards with various boredom busters written on them. Let your kids pick one during moments of “I’m bored!”
10. Puzzle Printables
Puzzles engage their brains, promote problem solving, and can be a fun solo or family activity for all ages.
Helpful Tips to Enhance Your Parenting Journey
- Set a Routine: Kids thrive on routine. Establish a consistent time for chores and fun activities. This consistency helps them understand expectations and creates a sense of security.
- Make It a Family Affair: Turn chores into family time! Get everyone involved in cleaning or cooking, and make it a fun bonding experience.
- Use Music: Create a playlist of upbeat songs to play during chore time. Music not only makes chores more enjoyable, but it can also help keep the energy high!
Encouraging Conclusion
Parenting can feel like a circus act at times, juggling responsibilities, activities, and everything in between. But remember, you don’t have to get it all perfect. The journey of parenting is about small, meaningful moments that add up to a life filled with love and growth.
By incorporating fun activities and well-structured chores, you create a balanced environment where your kids will thrive—both in play and personal responsibility. You’ve got this; take it one day at a time!
So, grab a snack, gather your family, and explore these fun ideas together. Enjoy every moment, and don’t forget to celebrate those little wins along the way!
FAQ Section
Q: How do I motivate my child to do chores?
A: Start with small tasks they can manage and use praise to encourage them. Making chores a game or involving them in creating their chore chart also helps!
Q: What age should kids start doing chores?
A: Kids as young as two can participate in simple chores. Adjust tasks according to their age, skills, and your family’s routine.
Q: Are printable activities effective?
A: Absolutely! Printables provide structure and inspire creativity. They keep kids engaged and can be easily customized for various interests and skills.
Remember, parenting is hard sometimes, but you’re not alone—and small changes can make a huge difference!
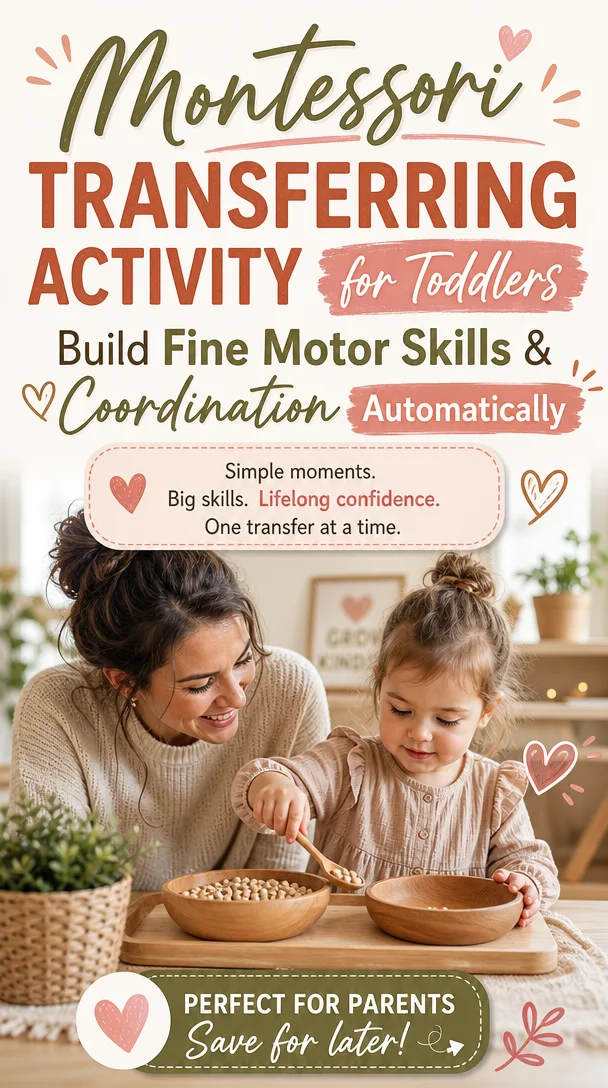
Montessori Transferring Activity for Toddlers: Build Fine Motor Skills & Coordination
Montessori Practical Life Transferring Activity: Boosting Fine Motor Skills & Coordination for Toddlers
Meta Description
Enhance your toddler’s fine motor skills with this Montessori-inspired transferring activity using beans and rice. Easy, engaging, and practical for home learning!
Introduction
Hey there, wonderful parents! If you’re anything like me, you know that parenting is a delightful mix of love, chaos, and a sprinkle of overwhelming moments. Your little one is constantly discovering the world, and as they do, their development grows! It’s amazing to think about the joy in those tiny hands mastering new skills, especially when it comes to fine motor development.
Today, let’s dive into a Montessori-inspired transferring activity that’s as engaging as it is educational. This simple yet highly effective exercise uses beans and rice to not only capture your child’s attention but also bolster their hand-eye coordination and concentration. It’s perfect for those bustling moments at home when you want to pave the way for your toddler’s independence and learning—one tiny scoop at a time.
So, grab that snack (I know you’ve got a few stashed away) and let’s explore how you can set up this delightful activity!
Understanding the Benefits of Fine Motor Skills
Fine motor skills encompass the small movements that children make using their hands and fingers. These skills are essential for everyday tasks—including writing, drawing, and self-feeding. The great news? With a few engaging activities, you can support your little one’s development right at home!
Why is Fine Motor Skills Development Important?
Fine motor skills play a critical role in your child’s overall growth. Here are just a few of the incredible benefits:
- Confidence Boost: Mastering a new skill encourages independence and a sense of accomplishment.
- Preparation for Future Skills: Developing these skills sets the foundation for tasks like buttoning shirts and holding pencils.
- Cognitive Growth: Engaging in these activities promotes focus, problem-solving, and curiosity about the world.
Encouraging fine motor development doesn’t have to be complicated; with simple activities like transferring beans and rice, you’ll nurture your child’s abilities while having a ton of fun together!
Setting Up Your Montessori Practical Life Transferring Activity
Now, let’s get into the nitty-gritty of setting up this activity. Trust me; it’s as easy as pie!
What You Will Need:
- Containers: Two small bowls or containers (think of a scoopable bowl for pouring and a receiving bowl).
- Beans and Rice: Use dry beans, rice, or any small items you have around. Colorful variations can be even more visually stimulating.
- Spoon or Cup: A scooping tool works wonders for this activity. Choose a child-friendly spoon or cup that fits nicely in their hands.
Step-by-Step Guide
-
Prepare the Space: Find a clean, flat surface. A table or a mat works perfectly. Lay down an old towel or tray underneath to catch any spills.
-
Introduce the Materials: Place one bowl filled with your chosen beans or rice on the table. Set the empty bowl next to it and show your toddler how to use the spoon to transfer the contents from one bowl to the other.
-
Demonstrate the Activity: Show them how to scoop, lift, and pour. Remember to gently encourage, use descriptive language, and model your excitement about the task.
-
Hands-On Exploration: Let your child take over! Let them explore the textures and sounds of the beans and rice. They may even enjoy pouring a bit on their hands—it’s all part of the experience!
Safety Tip
Always supervise your toddler during this activity. Ensure that they don’t put the beans, rice, or any small items in their mouths. Safety first!
Why Beans and Rice Are Ideal for This Activity
You might wonder, "Why beans and rice, specifically?" Let’s unpack that a bit!
Sensory Exploration
The different shapes and sizes of beans and rice offer a unique sensory experience. Your child can feel the variation, enjoy the sounds they make, and even observe how these items move from one bowl to the next.
Options for Variety
Switch it up! Try different materials like:
- Pasta: Twirl a handful of penne for a fun twist.
- Cornmeal or Sand: For an outdoor version, you can use kinetic sand.
- Colored Lentils: These vibrant options stimulate visual development and sensory play.
Enhancing the Learning Experience
You’re probably thinking how to extend this activity even further. Good news! Here are some ideas to enhance learning and make it more interactive:
Language Development
As you engage in the transferring activity, talk about colors, shapes, and textures. Ask questions such as:
- “What does it feel like?”
- “Can you tell me what color the beans are?”
Counting & Sorting
Turn the transferring activities into a mini-math lesson:
- Counting: Count the beans or rice together as they scoop from one container to another. “Let’s count to ten together!”
- Sorting: Introduce a sorting aspect—can they separate the beans from the rice by putting them in different bowls?
Practical Life Skills
As your child masters this transferring skill, encourage them to help with everyday tasks. Think of those moments when you’re cooking or cleaning—offer opportunities for them to transfer dry ingredients from one container to another during family meal prep. It’s a perfect way to blend learning with real-life skills.
The Joy of Mess
Let’s be honest: as much as we try to keep things tidy, messes happen! While we want to encourage exploration, we also recognize how overwhelming clean-up can feel. But fret not!
Embracing Messy Play
- Set Boundaries: Designate a specific area for messy play. A mat, tray, or even outdoors can make clean-up a breeze after fun activities.
- Involve Your Child: Turn clean-up into a game. Sing a song together or race to see how quickly they can collect the items. A little fun goes a long way!
Encouragement for the Journey
As you embark on this fantastic transferring activity, remember: every small step counts. Your child’s progress won’t come in leaps and bounds, but rather in those tiny moments filled with laughter, curiosity, and joy.
Conclusion
Oh, the beauty of parenting! Amidst the whirlwind of busy days, you create magical moments with activities as simple as transferring beans and rice. Engaging your child in practical life activities enhances their fine motor skills while building confidence and independence.
So, as you prepare to dive into this Montessori-inspired activity, know that you are doing an incredible job. Celebrate the small victories—the excitement in their eyes and the giggles that follow!
Keep creating those meaningful moments, and remember: you’ve got this, and you’re not alone in this tender, messy journey called parenthood. Until next time, relish those little moments that make life so richly beautiful.
Optional FAQ Section
Q: At what age can my toddler start doing this activity?
A: Generally, toddlers aged 2-3 years can start engaging with activities like this, with supervision. Adjust materials based on their developmental readiness.
Q: What if my toddler loses interest quickly?
A: That’s perfectly normal! Keep the sessions short and repeat them periodically. Change materials or introduce new challenges as they grow.
Q: How can I incorporate this into our daily routine?
A: Consider making this activity a part of your morning routines or as a quiet-time option in the afternoon. Consistency helps build familiarity!
Feel free to share this activity with fellow parents! It’s a fabulous way to foster fine motor development in a fun and engaging manner. Let’s create a supportive parenting community, one share at a time! 💛
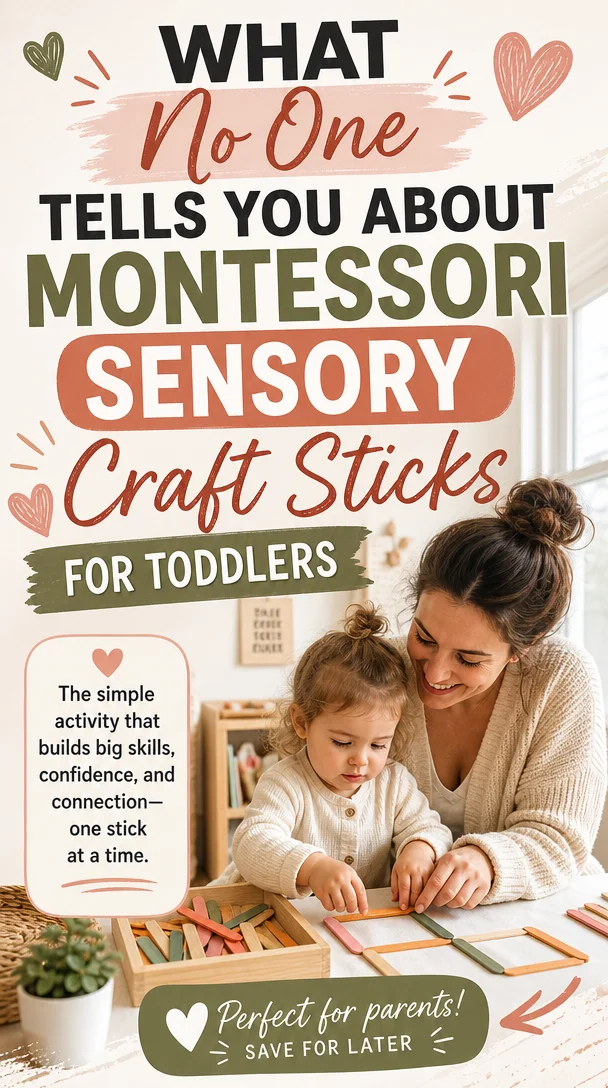
What No One Tells You About Montessori Sensory Craft Sticks for Toddlers
Montessori DIY Tactile Sensory Craft Sticks Toddler Activity
Meta Description
Create engaging and educational tactile sensory craft sticks with your toddler using this easy DIY guide, perfect for enhancing sensory exploration and development.
Introduction
Parenting comes with its own unique set of joys and challenges, doesn’t it? If you’re like me, some days you just want to create a warm, enriching environment for your little one while also finding moments of connection amidst the chaos. Today, I’ve got a fantastic activity for you that not only sparks creativity but also supports your child’s sensory exploration: DIY Tactile Sensory Craft Sticks.
Imagine your toddler sitting at the table, fully engaged with a selection of colorful, textured craft sticks, each one representing a new sensory adventure. With just a few materials, you can bring the Montessori method into your home in a way that feels natural and enjoyable. Let’s dive into this simple, engaging activity that not only builds fine motor skills but also nurtures your child’s curious mind.
What Are Tactile Sensory Craft Sticks?
Tactile sensory craft sticks are beautifully versatile tools used to explore textures and sensations. In the Montessori approach, sensory experiences are vital for a child’s development—they help little hands practice coordination and exploration while offering opportunities for imaginative play and learning.
Why Opt for a DIY Version?
Creating your own tactile sensory craft sticks means you can customize them to your toddler’s interests and developmental needs. Plus, using materials you already have at home makes this a budget-friendly and environmentally conscious choice. Let’s look at how you can get started!
How to Create Your Own Tactile Sensory Craft Sticks
Materials You’ll Need
- Craft sticks (popsicle sticks work great)
- Textured materials: Felt, sandpaper, fabric scraps, cotton balls, or textured wallpaper
- Glue: Non-toxic craft glue or a hot glue gun (with supervision)
- Markers or paint (optional for decoration)
- Small containers for organizing materials
Step-by-Step Instructions
Step 1: Gather Your Materials
Collect all your materials and set up a crafting station. You could even involve your toddler in picking out textures, fostering their ability to choose and express preferences.
Step 2: Prep Your Craft Sticks
Start by decorating your craft sticks with markers or paint if you wish. This adds a fun artistic flair! You can let your toddler get imaginative here, using colors that resonate with them.
Step 3: Apply the Textures
Now comes the exciting part. Choose a texture for each stick and apply it using glue. You can talk to your child about what they see and feel—encourage them to express their observations. For example, "How does the sandpaper feel?" or "Is this cotton soft or rough?"
Step 4: Let Them Dry
Once you’ve applied all the textures, set the sticks aside to let them dry completely. This could be a great time to chat about colors, shapes, and the various textures they’ve picked out!
Step 5: Play and Explore
Your tactile sensory craft sticks are now ready for exploration! Encourage your toddler to touch, feel, and describe the different textures. You can guide them through activities, like sorting the sticks by feel—“Which one feels the softest?”—or creating little games, like matching sticks with similar textures.
Expanding the Activity: Less Mess, More Fun
If you want to add more engaging aspects, consider these tips:
Create a Sensory Board
After making the craft sticks, how about turning them into a sensory board? Use a piece of cardboard or a small wooden board to attach various sticks, allowing your toddler to explore textures at different heights and angles.
Incorporate Movement
Create a mini scavenger hunt around your house where your child collects items that match the textures on your craft sticks—like a soft pillow, a smooth book cover, or a bumpy rock outside.
Encourage Language Development
As you play, take the time to describe textures and sensations. Use rich vocabulary words and ask your child open-ended questions, like, “How does this feel compared to this one?” This not only enhances language skills but also builds deeper connections with you.
Encouraging Inclusive Play
Montessori principles embrace independence and personal growth. Encourage your little one to show their creations to siblings or other family members, fostering social skills and inclusive play. This is where those beautiful bonds grow as they share findings and discoveries.
Helpful Tips for Success
-
Use what you have: Look around your home for materials you might repurpose for textures. Old magazines, fabrics, or even sponges can offer unique sensory experiences.
-
Mix textures: Combine rough with smooth, soft with hard, and colorful with muted materials. This diversity keeps things interesting and stimulates various senses.
-
Focus on the process: Remember, it’s about discovery and play, not perfection. Encourage your child to experiment and even mix textures on the same stick!
-
Stay engaged: Be present during the activity. Your involvement can transform this simple craft into a cherished bonding moment.
-
Keep it screen-free: Craft time promotes creativity and imagination, giving you and your toddler a refreshing break from screens.
Connecting Through Play: The Real Benefits
Activities like these do more than entertain—they strengthen emerging skills and nurture emotional development. By encouraging exploration and communication, you pave the way for your child to become more confident in discovering their environment.
Imagine the delight on your child’s face when they realize their ideas and choices lead to something fun! This kind of hands-on discovery cements essential life skills like problem-solving and creativity.
Concluding Thoughts: Parenting, One Moment at a Time
Being a parent is all about finding those little moments among the busy, chaotic days. When you dive into simple activities like DIY sensory craft sticks, you create cherished memories that last a lifetime. Remember, it’s perfectly okay if things don’t go perfectly as planned. Celebrate the great attempts and enjoy the experience—messy play is part of the journey!
So grab those craft sticks, gather your textures, and let the magic unfold! You’re doing wonderfully, even when it feels overwhelming. Embrace the imperfections and enjoy every precious moment with your little one. Remember, you’re not alone on this journey. You’ve got this!
FAQs
Q: What age is this activity suitable for?
A: This activity typically suits toddlers aged 18 months and older, but it can be adapted for younger kids with supervision.
Q: How often should we do sensory activities?
A: Feel free to incorporate sensory activities once or twice a week to keep the experiences fresh and engaging.
Q: Are there any safety considerations?
A: Always supervise toddlers during crafting to prevent any accidents with small materials.
Let’s continue weaving meaningful moments into your parenting journey, because every little touch counts!
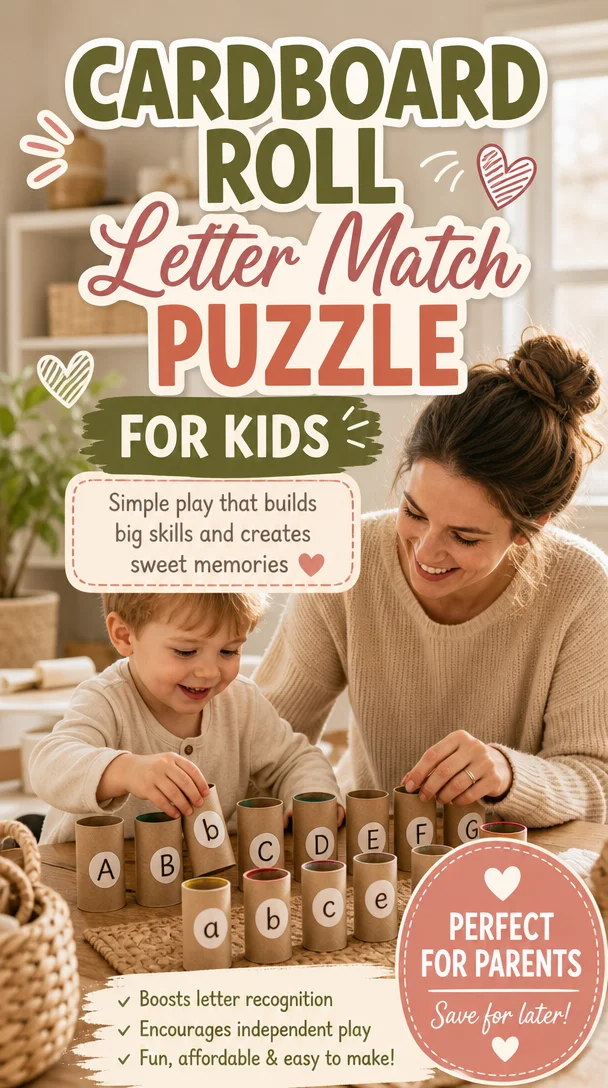
Cardboard Roll Letter Match Puzzle for Kids – Taming Little Monsters
Unlocking Fun and Learning: Cardboard Roll Letter Match Puzzle for Kids
Meta Description
Discover a fun and easy DIY Cardboard Roll Letter Match Puzzle that helps kids develop fine motor skills and letter recognition. Perfect for rainy days or busy bags!
Introduction
As a parent, you sometimes struggle to keep your little ones engaged while nurturing their minds. You know those moments when the rain pours outside, and you hear the dreaded, “I’m bored!”? Trust me, you’re not alone! We all want to create enriching experiences for our young explorers without feeling overwhelmed.
Cue the Cardboard Roll Letter Match Puzzle! This delightful and simple DIY project not only entertains but also enhances your child’s fine motor skills and letter recognition. Imagine your preschooler joyfully peeling and matching stickers! In just five minutes, you can set this up, making it an ideal activity for rainy days or busy bag adventures. Let’s dive into the fun and benefits of this educational puzzle!
Why Choose DIY Activities for Learning?
Creating engaging, hands-on learning experiences at home presents countless benefits. Here’s why you should consider DIY activities like the Cardboard Roll Letter Match Puzzle:
1. Encourages Independent Play
When kids dive into a DIY project, they take ownership of the activity, allowing you to catch a breather (or sip your now-warm coffee!). This independence also fosters creativity, giving them the freedom to experiment with their learning.
2. Supports Fine Motor Skills
Children develop necessary fine motor skills through hands-on activities. Your little ones will enhance their dexterity by peeling and matching stickers. Plus, it prepares them for activities like writing and buttoning shirts down the line!
3. Boosts Letter Recognition
As children play and learn, they become more familiar with the alphabet. This playful approach captures their interest better than flashcards, making it more likely they’ll remember their letters.
4. Perfect for Various Settings
Rainy days, busy bags, or quiet time at home—the Cardboard Roll Letter Match Puzzle fits seamlessly into any situation. This versatility keeps you prepared, no matter what life throws at you.
How to Create Your Cardboard Roll Letter Match Puzzle
Gather Your Materials
Let’s make this fun! Here’s what you’ll need:
- Cardboard rolls (think paper towel or toilet paper rolls)
- Colorful stickers or dots (make sure to have letters on them)
- Glue (optional)
- Markers or paints (optional, great for decoration)
- Scissors
Step-by-Step Instructions
-
Prep Your Rolls: Grab a few cardboard rolls and cut them to your desired sizes. Typically, cutting them in half works beautifully.
-
Decorate (If You Want): Use markers or paints to spruce up those rolls! This step adds a personalized touch, making the activity even more exciting for your child.
-
Create Letters: Write or stick letters on each roll. You can opt for uppercase, lowercase, or a mix—whatever best suits your child’s learning level.
-
Prepare Matching Stickers: Gather your colorful stickers or dots. Ensure you have the same number of letters as you have rolls.
-
Set Up the Game: Place the rolls in front of your child and scatter the stickers nearby. Watch them get excited as they see what they’ll be doing!
Playtime Begins!
Here’s where the real magic happens! Encourage your little one to pick a letter roll, find the corresponding sticker, and peel it off to stick on or match with the correct roll.
Tips for a Successful Puzzle Activity
Keep It Fun
Engagement is key! Use playful language, such as “Let’s go on a letter hunt!” to maintain your child’s excitement. Make it a game, and they’ll learn without even realizing it.
Incorporate Movement
Challenge them to hop to the stickers or do a little dance every time they successfully match a letter. This physical interaction keeps the energy high and reinforces their learning through movement!
Celebrate Small Wins
Positive reinforcement works wonders! Each time your child matches a letter correctly, celebrate with enthusiastic cheers or high-fives. This builds their confidence and motivates them to keep going.
Extension Ideas for Continued Learning
Now that your child has mastered the basics, how about building on that knowledge? Here are some fun extension activities:
Word Building
After they finish the matching puzzle, introduce simple words. Encourage your child to form short words using the letter rolls. It’s a natural next step that sparks curiosity about language!
Alphabet Games
Turn those rolls into a game! Mix them up and ask your child to arrange them in alphabetical order. You can also challenge them to say words that start with each letter they pick.
Themed Activities
Consider different themes for the stickers. Use animals, colors, or even favorite cartoon characters that match the letters! This personalization keeps your child invested and excited about learning.
Encouraging Emotional Growth
Remember, as parents, we play a pivotal role in shaping our children’s emotional development. Here are some strategies to incorporate into playtime:
Open Conversations
Alongside learning, use this time to engage your child in conversations about feelings and emotions. Ask questions like, “How do you feel when you find the letter ‘M’?” Such discussions help them identify their feelings and learn to articulate them.
Share Your Own Struggles
Show them that making mistakes is okay. Share a story when you found something challenging and how you overcame it. This builds resilience and normalizes struggles, helping your child understand that growth often comes from trying again.
Conclusion
Creating the Cardboard Roll Letter Match Puzzle empowers you and your child while turning learning into a joyful, memorable experience! Embrace the messiness of parenting and celebrate those small wins with your little monster. By fostering their fine motor skills and letter recognition through this simple DIY, you build a strong foundation for their future learning—without piling on any extra pressure.
Remember, you don’t have to be a perfect parent to provide enriching experiences. Each little moment contributes to their growth, and you’re doing an incredible job just by being there for them!
So the next time the clouds roll in, or you find yourself needing a low-stress activity, whip out those cardboard rolls and let the fun—and learning—begin! You’ve got this, mama (or dad)!
Optional FAQ Section
Q: Can I use different types of stickers?
A: Absolutely! Use any stickers that your child enjoys. You can even let them decorate the letters with pictures of their favorite characters.
Q: What age group is this activity suitable for?
A: This activity typically works well for preschoolers, but you can adjust the complexity for older children by adding more letters or encouraging them to create words.
Q: How can I make it more educational?
A: You can add fun facts or words associated with each letter. For example, "A is for Apple! What’s your favorite fruit?" Keep the conversation flowing.
Q: Can I participate in the activity?
A: Involve yourself! Kids love when parents join in. Play together to make it a bonding moment that fosters learning and fun.
May your days be filled with laughter, love, and learning!
What to Teach by 18: Everyday Skills That Turn Kids Into Independent Adults
Raising an Adult: Essential Skills Kids Should Learn by Age 18
Meta Description
Equip your teens for success with these essential life skills every child should learn by age 18. Start preparing your teen for independence today!
Introduction
Every parent experiences that moment of realization as their child approaches adulthood: they’ve watched them grow, yet there’s still so much they need to learn before stepping out into the big wide world. Suddenly, you might feel this urgency to teach them things like managing finances, cooking a nutritious meal, or even how to negotiate in a tough situation. This isn’t just a checklist of skills; it’s a heartfelt journey to prepare our kids for independence, enabling them to navigate life successfully.
Along the way, we can turn these lessons into memorable experiences, creating opportunities for growth, connection, and confidence. So grab a warm cup of your favorite drink, and let’s chat about the essential life skills every child should master before age 18. Together, we can make sure our kids are not just surviving but thriving!
Life Skills for Independence
H2: Practical Skills for Daily Living
H3: Cooking Basics
Cooking isn’t just a life skill; it’s an important act of self-care. Start by teaching your kids simple recipes, such as scrambled eggs or pasta. As they grow more confident, introduce one or two new ingredients each week. Consider organizing a weekly “family cook night” where everyone contributes to a meal. This not only sharpens their cooking skills but also fosters family bonding.
Tip: Make it fun! Use themed nights like “Taco Tuesday” or “Pasta Palooza” to encourage creativity and excitement around cooking.
H3: Budgeting and Financial Literacy
Understanding money is crucial for independence. Start by giving your child a small allowance and guide them in budgeting their expenses. Show them how to track their spending using a simple app or spreadsheet. Consider setting up a “savings challenge,” where they save a portion of their allowance for a fun purchase.
Example: Have your teen plan a fun day out with their budget. They can research fun activities, restaurants, and travel costs — all while learning to prioritize and manage their funds.
H3: Basic Household Maintenance
Teach your child how to take care of their living space. Start with simple tasks like making their bed, doing laundry, and cleaning their room. Middle school can be an excellent time to introduce them to more advanced skills, like basic repairs and organizing a cleaning schedule.
Tip: Make mastering these skills a friendly competition! Who can clean the living room fastest or fold laundry most neatly?
Social Skills and Emotional Intelligence
H2: Communication and Conflict Resolution
H3: Conversation Skills
When it comes to social interactions, effective communication makes all the difference. Encourage your child to practice active listening and express their thoughts clearly. Role-playing different scenarios, such as introducing themselves or navigating a disagreement, can build their confidence.
Example: Challenge them to start a conversation with someone new each week. It could be a peer at school or even at a local event – these skills will serve them well in the future!
H3: Conflict Resolution
Conflict is a natural part of any relationship. Teach your child how to manage disagreements calmly. Discuss different approaches, such as finding common ground or negotiating a solution.
Tip: Use examples from your own life or even their favorite TV shows to spark discussion about conflict. How could a character have handled a situation differently?
Health and Well-Being
H2: Physical Health and Wellness
H3: Basic Cooking Skills
Understanding how to prepare healthy meals fosters a healthy lifestyle. Sit down with your teens and discuss nutrition. Explore recipes together, emphasizing wholesome, balanced meals. You can incorporate fun, interactive cooking lessons using ingredients from your pantry.
Example: Try making a “healthy cooking challenge” where everyone picks one meal to create, and then you taste test and vote for the winner.
H3: Emotional Wellness
Teach your child about mental health and the importance of expressing feelings. Encourage them to journal or talk openly about what they’re experiencing.
Tip: Consider introducing mindfulness practices, such as meditation or yoga, as a family weekend activity. This cultivates emotional regulation and self-awareness.
Safety and Self-Defense
H2: Personal Safety and Awareness
H3: Stranger Safety and Consent
Discuss and role-play scenarios surrounding stranger danger and assertive communication. Your child should know how to protect themselves without instilling fear.
Tip: Use everyday examples to explain consent. Talk about personal space and listening to their instincts. It’s crucial that they feel empowered to say “no” when uncomfortable.
H3: First Aid Basics
Teach your child essential first-aid skills — from treating minor cuts to understanding when to seek help. Consider a “first-aid day” where you simulate an emergency and practice responding appropriately.
Example: Use fun bandages and supplies to make the learning process engaging, maybe even inviting friends over for a mini first-aid class!
Career and Future Planning
H2: Career Awareness and Job Skills
H3: Building a Resume and Interview Skills
Help your teen start a resume, even if they haven’t worked yet! Include volunteer experience, extracurricular activities, and any skills they’ve developed. Practice interview techniques with them, role-playing potential questions they might face.
Tip: Arrange mock interviews with family members or trusted friends. This adds a layer of realism and prepares them for the real deal.
H3: Networking and Professional Etiquette
Teach your child about the importance of networking by introducing them to friends and acquaintances in your community. Discuss professional manners, including proper email etiquette and how to introduce themselves in a professional setting.
Example: Set a goal to attend at least one community event each month together. This helps them meet new people while practicing their networking skills.
Encouraging Independence and Curiosity
H2: Self-Discovery and Life Experiences
H3: Setting Personal Goals
Encourage your teen to set personal goals, whether related to academics, sports, or hobbies. They should learn how to create action plans, and understand that even small steps matter.
Tip: Use a vision board to help them visualize their ambitions. This hands-on project can serve as a daily motivation and boost their confidence.
H3: Travel and Exploration
If possible, plan family trips. Travel exposes your child to different cultures, ideas, and experiences. Encourage them to document their travels, whether through photography, journaling, or creating a scrapbook.
Example: Consider organizing a trip based on their interests; whether it’s nature-themed or an art adventure, this firsthand experience will inspire their curiosity about the world.
Helpful Tips and Actionable Ideas
Practical Tips for Everyday Learning
- Make It Fun: Turn chores into games or challenges.
- Model Behaviors: Show your kids how you manage tasks and emotions.
- Encourage Questions: Be open to discussions about various topics, fostering a habit of curiosity.
- Be Patient: Skills take time to develop; celebrate progress, even when it feels small.
- Create Routines: Regularly practice skills at home to reinforce learning.
Conclusion
As we prepare our kids for adulthood, we have an amazing opportunity to raise capable, confident individuals. While this journey may feel overwhelming at times, remember that you’re not alone. Small steps can lead to significant growth.
By teaching life skills, nurturing communication, and encouraging self-discovery, we set our children on the path to become thoughtful, independent adults. So take a deep breath, embrace the process, and remember that each lesson learned — no matter how small — contributes to their future success.
Together, let’s equip our kids for the beautiful adventure ahead!
Optional FAQ Section
Q: How can I make teaching these skills engaging?
A: Think of creative and interactive ways to introduce each skill. Games, challenges, and family competitions can make learning fun!
Q: What if my child struggles with some skills?
A: Every child learns at their own pace. Offer support and encouragement, and be patient through the process. Celebrate their progress!
Q: When should I start teaching these skills?
A: Start as early as you can! Many of these skills can be introduced in fun ways during toddler and preschool years, gradually developing as they grow.